
Ever wondered why some professional portraits look effortlessly lit using natural light while others struggle with harsh shadows and flat tones? In this article, with the help of a video, we explore how mastering the simple positioning of your subject can transform ordinary sunlight into a high-end, studio-quality look without a single piece of extra gear.
Martin Castein, a portrait and lighting specialist from the UK, shares tips in this video on handling natural light by simply being aware of your surroundings. He goes over five different techniques that can work in all kinds of conditions. The main point he drives home is that great lighting isn’t all about waiting for perfect weather; it’s really about understanding what your subject is facing and how to use the environment to your advantage. He points out that some of his most popular shots, which people often assume were taken with fancy flash setups, are actually the result of smart positioning in relation to the sky and nearby buildings.
This video is jam-packed with tips. I would like to share two that I found most interesting.
First, for harsh midday light, he suggests finding an overhang or porch to block the top-down light that creates unflattering shadows under the eyes, often called “raccoon eyes.” This effectively turns the open area in front of the subject into a giant, soft outdoor window.
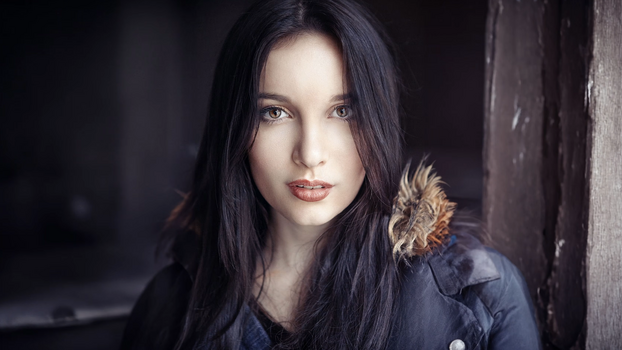
The second is the concept of negative fill on overcast days. Martin explains that when the sky behaves like a massive, flat softbox, you can create dimension by placing your subject next to a dark surface, such as a wooden panel or a dark wall. Instead of adding light, you are subtracting it from one side of the face to create shadows and shape. This counterintuitive approach turns a boring, gray day into an opportunity for moody, directional portraits that have a clear sense of depth and professional polish.
In the end, these methods demonstrate that you can achieve a cinematic aesthetic without reflectors or flashes, as long as you understand how to assess your surroundings. For visual examples showing how slight adjustments in positioning can dramatically alter the final image, be sure to check out the video.