

Key points
Taking a smartphone image of the Moon is tricky – it’s bright, small in the frame and your phone’s night mode is probably hindering more than helping.
Here are some top tips that will make the Moon’s craters ‘pop’.
Even with the best possible conditions a smartphone photo won’t capture Artemis II on its journey, but you’ll know it was there!
Eyes are on the sky this week as four astronauts get the closest humans have been to the Moon for more than 50 years on NASA’s Artemis II mission.
Join the millions of people looking up while it’s on its way and we’ll show you how to get the best photo of the Moon using your phone.
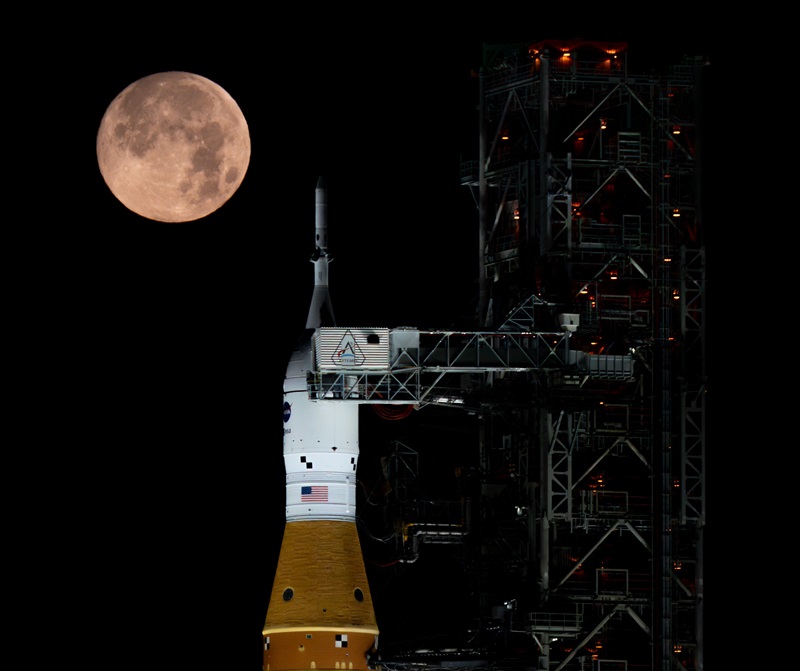
Full Moon setting behind full Artemis II stack at Launch Pad 39B in February 2026.
©
NASA/Brandon Hancock
Why the Moon looks amazing to your eyes and weird on your phone
We’ve all seen the Moon looking huge and bright next to buildings or trees near the horizon. But try to snap a picture and the image is a blurry white dot that looks tiny. What’s going on?
Lots of things are adding up to make smartphone snaps of the Moon look uninspiring. The Moon is not all that big compared to the area of sky your phone can photograph, leaving it looking much smaller than you expect. It’s also very bright with all that reflected sunlight, meaning auto settings can easily overexpose it against the darker sky, or smear the detail as they try to brighten the background.
The Moon is further away than most things snapped on a phone camera, so autofocus can struggle and keep changing as it hunts for what to focus on. The distance also means there’s a lot of Earth’s atmosphere between your phone and the Moon, so heat shimmer and hazy clouds can blur the detail.
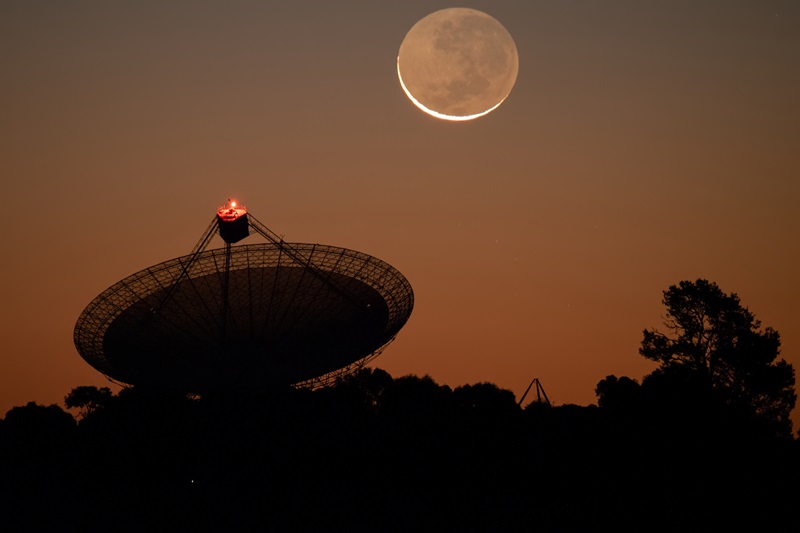
Murriyang, CSIRO’s Parkes radio telescope, has a long history with missions to the Moon.
©
CSIRO/Alex Cherney
The mission plan: take a sharper Moon photo in 4 steps
Award-winning astrophotographer Alex Cherney knows how to make the most of a smartphone when photographing the sky. He’s shared his top tips to make your personal lunar mission a success.
Step 1: Prep
Make sure the view will be clear by checking the weather. Choose a location that avoids taking your photo over rooftops or roads that radiate heat and make the air wavy. Also pack a tripod or phone clamp to hold your phone steady.
“We just had a full Moon, but shooting during the quarter or crescent phases gives you a more defined terminator line, and those stronger shadows help the largest craters stand out for a more dynamic image,” said Alex.
Step 2: Adjust your settings
Make sure your flash is turned off and set your display brightness as low as possible to preserve your night vision.
Use manual focus and lock it on the Moon if your phone allows. Adjust the exposure to control the image brightness until you can see the craters and features on the bright parts of the Moon.
Avoid using night mode if your phone has it. Sometimes it can brighten the sky and blur detail or overexpose the Moon.
“If your phone doesn’t support manual focus and exposure controls within the native camera app, you will need a third-party app such as Halide, ProCamera or Camera M,” said Alex.
Step 3: Take the photo
“Especially at large zoom settings, eliminating shake is key to keeping the Moon steady long enough to frame your image and capture detail. Otherwise, you’ll end up with blur, a blown-out white blob, or both.”
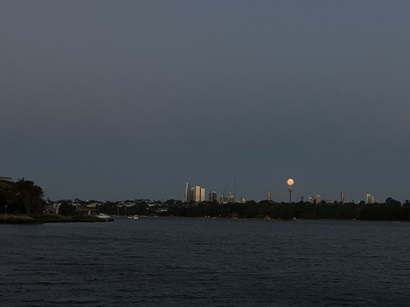
A picture of the Moon rise taken in Sydney on an iPhone, after following the four steps recommended by Alex Cherney. Image: Gabby Russell
Set your phone up to use a short self-timer to minimise camera shake from button pressing and make sure your camera lens is clean.
If your smartphone has an optical zoom lens, it will help to make the Moon look bigger in your picture. But using digital zoom doesn’t work very well in low light so avoid using it and instead crop your picture later.
Step 4: Quick edit
Crop in so the Moon is the feature of your image. You can also alter the highlights or brightness in most smartphones, adding a little contrast and making sure you see the Moon’s texture.
What about day?
The Moon isn’t only visible at night. This week the Moon sets below the horizon around mid-morning – plenty of time to snap a pic while the Sun and Moon are in the sky together.
Alex says the Moon will be thinning out to a crescent this week, which means the best shooting window is in the early morning or even morning twilight.
“Finding that sweet spot where you balance the Moon, the dawn sky, and an interesting foreground (like treetops) is a good way to get a really dynamic image.”
Troubleshooting: from ‘white dot’ to wow
Alex’s troubleshooting for problems with your lunar pictures.
Problem
Solution
Moon is a featureless white circle
Reduce exposure
Try turning night mode off
Moon is too small
Crop your image later
Use optical zoom if your phone has the option (avoid digital zoom)
Blurry edges
Stabilise your phone (use a tripod if you were attempting without)
Use a timer
Manually refocus
Take a burst photo and choose the best or if your phone allows, take a short video and choose a frame
Halo or weird colour in the sky/Moon
Clean camera lens
Avoid sharpening settings
Check for streetlights or thin cloud and try a different area
If you don’t have a smartphone tripod ready to go, you can make do with some DIY options. Try perching your phone on the roof of your car or another stable surface, propped up by a wallet or book.
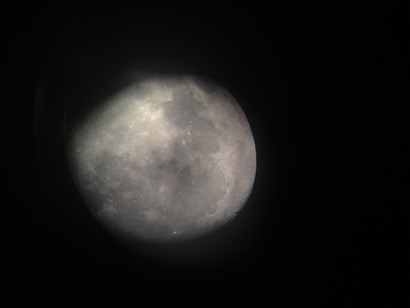
The Moon through a telescope, photo taken through a telescope. Image: CSIRO/Kirsten Fredericksen
If you’ve tried the above steps and the Moon looks soft or blurred, it may be the atmosphere so try again another time.
Where’s Artemis II?
Now you’re ready to run your own mini lunar mission from home and capture the Moon’s craters from your smartphone. But where in your photo is Orion, the Artemis II spacecraft?
Even if you’ve snapped your pic while Orion is on this side of the Moon, the spacecraft is far too small to be seen. But you’ll know it’s there in your photo, even if you can’t see it.