


Utter the phrase “Let’s film it on a green screen,” and watch a few faces on set quietly curdle. People’s minds immediately jump to memories of bad keying – green spill on faces, patchy edges, or body parts that vanish and reappear without warning. Yet a green screen is still a common tool for compositing tasks. On top of that, it’s not uncommon for the same people shooting on green screen to also handle post-production, as one-man shows and independent creators are becoming more and more common. Thus, it doesn’t hurt to go over a few practical tips for working with green screen – ones that might just save you (or your VFX artist) some headaches later on.
Luckily, we’ve got you covered! Well, not we specifically, but Digby Hogan, a seasoned filmmaker, editor, and educator. Digby dedicates a couple of modules in his latest MZed course, “Get Me Started with Adobe After Effects – Compositing,” to this exact topic. There, he shares a step-by-step guide on working with a green screen, and we decided to summarize his tips into a list, useful for everyone, but especially for filmmakers, creators, and VFX artists who are just starting out.
Check out the full course here!
Working with a green screen setup: background material
Imagine this is your green screen shot. You’re the VFX artist on the project, or maybe you even shot the footage yourself.
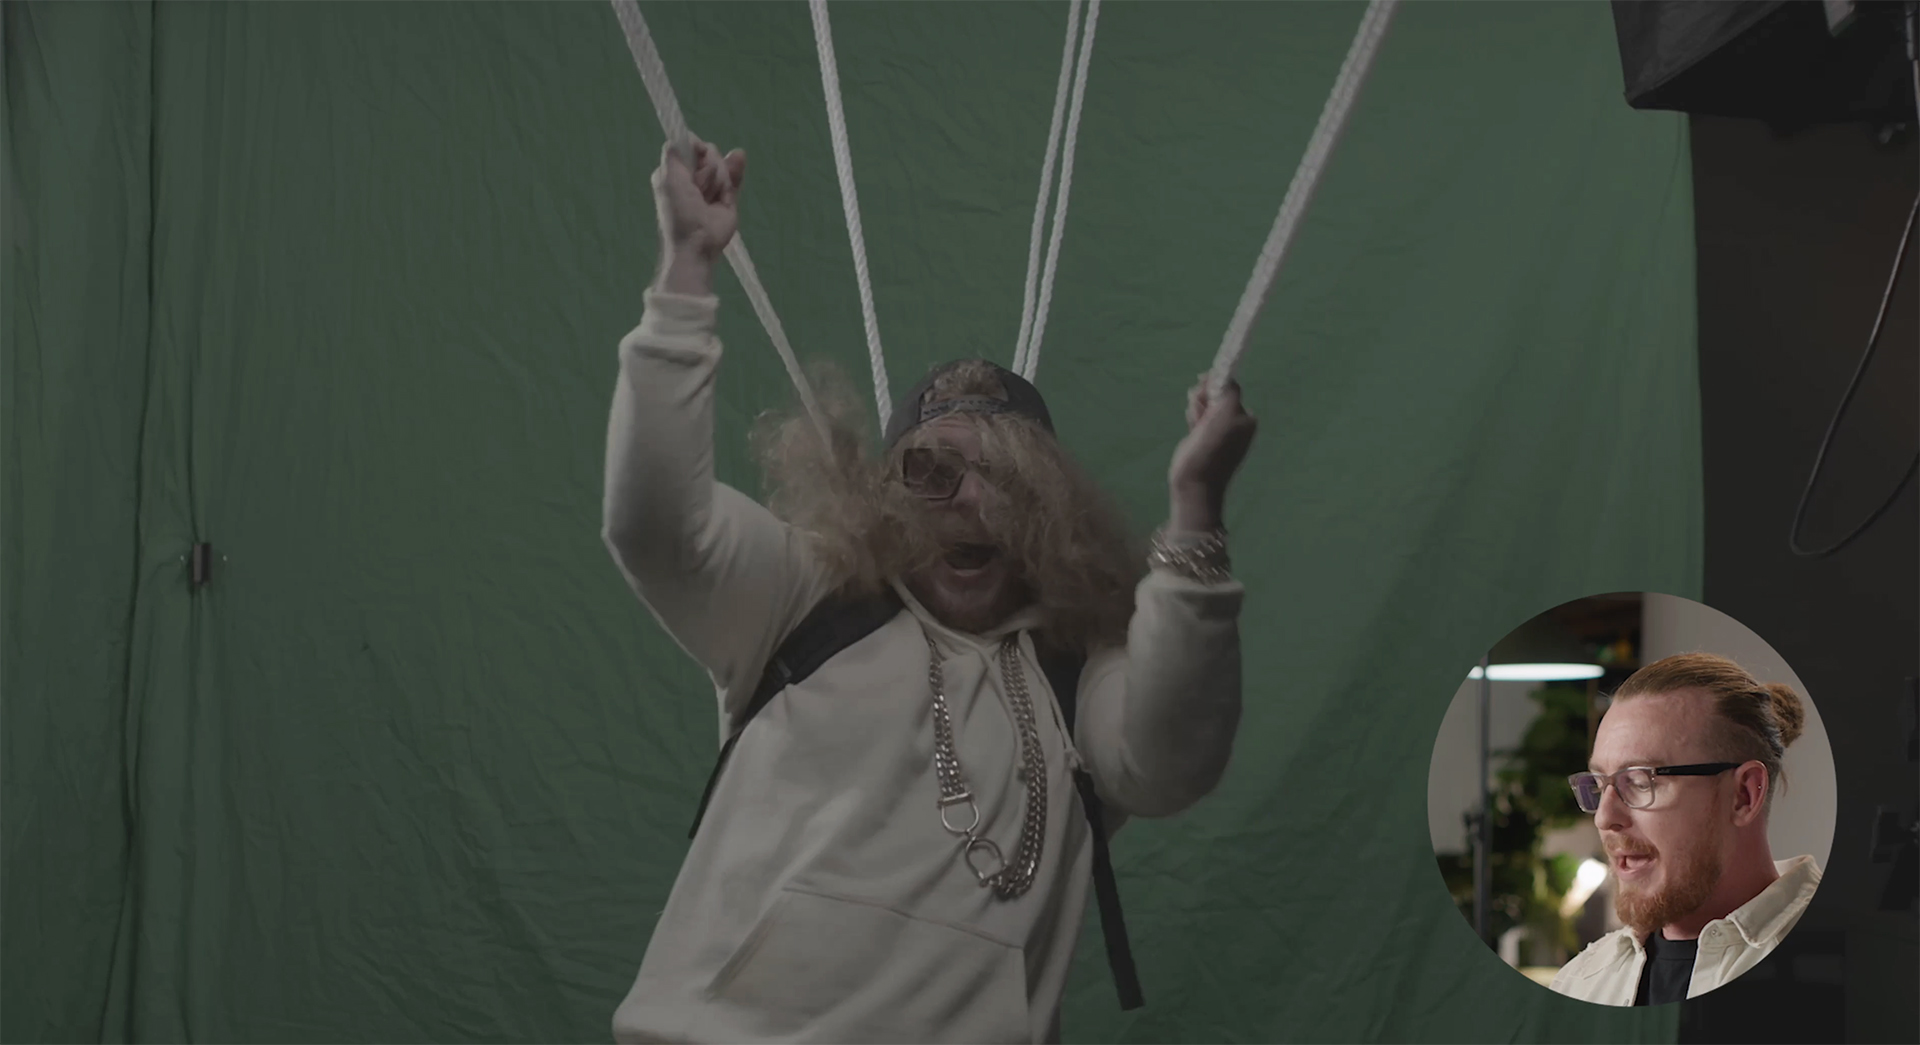 Image source: Digby Hogan / MZed
Digby Hogan uses this example for the demonstration in his course and shows how to work around different issues. However, as he himself admits, there are quite a few things one could have improved while filming it to make the post-production smoother.
The first tip in Digby’s book is to have a flat background. The best option you can go for is to use a proper chroma-key green backdrop, such as muslin, vinyl, or stretch fabric, for example, with no wrinkles, creases, or reflective sheen. As you can see, it’s not the case in Digby’s demo shot. Why is it generally bad? Because wrinkled fabric, shiny material, or unevenly painted surfaces lead to color variations, shadows, or reflections that make keying more complex. Working with a flat, smooth background is faster and easier.
Wardrobe and props colors
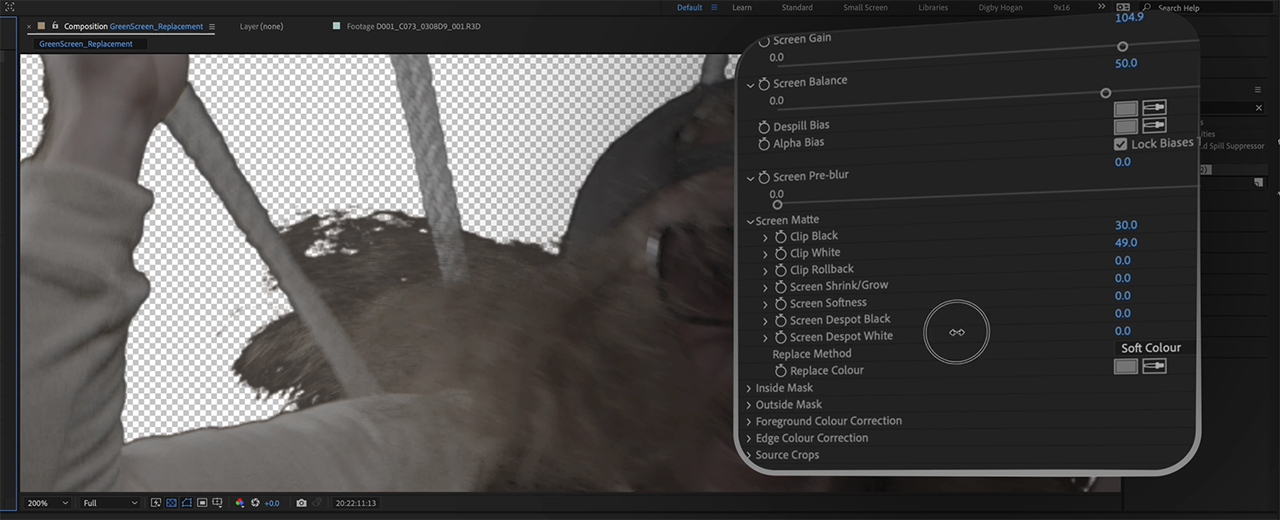
Next tip from Digby that can make your VFX composite much easier is to make sure that your subject, whether it’s a person, a prop, or anything else, is wearing a color that clearly contrasts with green. In the example above, the yellow shirt became semi-transparent during keying. (We’ll cover how to handle that kind of issue a bit later.) A better choice would have been blue, black, or even orange.
![]() Transparency grid peeking through the shirt. Image source: Digby Hogan / MZed
Transparency grid peeking through the shirt. Image source: Digby Hogan / MZed
If, for some reason, you do need to have the subject in green, yellow, or other similar colors, you can always change the background to blue and use a so-called blue screen. As Digby Hogan explains, it works exactly the same way. So, his go-to workflow would be: Pick the foreground color and then pick the opposite color for the background, blue or green.
In addition to this, it is recommended to keep the silhouette details simple. Things like frizzy hair or transparent fabrics can be a pain in the neck for a clean key. Hair is also one of the issues of Digby’s initial shot, which he would have done differently.
Lighting on a green screen: working with separation and evenness
A further essential part of working with a green screen is the lighting. First, your backdrop itself should be evenly lit. To produce better compositing results, use soft lights and try to avoid shadows, gradients, or hot spots.
At the same time, include a back or rim light on your subject. It helps to reduce the spill and separates the talent from the screen by creating a clean edge around them. In Digby Hogan’s opinion, his shot would have worked much better if the backlight had been more prominent. A pro tip is to match the color temperature of the light to the style of your intended background plate.
What else helps to increase the separation? Placing your subject several feet from the green screen. Ideally, around 2 meters (around 6–8 ft) or even more. This also helps to reduce shadows, which is always a good decision for keying.
Issue fixing: a color problem
In our previous article, we gave you a sneak peek into how Digby Hogan removes the green screen in Adobe After Effects using the Keylight 1.2 tool. Please make sure to read it first in order to understand the basic workflow and follow along.
Now, what about fixing some of the issues? For instance, how can you work around the semi-transparency we mentioned earlier? Digby’s tip here is to play with the Clip Black and Clip White toggles in the “Keylight” settings. He demonstrates that by lowering the Clip White, the transparency on the keyed object fades away, resulting in a cleaner, more defined selection.
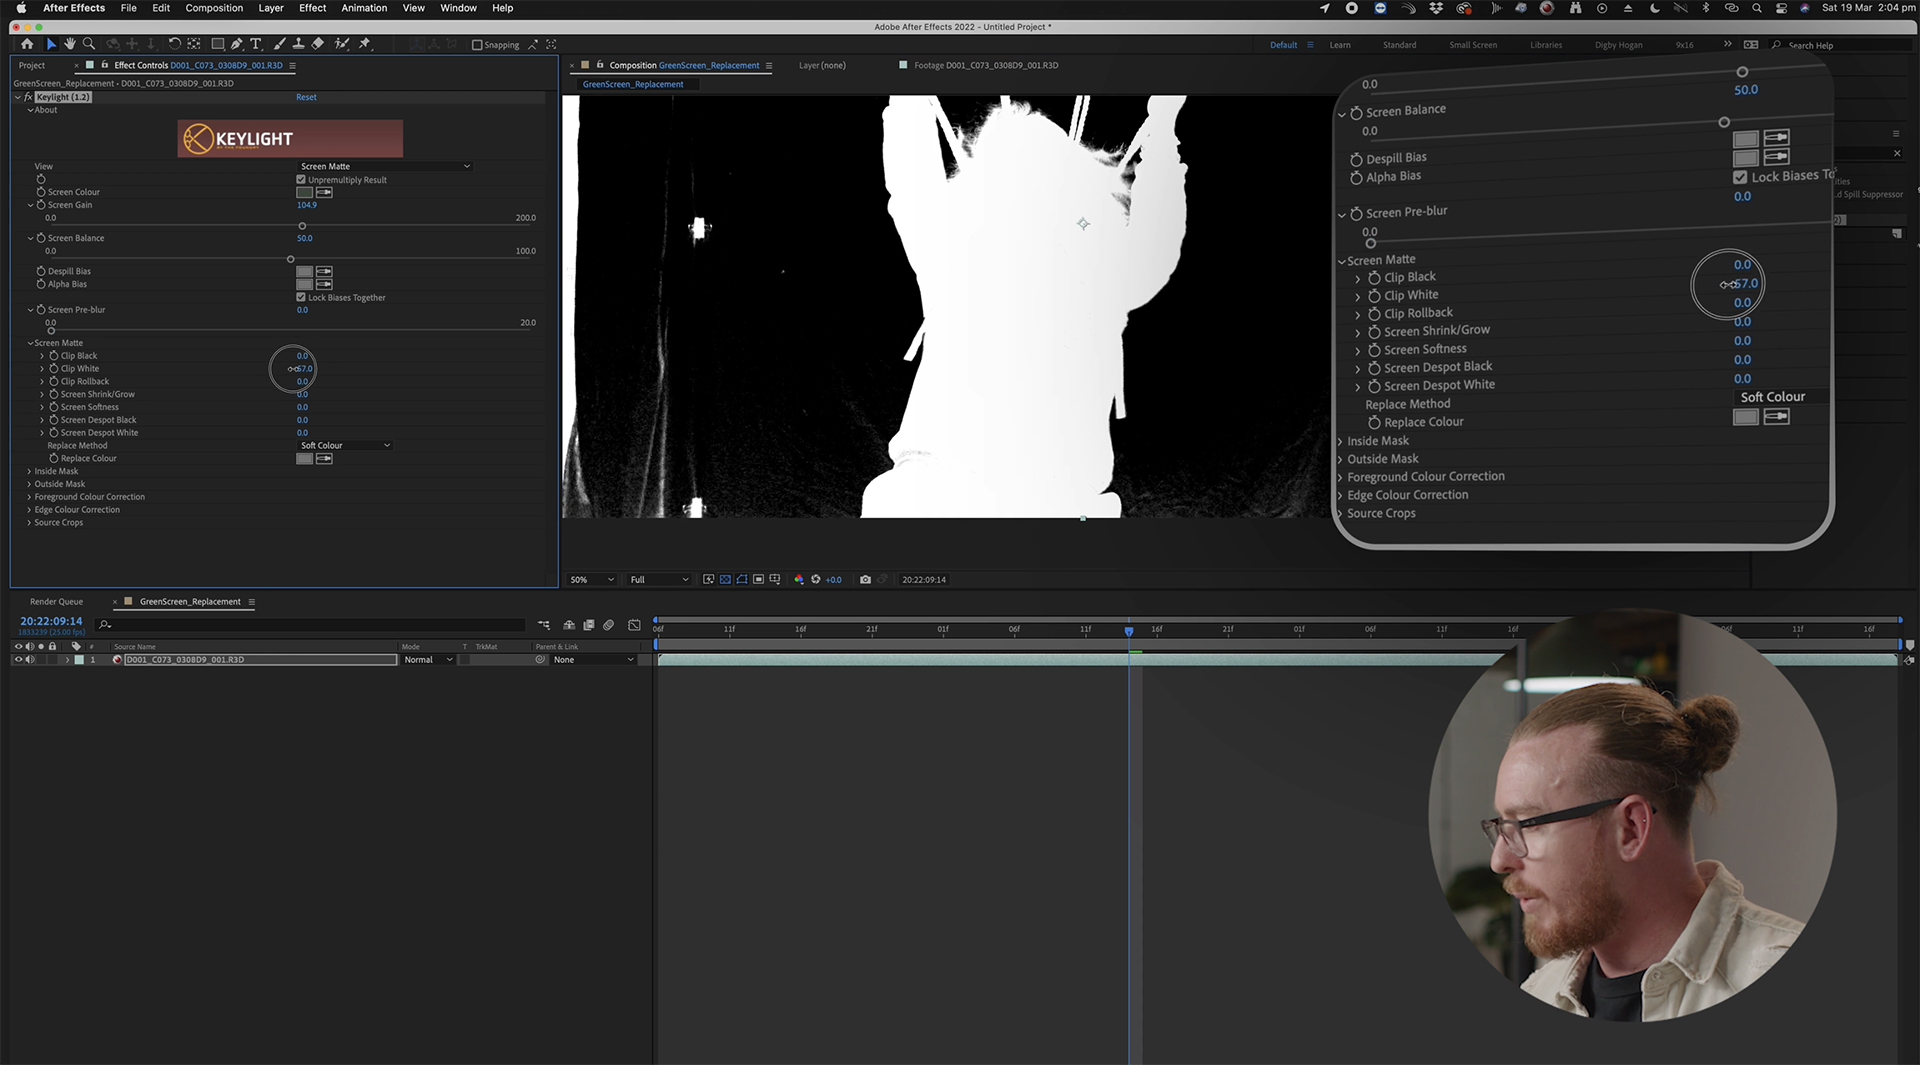 Image source: Digby Hogan / MZed
It is important not to overdo it, though. Otherwise, your selection might include too much and start looking odd.
Getting rid of the sides of the shot
Another tip when working with green screen: don’t worry too much about the edges of the frame. As long as your subject stays more or less centered and your backdrop is large enough to stay behind them, you can clean up the sides using something called a garbage matte. For that, Digby uses a simple mask. First, select the clip in the timeline, move to the upper menu bar, and find the Rectangle Tool.
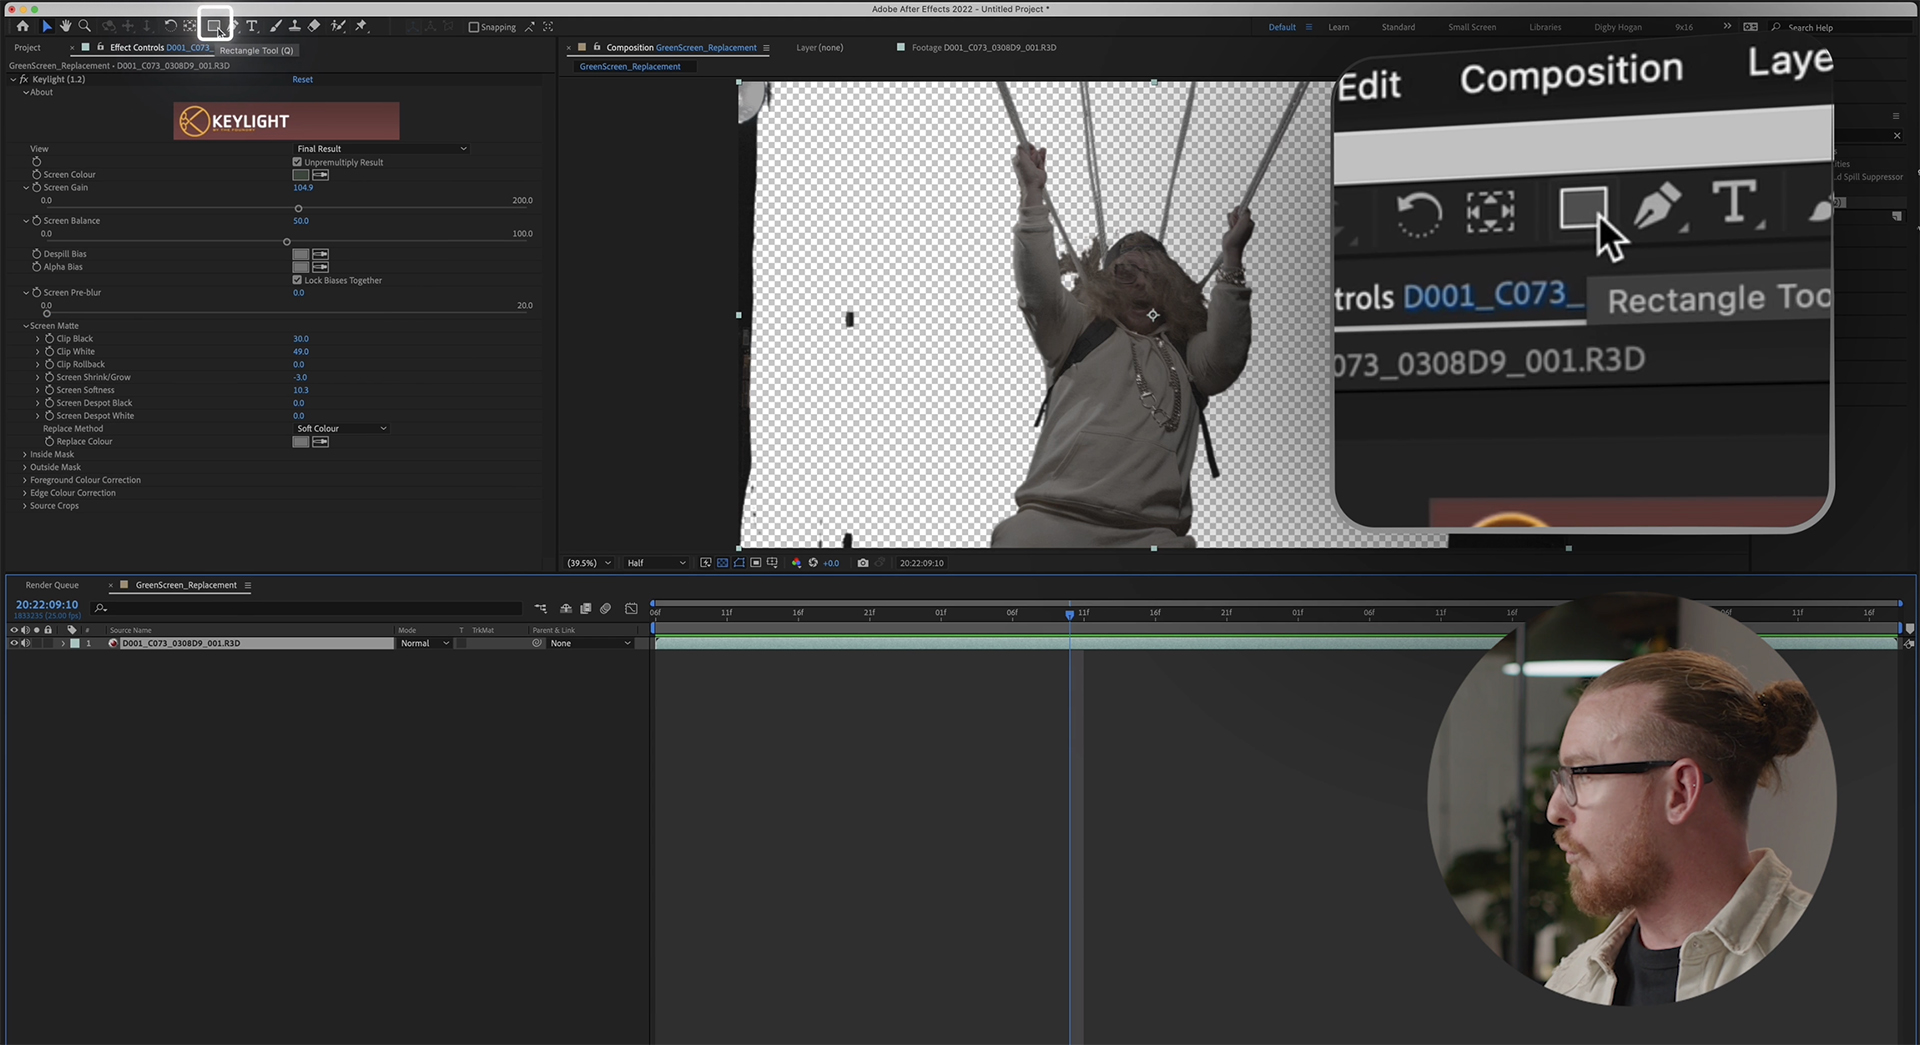 Creating a “garbage matte” – step 1. Image source: Digby Hogan / MZed
Click and drag it around the area that you need to remove. (For instance, Digby chooses everything on the left side that doesn’t touch his subject). Then come down to your timeline and in the mask’s Mode setting, select “Subtract.”
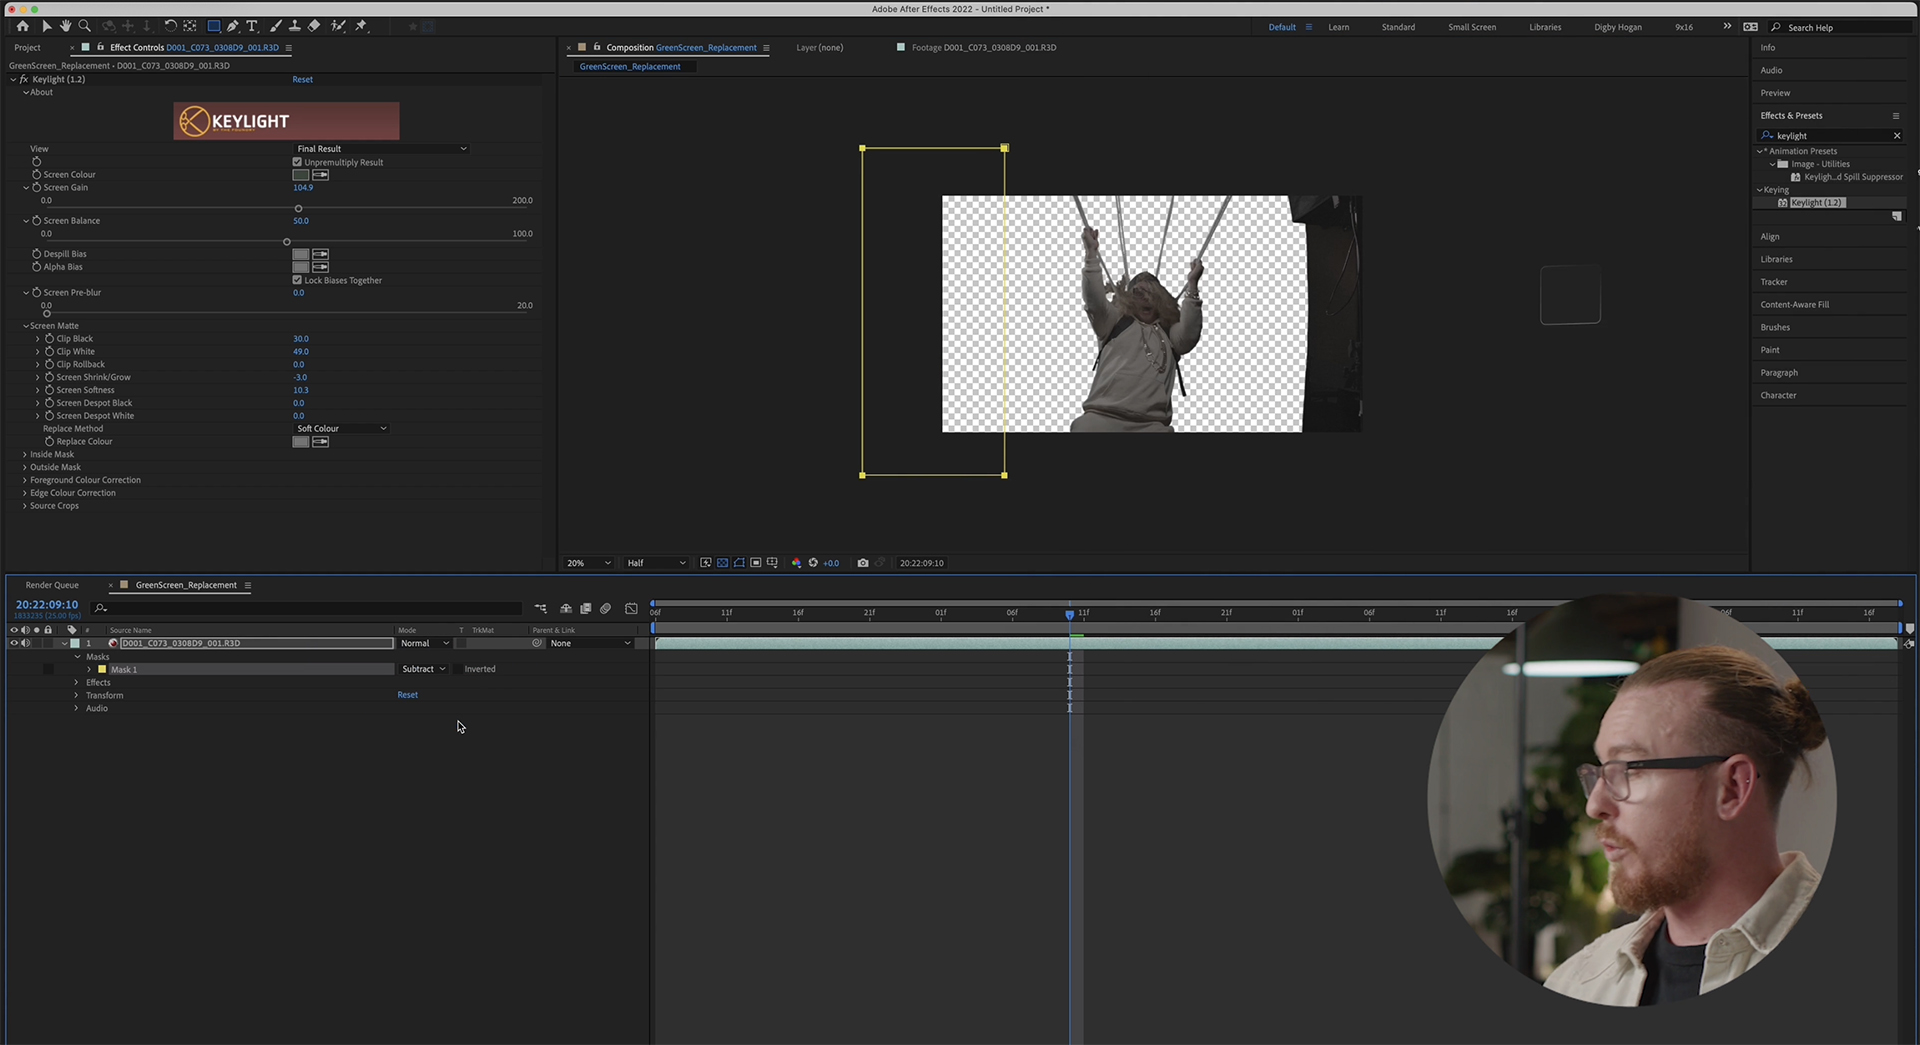 You can find this setting in the tab on your bottom left. Image source: Digby Hogan / MZed
Repeat with the other corners of your frame, creating all the required garbage mattes. Easy, isn’t it? By the way, if you don’t see specific modes or settings for your layers, go down to the bottom left corner of After Effects and enable all the small icons there (they will turn blue).
Working around hair on a green screen
The hair. The uphill battle in the keying and compositing process. And in Digby’s demo shot, it’s everywhere. When it’s already in the filmed footage, how do we approach it?
There are a thousand and one ways to refine your final matte, explains Digby. Yet, the quickest solution to the jagged hair problem is to add a bit of blur to it. For that, you can dial up “Screen Softness” in the Screen Matte settings and watch how it affects the edges. Softening the edges around the hair can help the composite look more convincing, depending on the next compositing task. Here are Digby’s before and after:
 Before. Images source: Digby Hogan / MZed
 AfterConclusion
There are a lot of other useful tips on working with a green screen, eliminating the spill in post, and refining your selection. (If you want to watch some of them in action, head over here to Digby’s “Get Me Started with Adobe After Effects – Compositing” course on MZed). Still, just keeping the tips above in mind can already improve your composite and make your VFX artist’s job a little easier. As always, the more you learn, the better your work becomes.
What else can you learn with MZed?
As an MZed Pro member, you can access hundreds of hours of filmmaking education. Additionally, we’re continually adding new courses (several are currently in production).
Starting at just $29/month (billed at $349 in the first year, $199 from the second year, or billed monthly at $49), here’s what you’ll get:
60+ courses, over 800+ high-quality lessons.Highly produced courses from educators with decades of experience and awards, including a Pulitzer Prize and an Academy Award.Unlimited access to stream all content during the 12 months.Offline download and viewing with the MZed iOS app.Discounts to ARRI Academy online courses, exclusively on MZed.Most of our courses provide an industry-recognized certificate upon completion.Purchasing the courses outright would cost over $9,500.Course topics include cinematography, directing, lighting, cameras and lenses, producing, indie filmmaking, writing, editing, color grading, audio, time-lapse, pitch decks, and more.7-day money-back guarantee if you decide it’s not for you (on annual billing only).
Full disclosure: MZed is owned by CineD.
Join MZed Pro now and start watching today!
What about you? Do you often work with a green screen? Are there any essential tips we should have mentioned above, but missed? What would you like to learn next in terms of VFX? Please leave your comments below!
Feature image source: Digby Hogan / MZed.