
Photographer Matt Suess was halfway through a 45-minute star trail exposure in Joshua Tree when he noticed a hazy band stretched across the sky. He had grown up in New England, where light pollution hid the Milky Way, so he didn’t know what he was looking at. He pointed his camera at it. It was Suess’s first time seeing the Milky Way, but the photos came back soft. Decades of night shooting later, understanding why is the kind of lesson only experience can teach.
Full disclosure: This article was brought to you by OM SYSTEM.
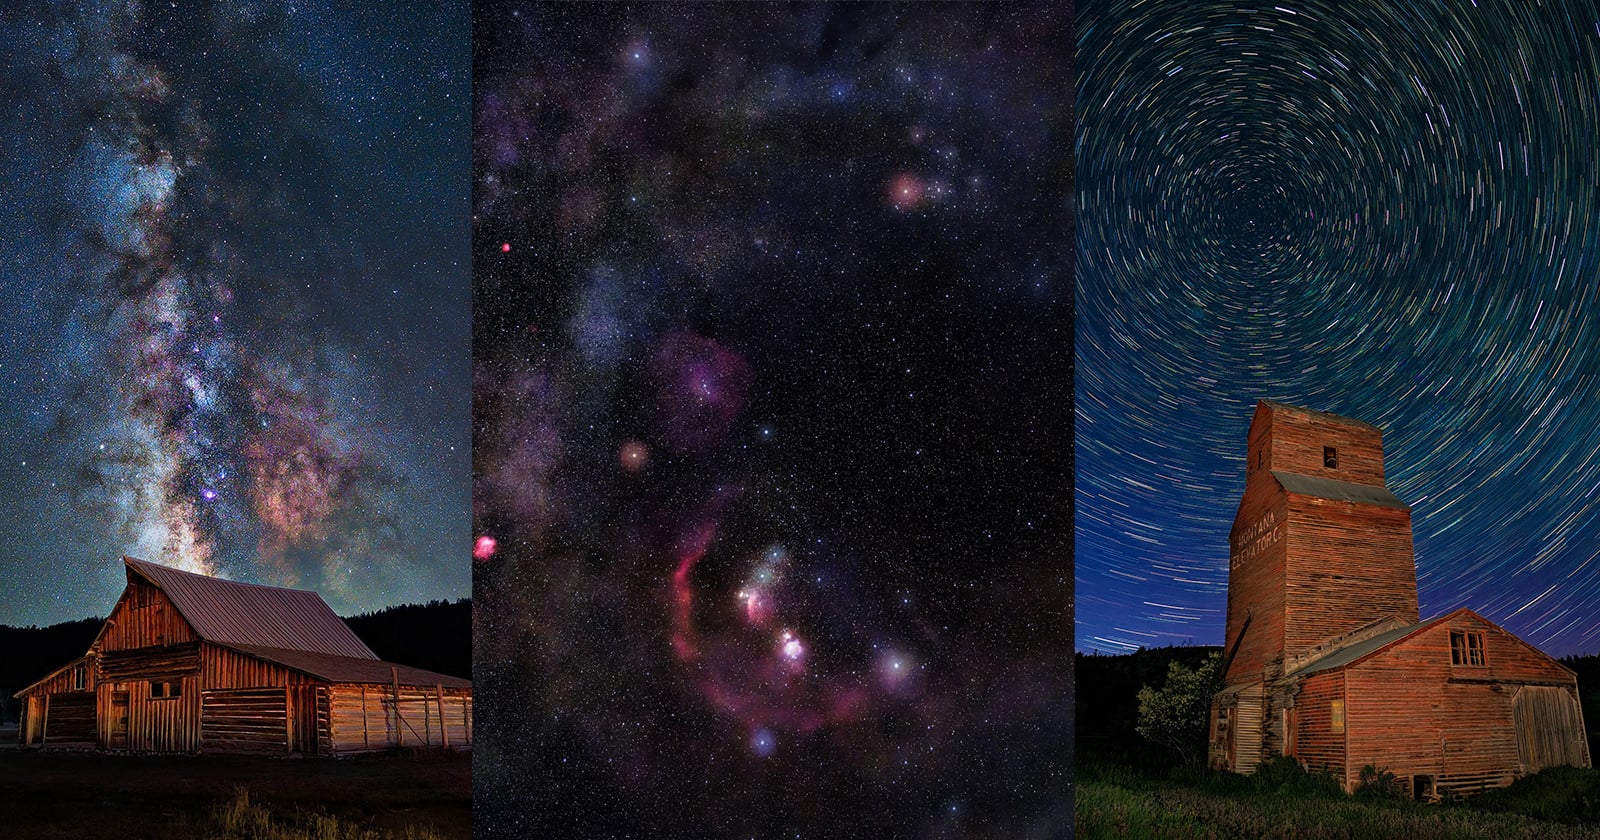
At a Glance
OM SYSTEM Ambassador Matt Suess has been taking photos of landscapes and the night sky for decades. He built his first darkroom at 12 years old and photographed star trails on color slide film as a teenager in Connecticut. His fascination with the stars briefly led him to study mechanical engineering with dreams of designing rockets for NASA. The rockets didn’t happen, but his love of the night sky never went away.
Today he leads night sky workshops from the Grand Tetons to arctic Norway, teaching photographers how to work in conditions most of them have never experienced before.
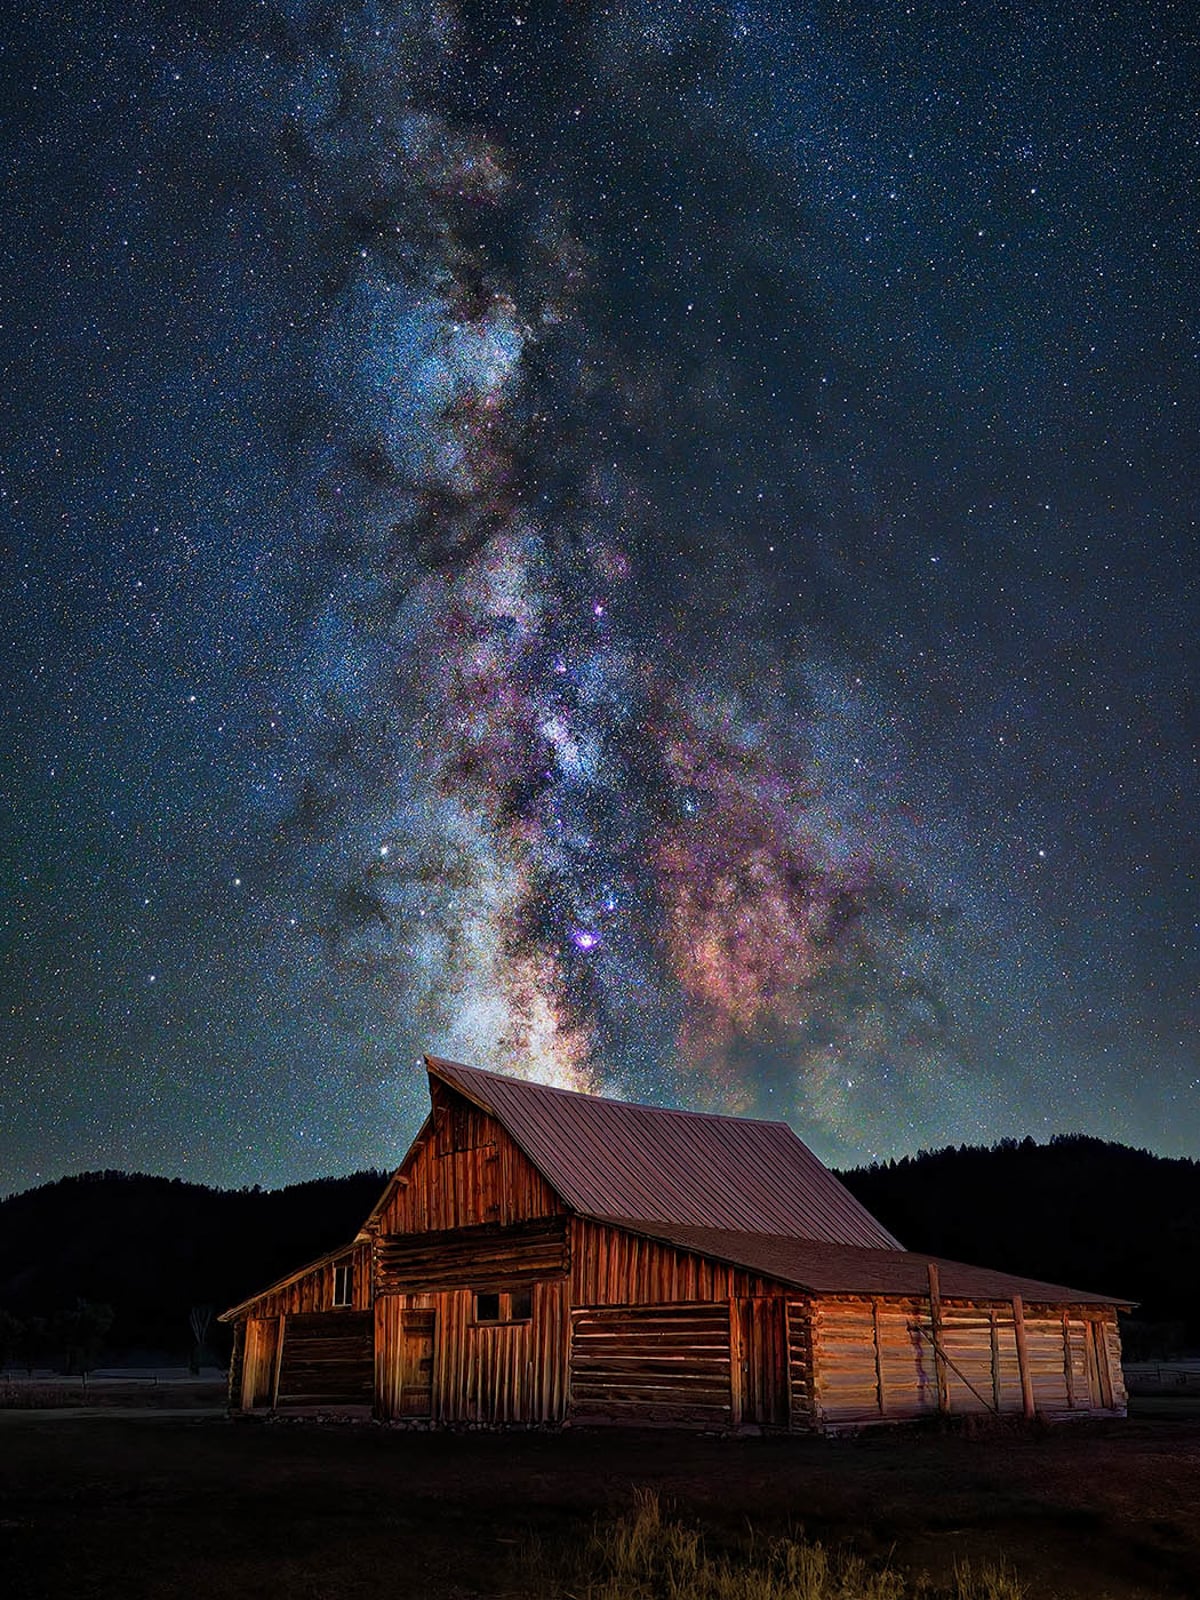
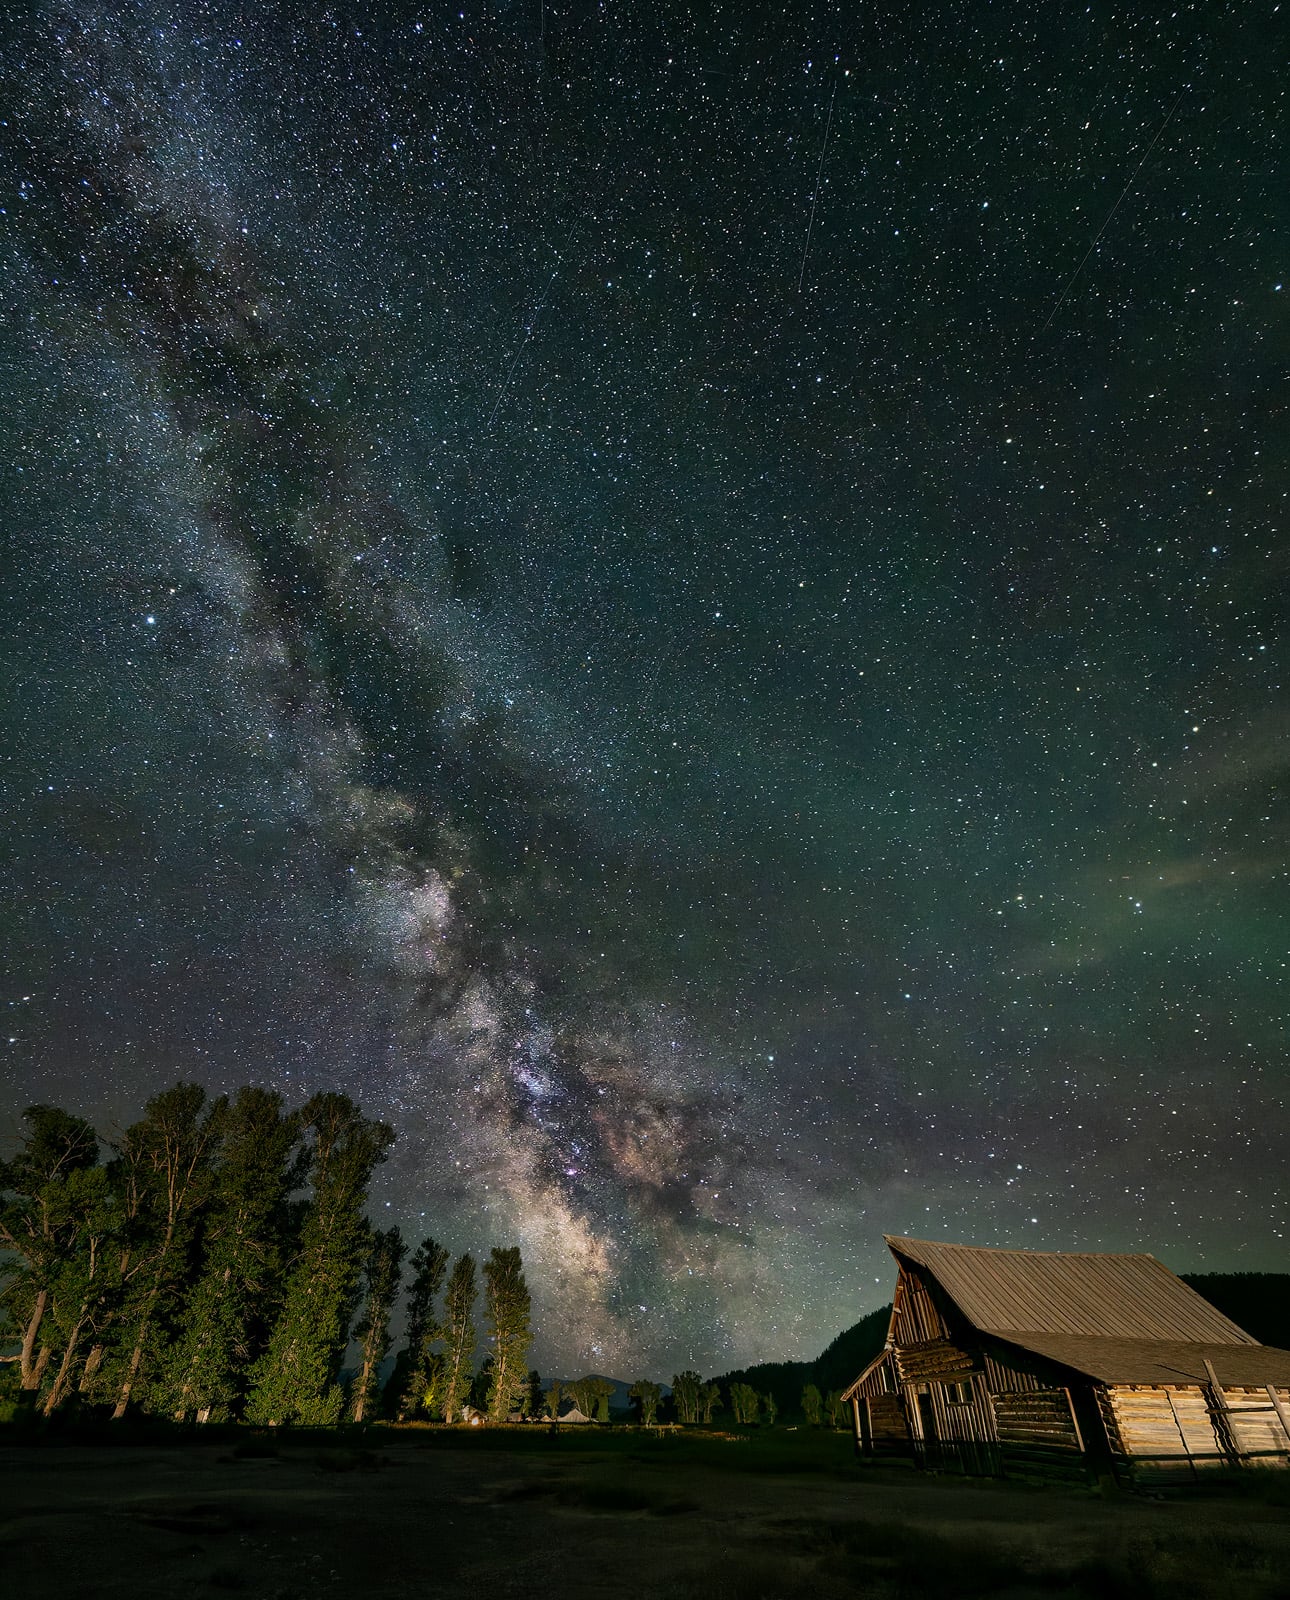
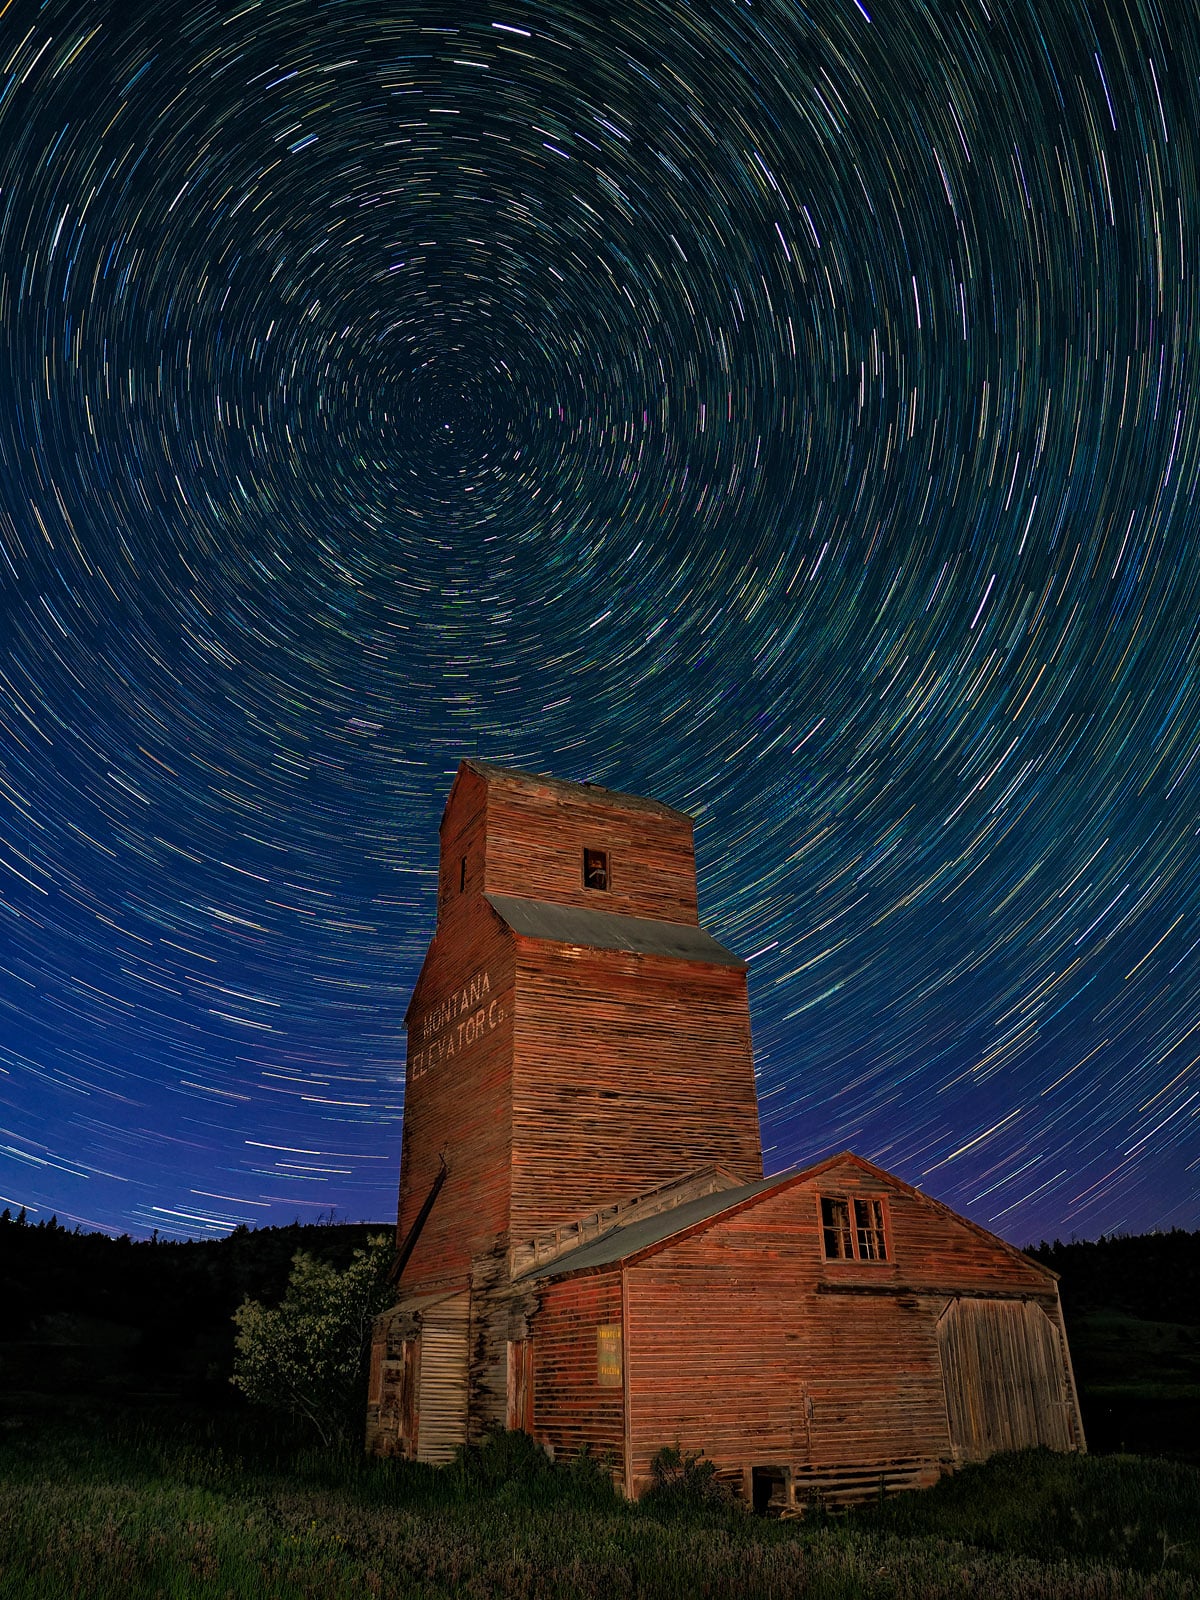
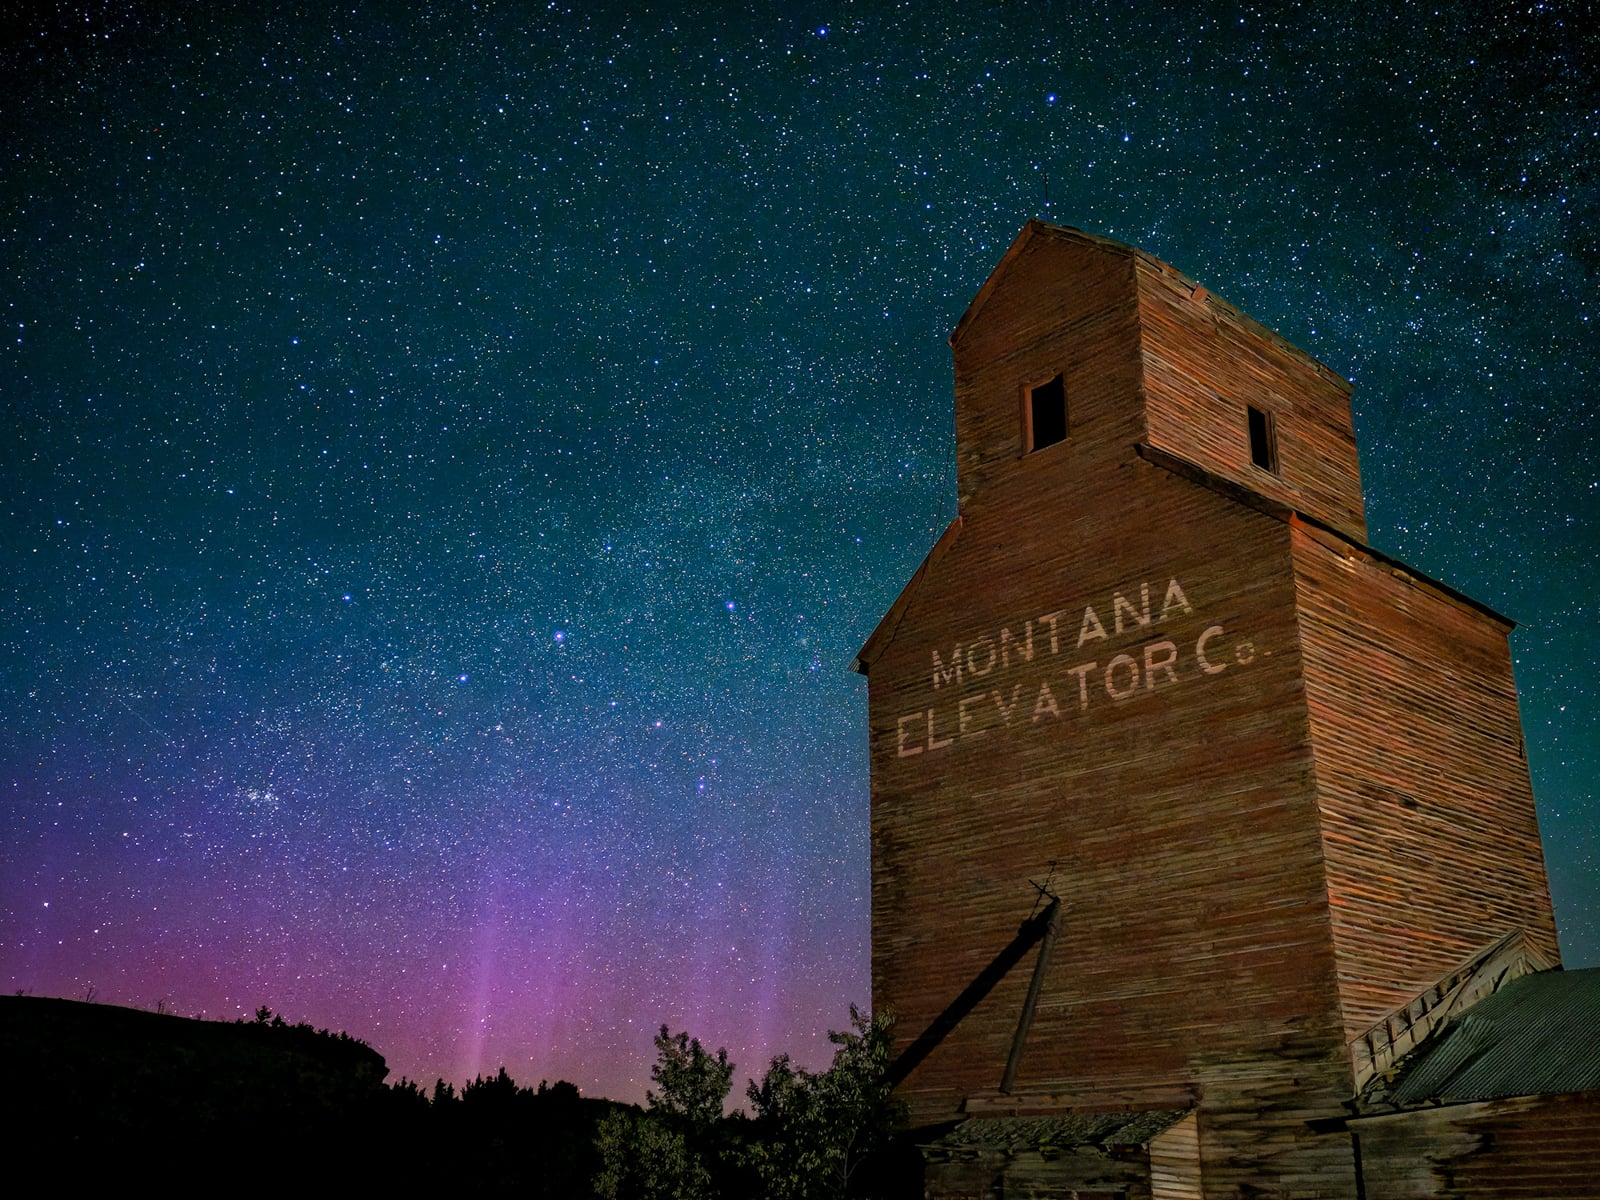
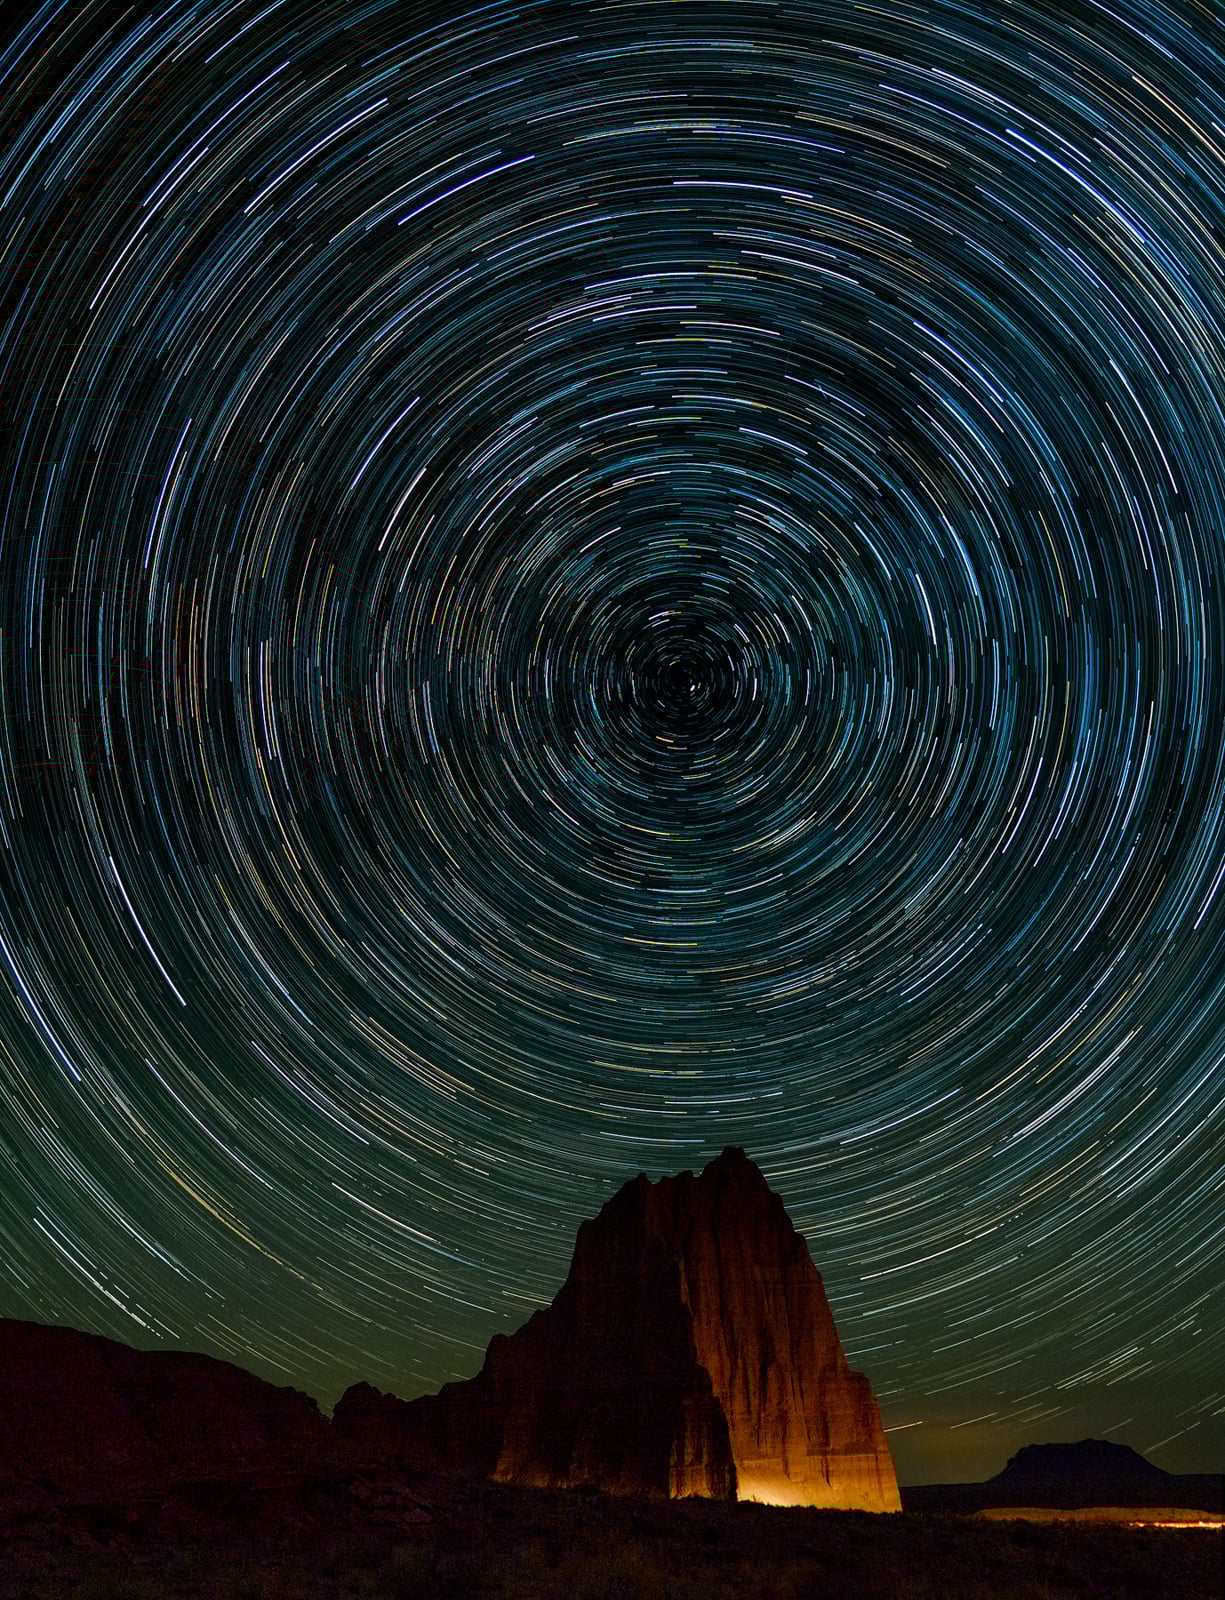 E-M1X • M.Zuiko Digital ED 12mm F2.0 • 12mm (24mm equivalent) • 60sec • f/2.8 • ISO 1600. Live Composite.
“I remember what I was feeling when I saw the Milky Way for the first time in Joshua Tree,” Suess shares with PetaPixel. “I couldn’t believe what I was looking at. I just stood there staring at it. A lot of people who attend my workshops experience that same moment of seeing a truly dark night sky for the first time. Watching them see it with their own eyes and then helping them photograph it, that’s a reward that never gets old.”
His most useful lessons don’t come from books or gear guides. They come from hundreds of nights in the field diagnosing what went wrong.
Start With the Right Question
Semi-experienced astrophotographers plateau more often from asking the wrong question than from having the wrong gear. “Do I need a better camera?” is the wrong starting point.
“The real question is what’s actually limiting your shots,” Suess tells every workshop student who asks about upgrading. “If you’re not getting sharp stars, it could be focus technique, wind on a lightweight tripod, or a lens that’s too slow or soft for the conditions. A lot of photographers upgrade bodies when what they actually need is a faster prime or a more stable tripod.”
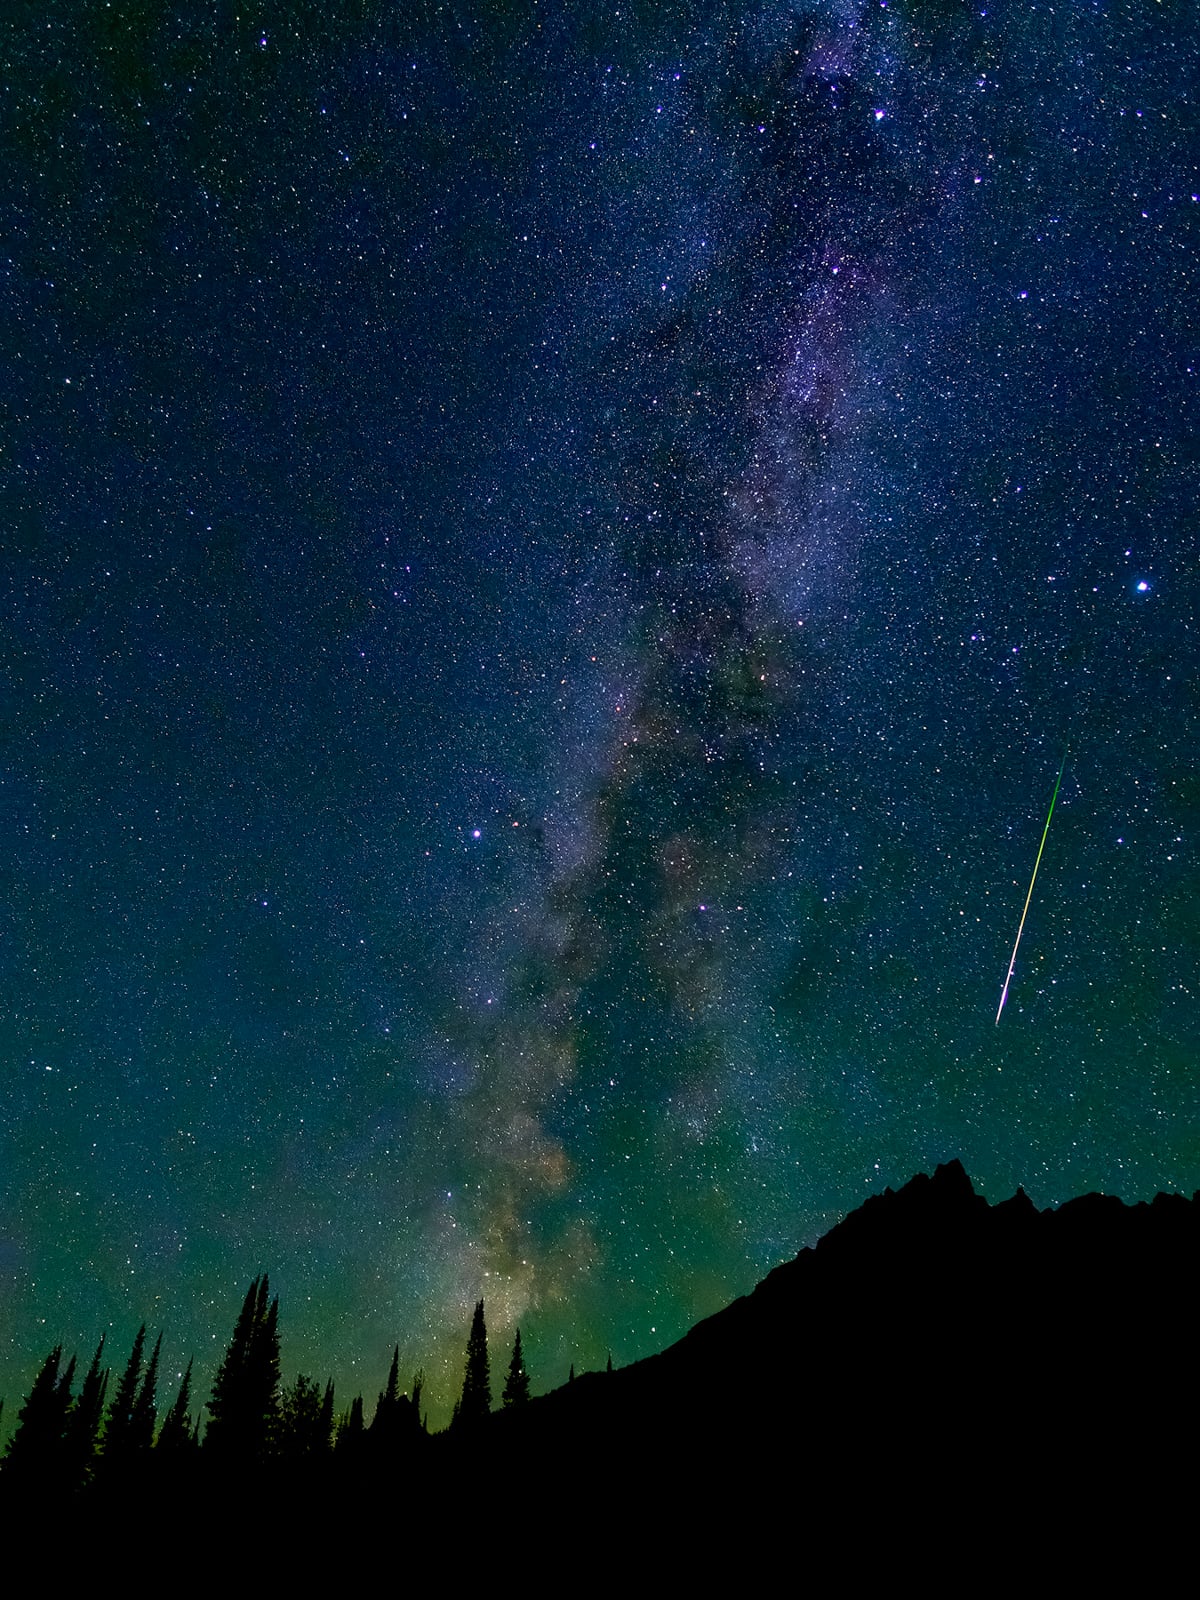
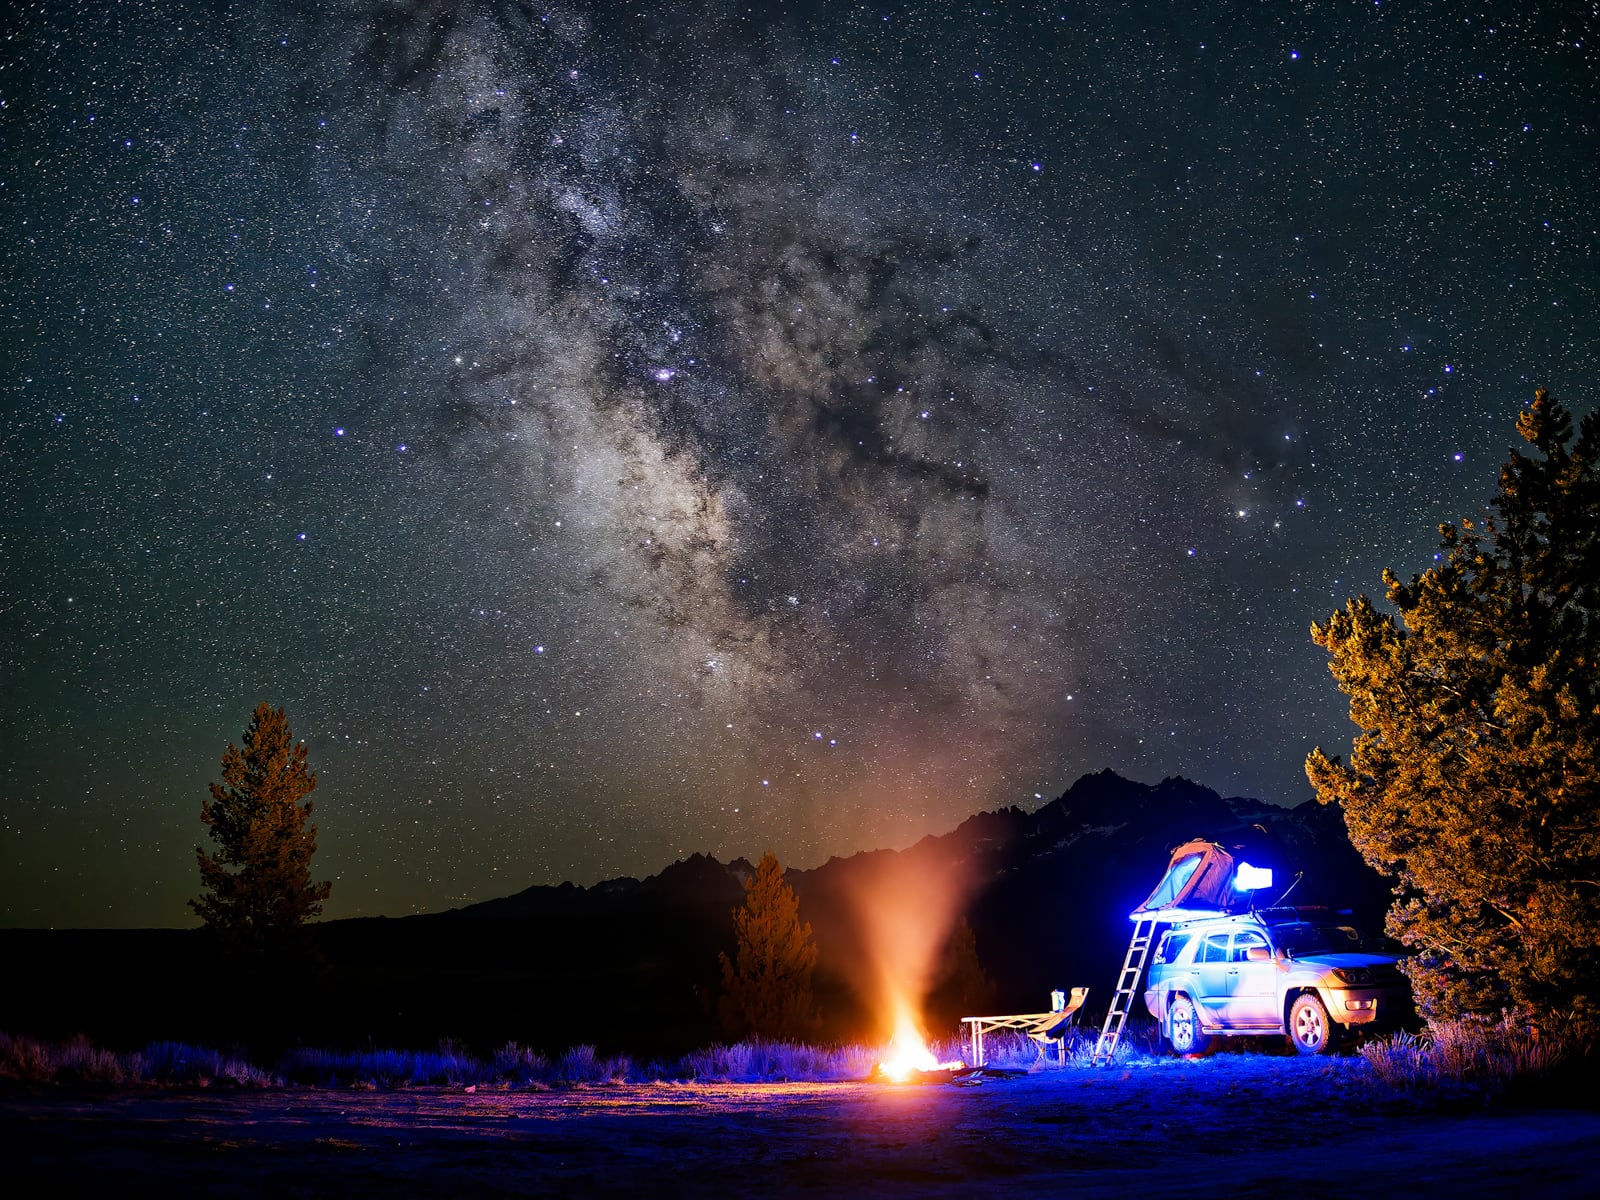 OM-5 • M.Zuiko Digital ED 17mm F1.2 PRO • 17mm (34mm equivalent) • 13sec • f/1.4 • ISO 3200
The astrophotography technique Suess relies on most for star trails came from a workshop student, not a manual.
“A participant wasn’t taking my advice on manual stacking,” he continues. “I walked over to ask why, and he showed me star trails building on the back of his camera in real time, all in camera without any post-processing. I’d been stacking exposures in post for years to get the same effect. That moment changed how I thought about what astro gear could do.”
The feature was Live Composite, an in-camera long-exposure tool on OM SYSTEM cameras.
“That’s still how I think about gear decisions,” he reflects. “Before I recommend anything to a student, I ask them: have you tried every feature and setting in your current camera? Have you tried astrophotography with different lenses? Most people haven’t experimented. They’ve used maybe 30% of what they already own.”
Get to Know Your Kit Before You Buy
Knowing your kit starts with what’s already in the bag, and just as importantly, with what gets left behind.
“When you get serious about astrophotography, night work might involve two tripods, a star tracker, and multiple lenses,” Suess insists. “Lighter bodies and glass make a real difference. My own kit includes the OM-1 Mark II, the OM-5 Mark II, fast primes, and a star tracker for deep sky. The heavier the gear, the less you bring, and the more you wish you had out in the field. A lightweight setup that works for you will help you take better images and enjoy your time under the night sky.”
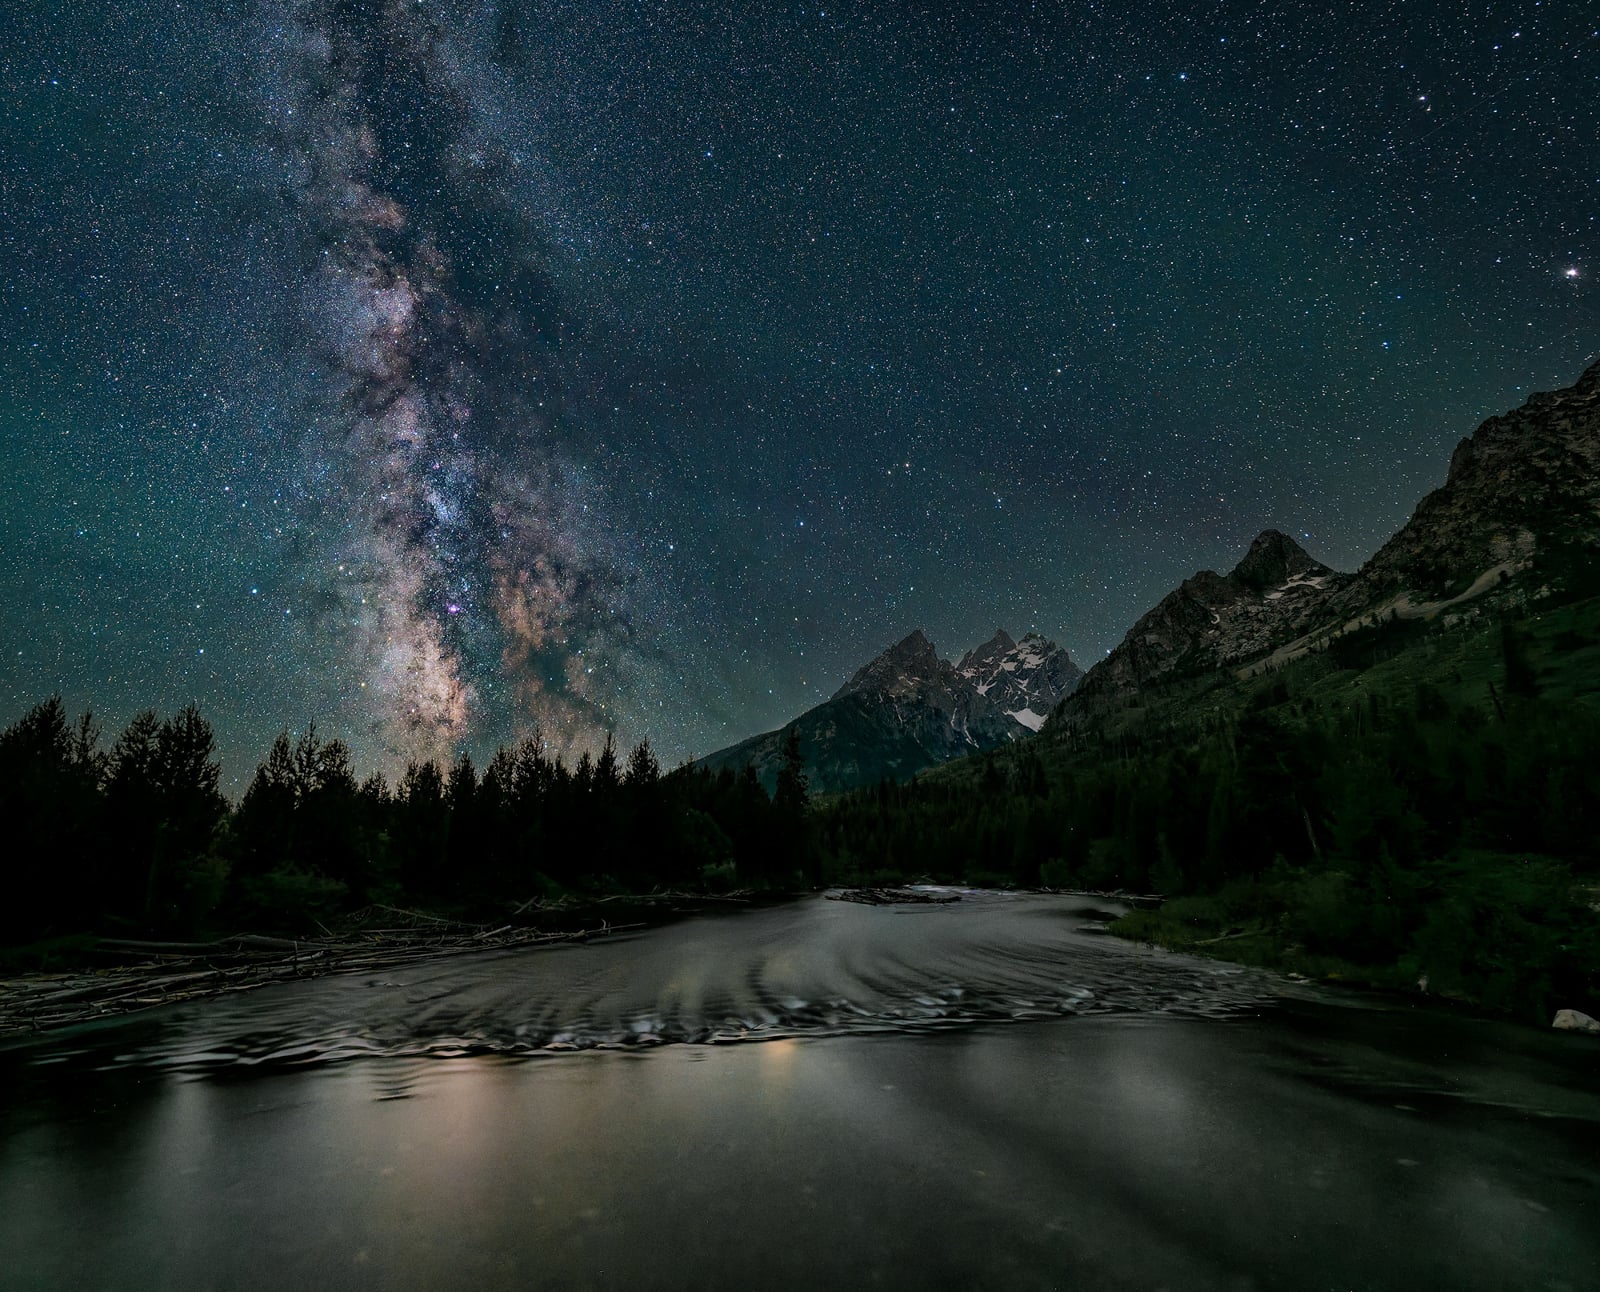
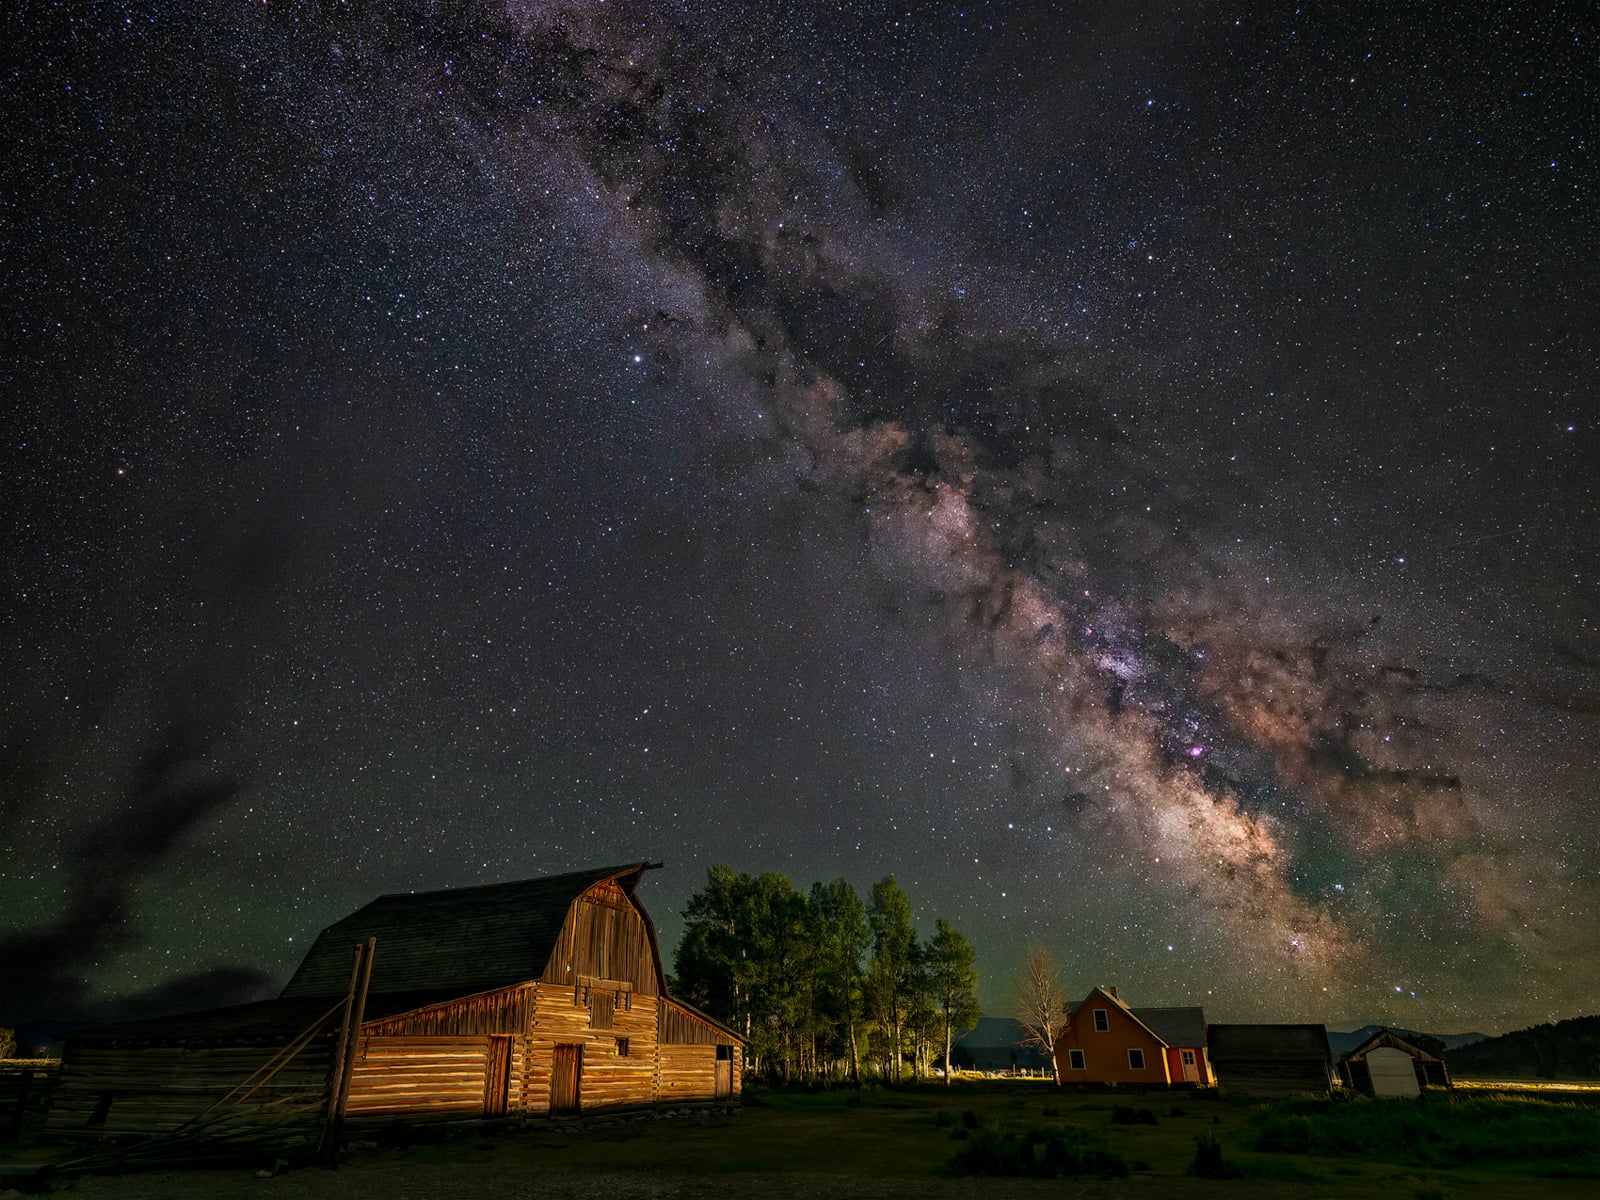 OM-1 Mark II • M.Zuiko Digital ED 7-14mm F2.8 PRO • 9mm (18mm equivalent) • 60sec • f/2.8 • ISO 2000. Tracked and stacked composite. Listed EXIF is for the sky; foreground exposed at 60sec, f/2.8, ISO 4000.
In his workshop teaching, the lessons he repeats most often have nothing to do with what’s in the bag:
“Before making any changes, identify how you can take better photos with the gear you have. For instance, one of the more common things I see on night one of my workshops are images with a small star trail because the shutter speed was too long.”
One formula is worth memorizing as a starting point: the 500 rule. Divide 500 by the 35mm equivalent of your focal length, and any shutter speed longer than that number creates small star trails.
Suess himself skips the formula:
“I prefer not to do math out in the field. I’d rather take a test shot, see if the stars are sharp, and adjust the exposure time from there.”
With experience, you will know the maximum exposure time allowed once you find your favorite lenses for astrophotography. One lens in Suess’s kit earns more night-sky time than any other.
“The M.Zuiko Digital ED 17mm F1.2 PRO is what I reach for most nights when I’m chasing the Milky Way,” Suess shares. “At 34mm equivalent, it’s wide enough to frame the Milky Way’s arc with meaningful foreground, but not so wide that the stars stretch at the edges. F1.2 lets me drop my ISO by a stop or more compared to an F2 lens, which translates directly to cleaner stars and less noise in the RAW file. Fast glass is what separates a usable wide-field astro shot from a soft, noisy one. That lens stays on one of my cameras more than any other.”
Find Your Focus, One Way or Another
Accurate star focus is one of the most technical challenges in astrophotography. The technique Suess teaches starts the same way.
“You put the camera in live view, increase the magnification, and find the brightest star near the center of your frame,” Suess explains. “Take the manual focusing ring and rotate it back and forth. You’ll see the star get big and soft, like a golf ball, and then tiny. You keep making smaller increments, zeroing in until that star is at its smallest point. Tape down the focusing ring, and hope that focus stays throughout the night.”
 OM-1 Mark II • M.Zuiko Digital ED 7-14mm F2.8 PRO • 7mm (14mm equivalent) • 363sec • f/2.8 • ISO 2000. Tracked and stacked composite. Listed EXIF is for the foreground; sky exposed at 120sec, f/2.8, ISO 1250.
That process worked most of the time, but it took patience, steady hands, and conditions that didn’t shift.
“For me, being a professional, it’s something I got used to,” he acknowledges. “With practice, I got quicker at it. But there were times I was still off just a little bit and my stars weren’t as sharp as they could have been. The distance between sharp and soft is very small.”
Temperature changes, bumped tripod legs, or zooming to recompose can all shift focus. With workshop students shooting their first Milky Way, one drift means a night of soft stars.
 E-M1X • M.Zuiko Digital ED 12mm F2.0 • 12mm (24mm equivalent) • 13sec • f/2.2 • ISO 5000
Suess found OM SYSTEM’s Starry Sky AF feature replaced that entire manual focus process with a single button press. The camera runs the same focusing sequence automatically, locking focus on a star and confirming the result.
“It’s almost like cheating,” Suess continues. “I watch the camera do basically the same technique I’d been doing manually. The stars get bigger and softer, then smaller, and then it just locks in. Done. For me, and especially for my clients that have a camera with Starry Sky AF, it takes all the guesswork out of focusing on the stars so they can focus on getting the right exposure and the right composition.”
Prepare for What the Guides Skip
Most astrophotography workshops start with teaching camera settings. Suess starts with teaching about the sky.
“Number one: clouds,” he describes. “If you’ve got clouds, you usually don’t have a nice shot, unless there are some breaks in the clouds somewhere. I photograph a lot in the Tetons and we get sudden storms. You can look in one direction and see clear skies and in the other direction, it’s gray and raining. So keeping an eye on the weather and being prepared to pivot locations is critical.”
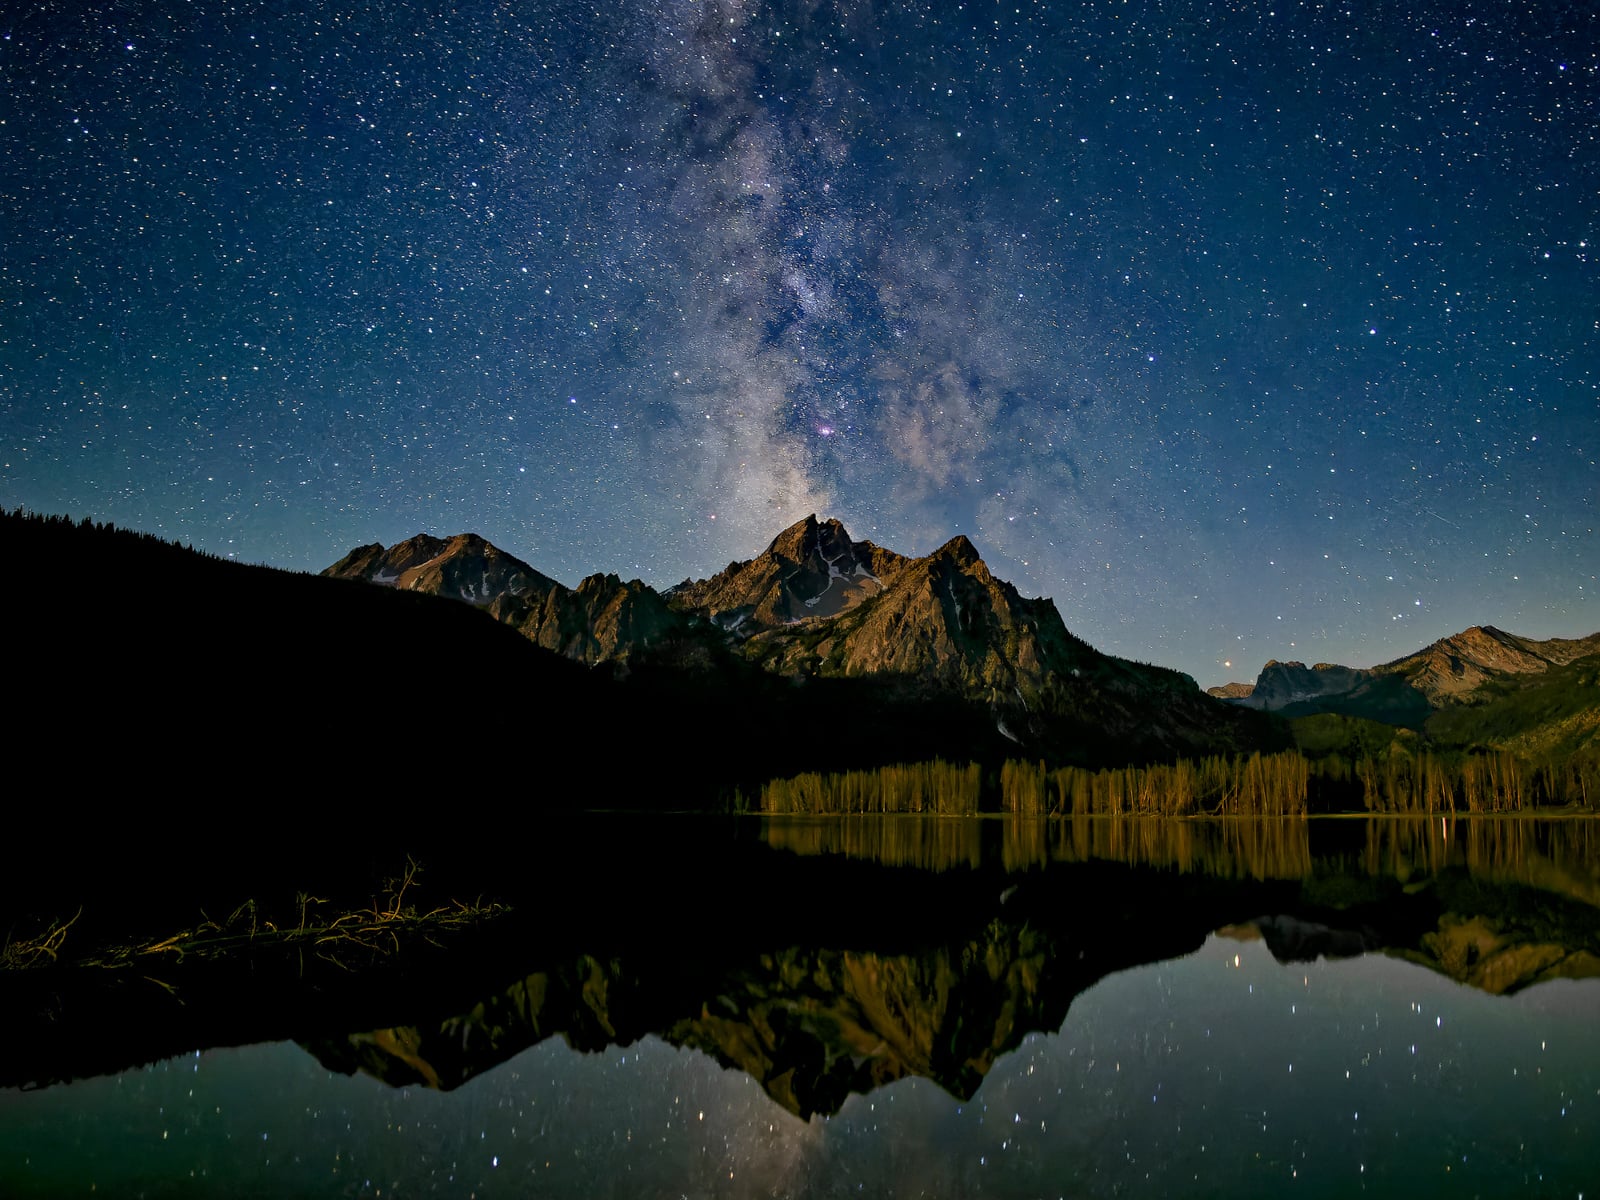
 OM-5 • M.Zuiko Digital ED 17mm F1.2 PRO • 17mm (34mm equivalent) • 60sec • f/2.5 • ISO 1250. Tracked and stacked composite. Listed EXIF is for the foreground; sky exposed at 60sec, f/1.6, ISO 500.
Suess checks Weather Mate (iOS only) for hourly forecasts and Windy for satellite cloud coverage before leaving home.
“I always recommend being ready to change plans,” he advises. “Time with ideal darkness for stars is limited, so a great plan B astro shot is better than no shot at all.”
The cold weather is one of the main things that can cut into that valuable astrophotography time.
“I’ve done shoots where 42 degrees felt manageable on the drive out,” Suess recalls. “But, after two hours into a Live Composite star trail, standing in one spot, not generating any heat, I was shaking. If you’re not moving much, it feels a lot colder than what the temperature is reading. I have learned to dress two layers warmer than the forecast.”
 OM-5 • M.Zuiko Digital ED 12mm F2.0 • 12mm (24mm equivalent) • 20sec • f/2 • ISO 3200
Most photography guides don’t address what to do when something moves in the dark.
“Animals are always a concern,” Suess stresses. “I’m photographing in landscapes with bears, moose, and bison. In the desert, I’ll bring a black light to see if there’s any scorpions on the ground. I always recommend doing research on wildlife in any location you’re visiting, because the best conditions for astro photography, darkness and remote nature, are also prime conditions for dangerous animals.”
Many photographers write off partial-moon nights. Suess sees them as composite opportunities.
“For the darkest skies, I recommend shooting four or five days around the new moon,” Suess advises. “That guarantees completely dark skies and the best view of the Milky Way. But even on nights with a half or three-quarter moon, as long as that moon is still below the horizon, you can shoot astro. If the moonrise is 45 minutes to an hour away, you’ve got a solid dark sky window. Photograph your dark sky first, keep your tripod and camera in the exact same position, and then when the moon comes up, let it light your foreground. Get both images and blend them in Photoshop later.”
“I’ll use PhotoPills to know when it’s blue hour, when it’s nautical twilight, and when it’s pure dark,” Suess adds. “Pure dark is when the sun is 18 degrees below the horizon and there’s no ambient illumination left in the sky. That’s when you get the most out of the Milky Way.”
 OM-1 Mark II • M.Zuiko Digital ED 7-14mm F2.8 PRO • 7mm (14mm equivalent) • 54sec • f/2.8 • ISO 3200. Untracked exposure blend. Listed EXIF is for the foreground; sky exposed at 15sec, f/2.8, ISO 12,800.
Most shooters skip one camera check that costs them at import. Suess recommends setting the EVF and LCD to their darkest levels before heading out.
“There’s nothing worse than reviewing your shots through the viewfinder when it’s bright and walking away with your eyes ruined for the dark sky,” Suess notes. “It’s not just about night vision, either. If you have the brightness up, your photo’s going to seem a lot brighter than it actually is, which can lead to disappointment when you see the RAW file on your computer. You should always be relying on the histogram for the truth.”
Use a Tracker, But Give Yourself Patience to Fail
A star tracker is a motorized mount that rotates your camera in sync with the Earth’s rotation, counteracting the movement that turns sharp stars into soft, blurry lines. With a tracker running, exposures can stretch from 30 seconds to several minutes, revealing color and detail invisible at shorter settings.
Weight is the variable most beginners don’t account for.
“On a portable tracker like the Move Shoot Move NOMAD, the motor can only handle so much weight,” Suess warns. “Bigger trackers with counterweights will handle heavy glass just fine, because the counterweight balances the load on the motor. But on a rig without that option, the lighter your camera and lens, the better it tracks. That’s where the lightweight Micro Four Thirds system has a real practical advantage.”
 OM-3 ASTRO • M.Zuiko Digital ED 17mm F1.2 PRO • 17mm (34mm equivalent) • 40sec • f/1.8 • ISO 1250. Tracked with a Move Shoot Move Nomad star tracker.
For his preferred deep-sky setup, Suess pairs the Move Shoot Move NOMAD with the M.Zuiko Digital ED 50-200mm F2.8 IS PRO and the M.Zuiko Digital 1.4x Teleconverter MC-14. That combination is light enough to hold exposures stable.
Suess cautions that trackers are made for deep-sky photography, so while you can shoot wide angle, there is one extra step to prepare for. “When you’re on a tracker, your foreground is going to get blurry because the tracker keeps moving to follow the stars,” he adds. “If you want foreground in your shot, you need separate exposures for sky and ground, then combine them in post.”
Despite capturing deep-sky photos he is proud of, not all of it has clicked yet.
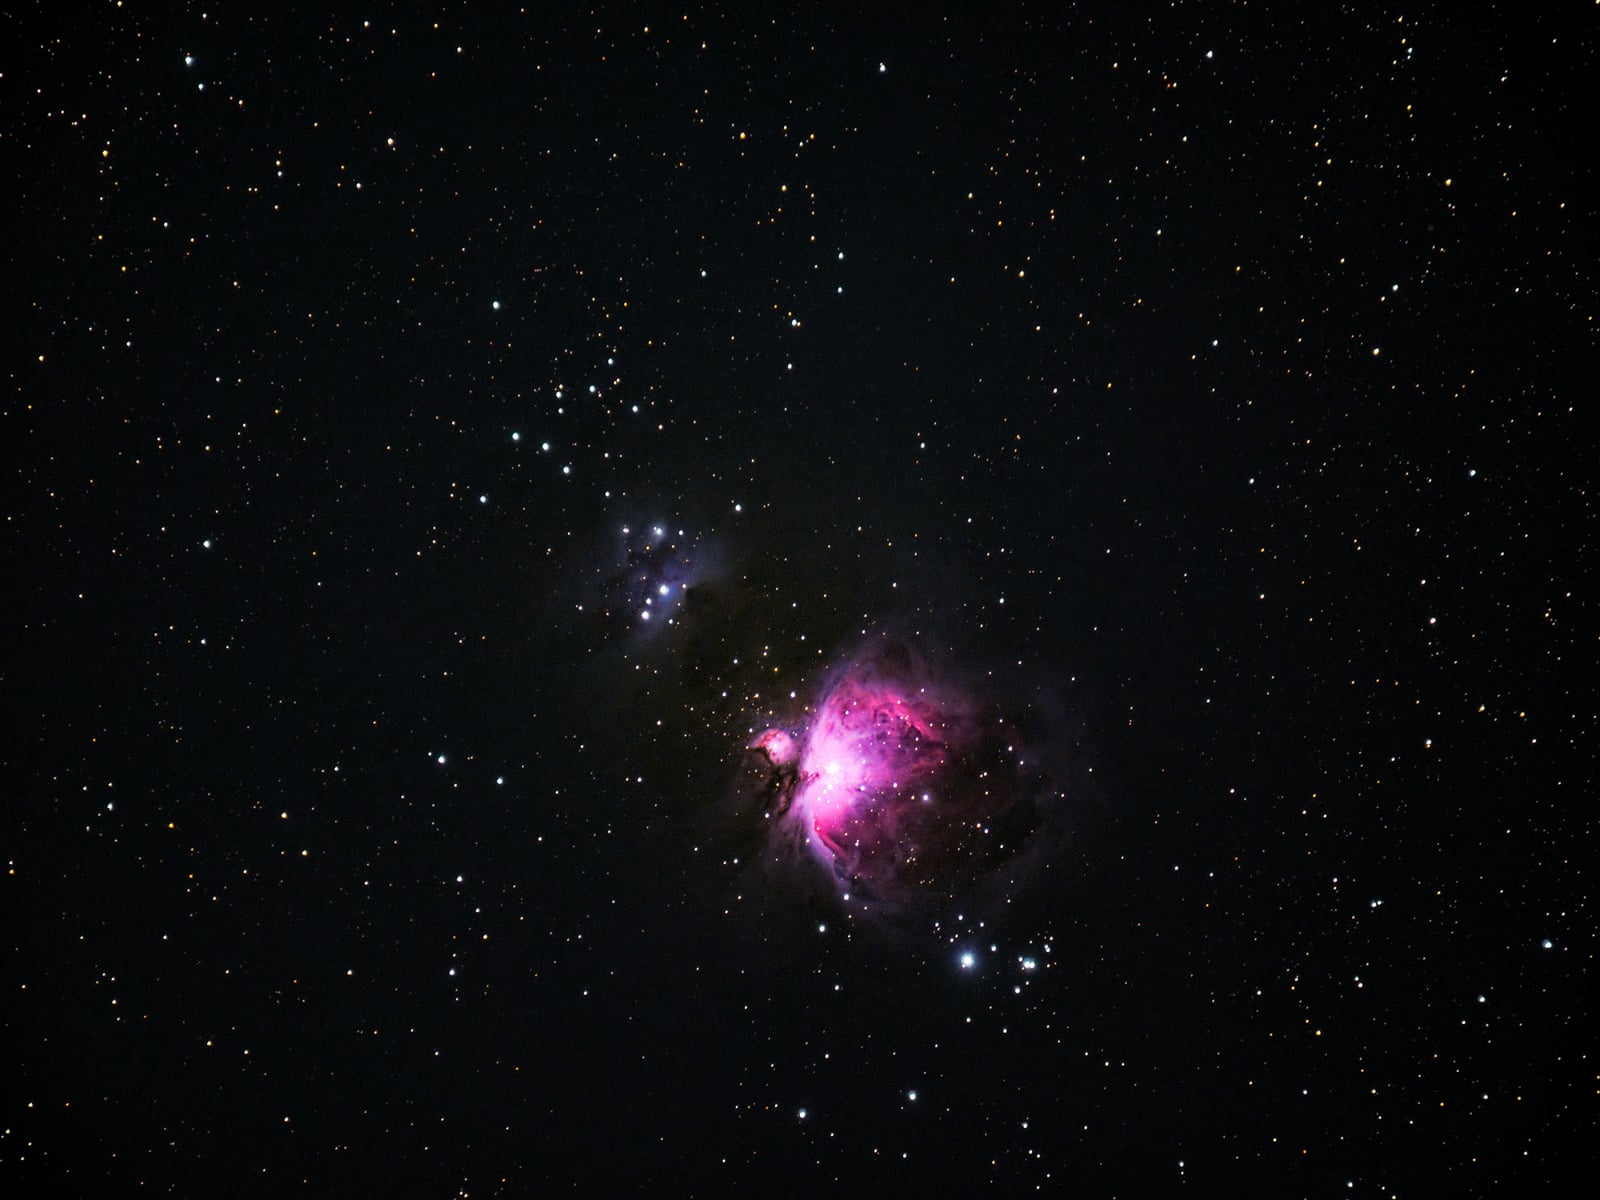
“I’m not an expert on deep sky photography, and I don’t know if I ever will be,” he admits. “And that’s ok, because I am really enjoying the learning process and I love creating something different than my usual Milky Way shots. Once I got that first exposure of the Andromeda Galaxy, I was hooked. I was surprised I could get that much detail out of a single exposure. The Orion Nebula in winter has also become an instant favorite.”
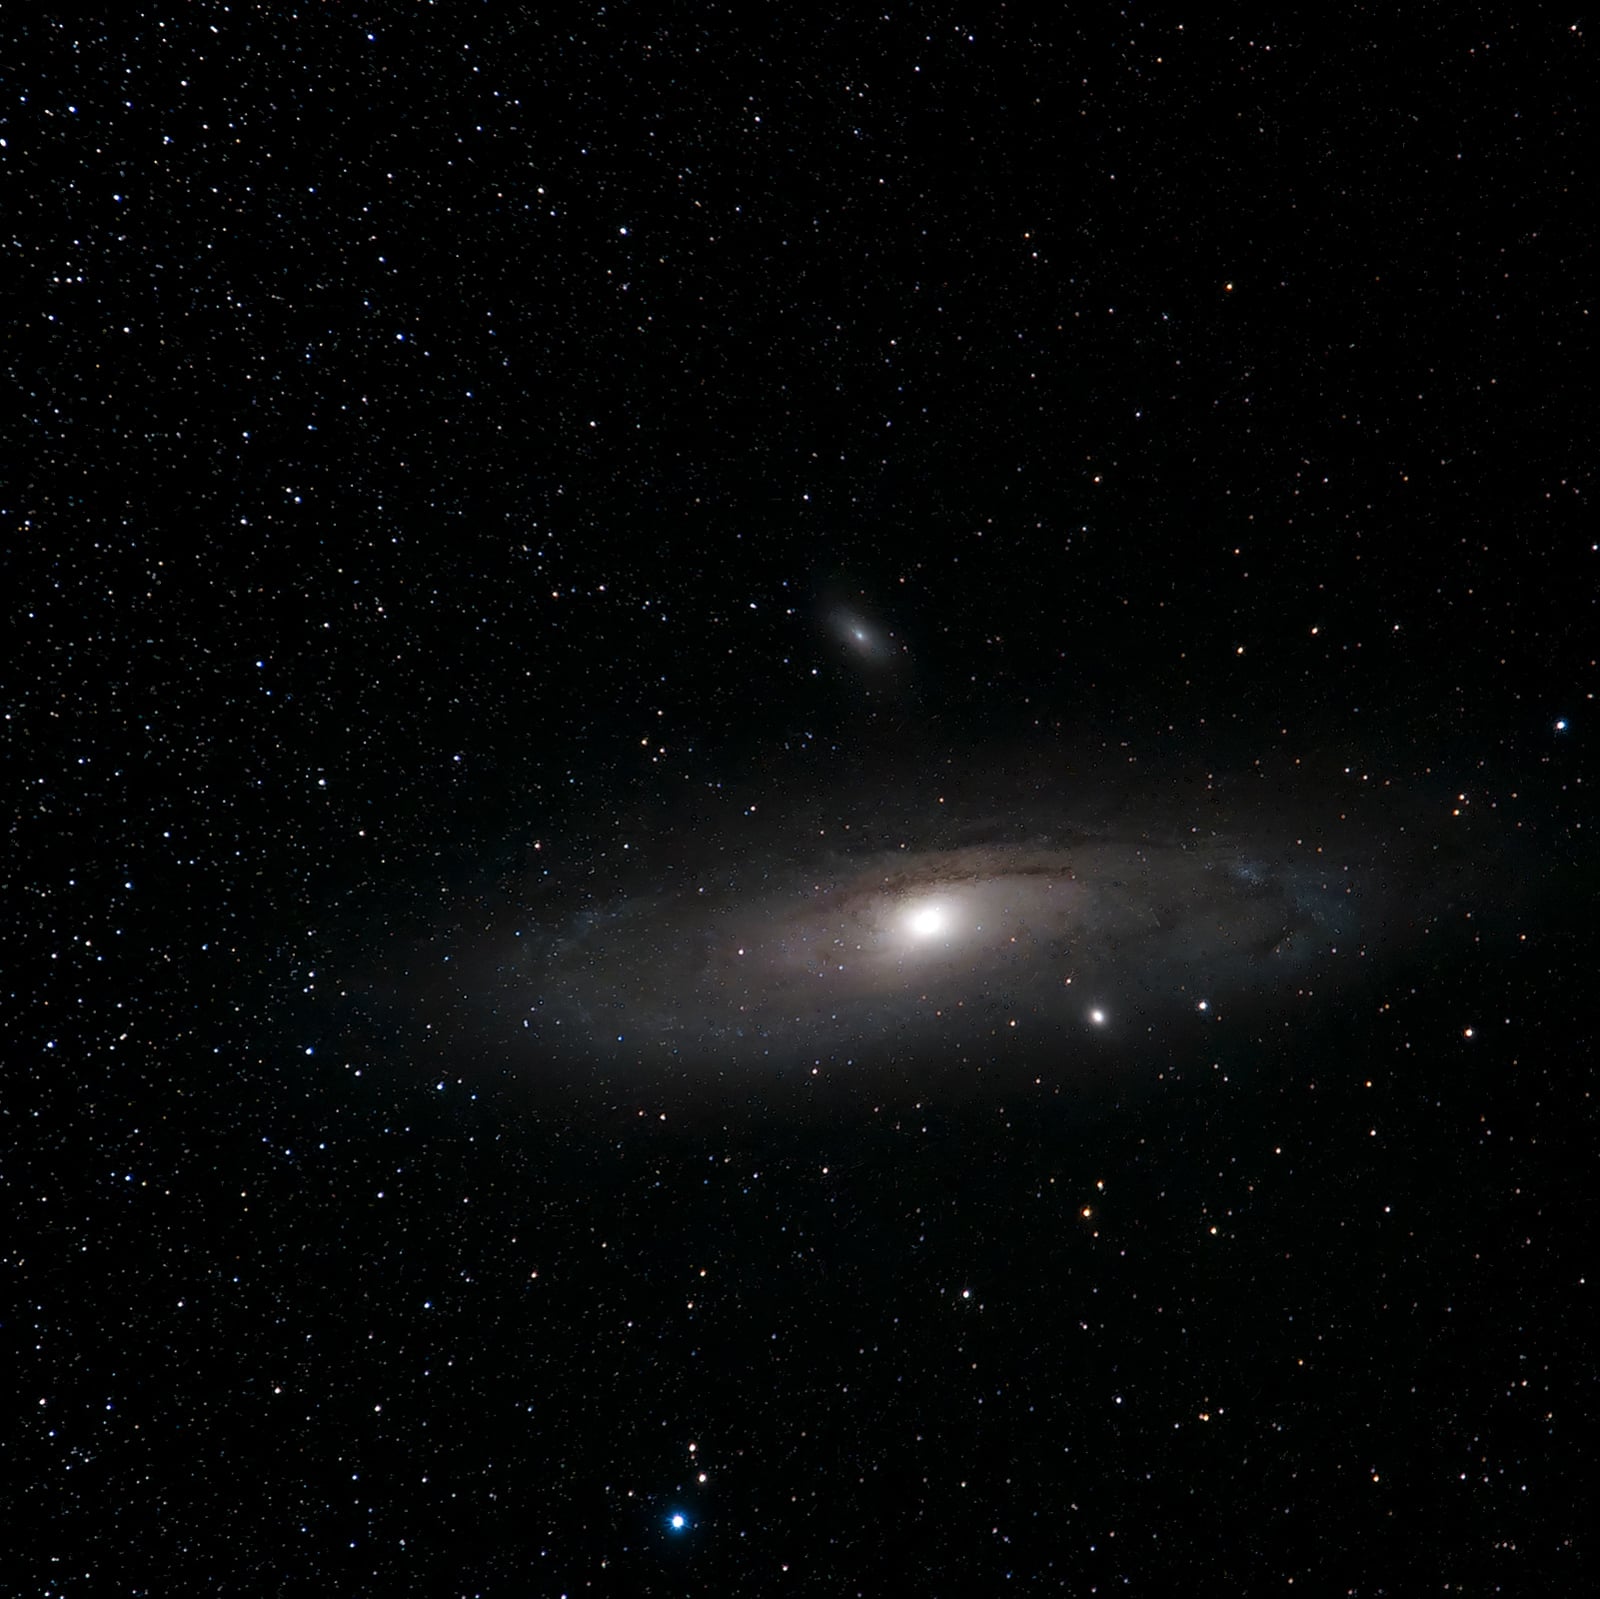 OM-1 Mark II • M.Zuiko Digital ED 40-150mm F2.8 PRO + MC-14 • 210mm (420mm equivalent) • 60sec • f/4 • ISO 3200
Most beginners hit the same wall with their first star tracker: polar alignment, the process of pointing the tracker’s axis at Polaris so the mount follows the sky.
“Getting polar alignment starts with finding Polaris in the polar scope, and the first thing that throws people off is that the view is upside down,” he cautions. “Then you’ve got trees to contend with. The North Star is in a fixed position, and if there’s a tree in between you and the North Star, you’ve got a problem. And even when you think you’ve got it, you’re asking yourself, did I align on the right star? There are a lot of stars up there.”
Finding Polaris is one challenge. Finding a faint galaxy at 300mm is another.
“One of the biggest advantages of a zoom telephoto lens like the 50-200mm over a fixed telephoto is how easily you can find your target,” he explains. “You zoom out wide, take a quick test photo, and you can see where Andromeda sits relative to the surrounding stars. Then you zoom in. With a fixed focal length like a 300, you’re staring through the lens at a field of stars trying to find one specific target. That is difficult.”
 OM-1 Mark II • M.Zuiko Digital ED 40-150mm F2.8 PRO + MC-14 • 210mm (420mm equivalent) • 30sec • f/4 • ISO 3200
Getting alignment and keeping it are two different skills.
“I can’t tell you how many times I’ve gotten polar alignment and then accidentally kicked my tripod leg,” he stresses. “Or you get it dialed in and then put a heavier lens on and one of your tripod legs sinks a little. You need a lot of patience and you need to have some forgiveness for yourself too, because things can and will go wrong.”
If You’re Serious, Research Why an Astro Sensor is Valuable
The OM-3 ASTRO was Suess’s entry into deep-sky photography, and it taught him something most photographers never think about: the sensor in the camera most of us own is quietly filtering out the exact light that makes nebulae look like nebulae.
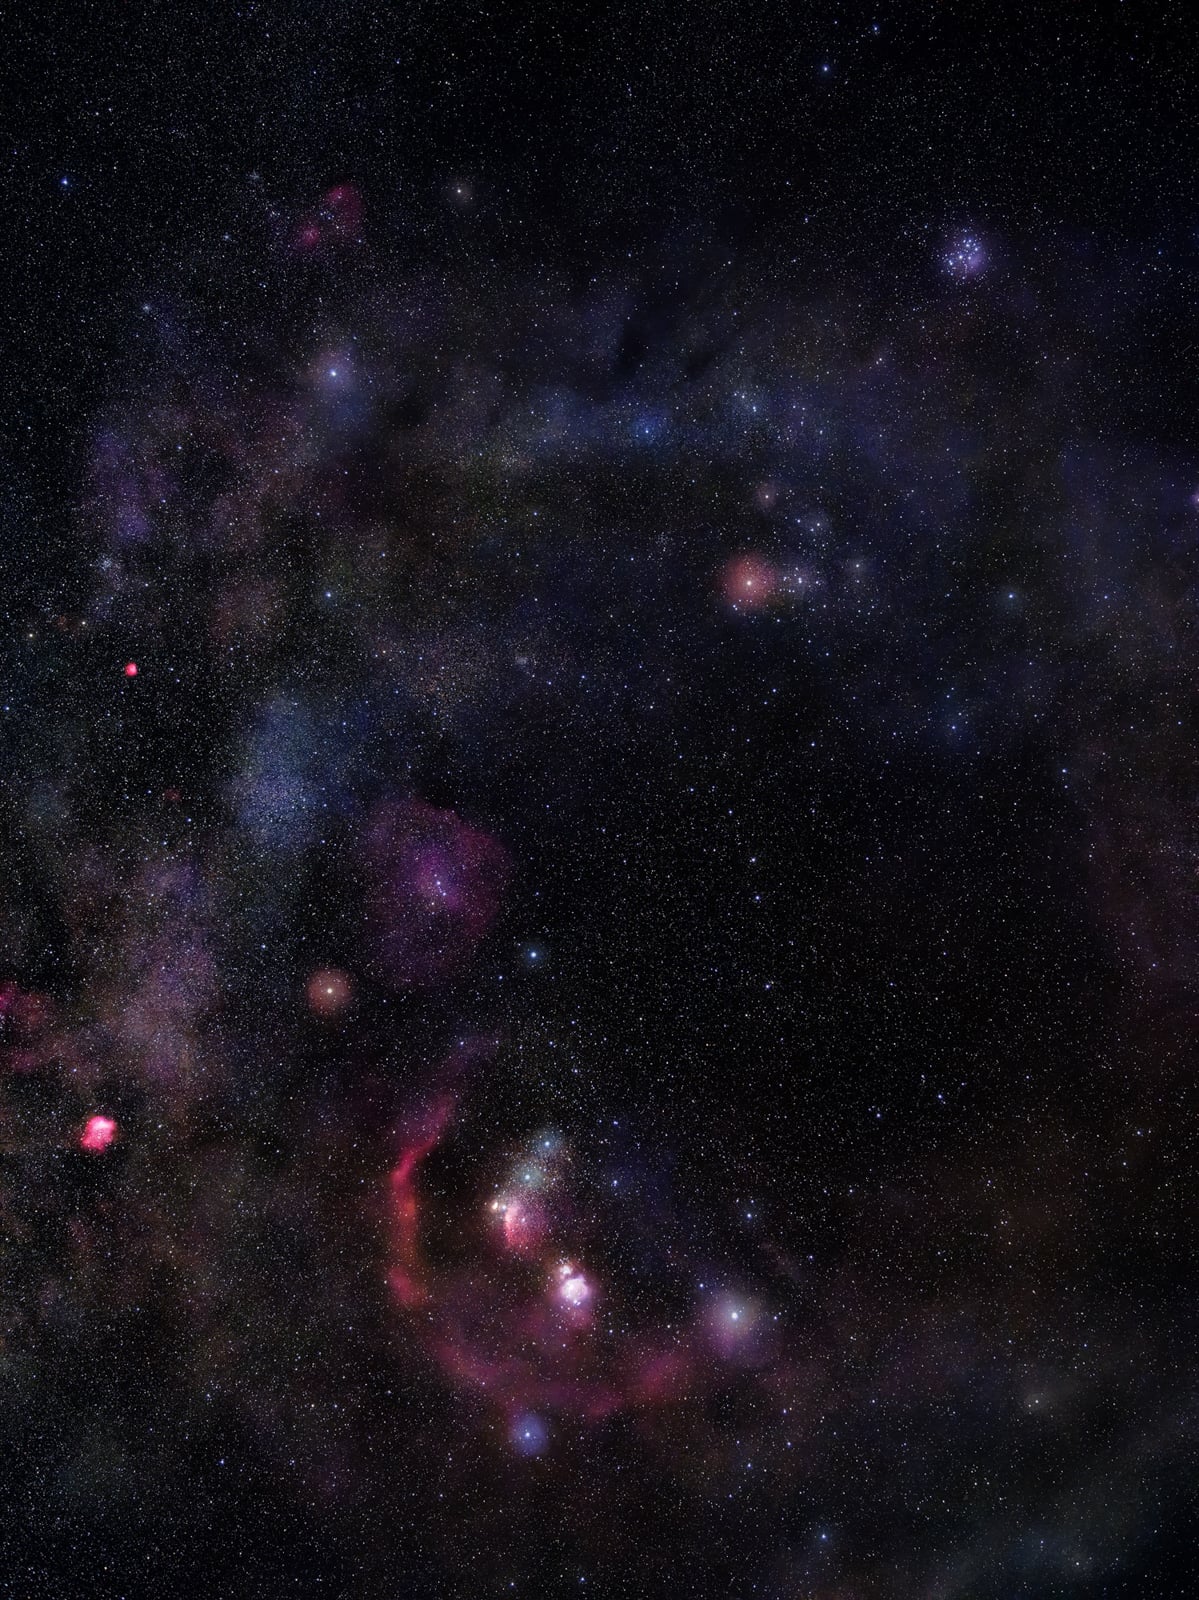
On non-astro-modified cameras, the pink and red clouds at the heart of the Orion Nebula show up as muted smudges. On an astro camera, the same scene glows. That color jump is why published nebula photographs look nothing like what most cameras actually record.
Every standard camera sensor has a filter that blocks hydrogen-alpha, the wavelength responsible for those glowing reds in nebulae. Getting it back traditionally meant a third-party modification service costing around $300 that voided the camera warranty and left the body with a reddish-pink cast for any non-astro use.
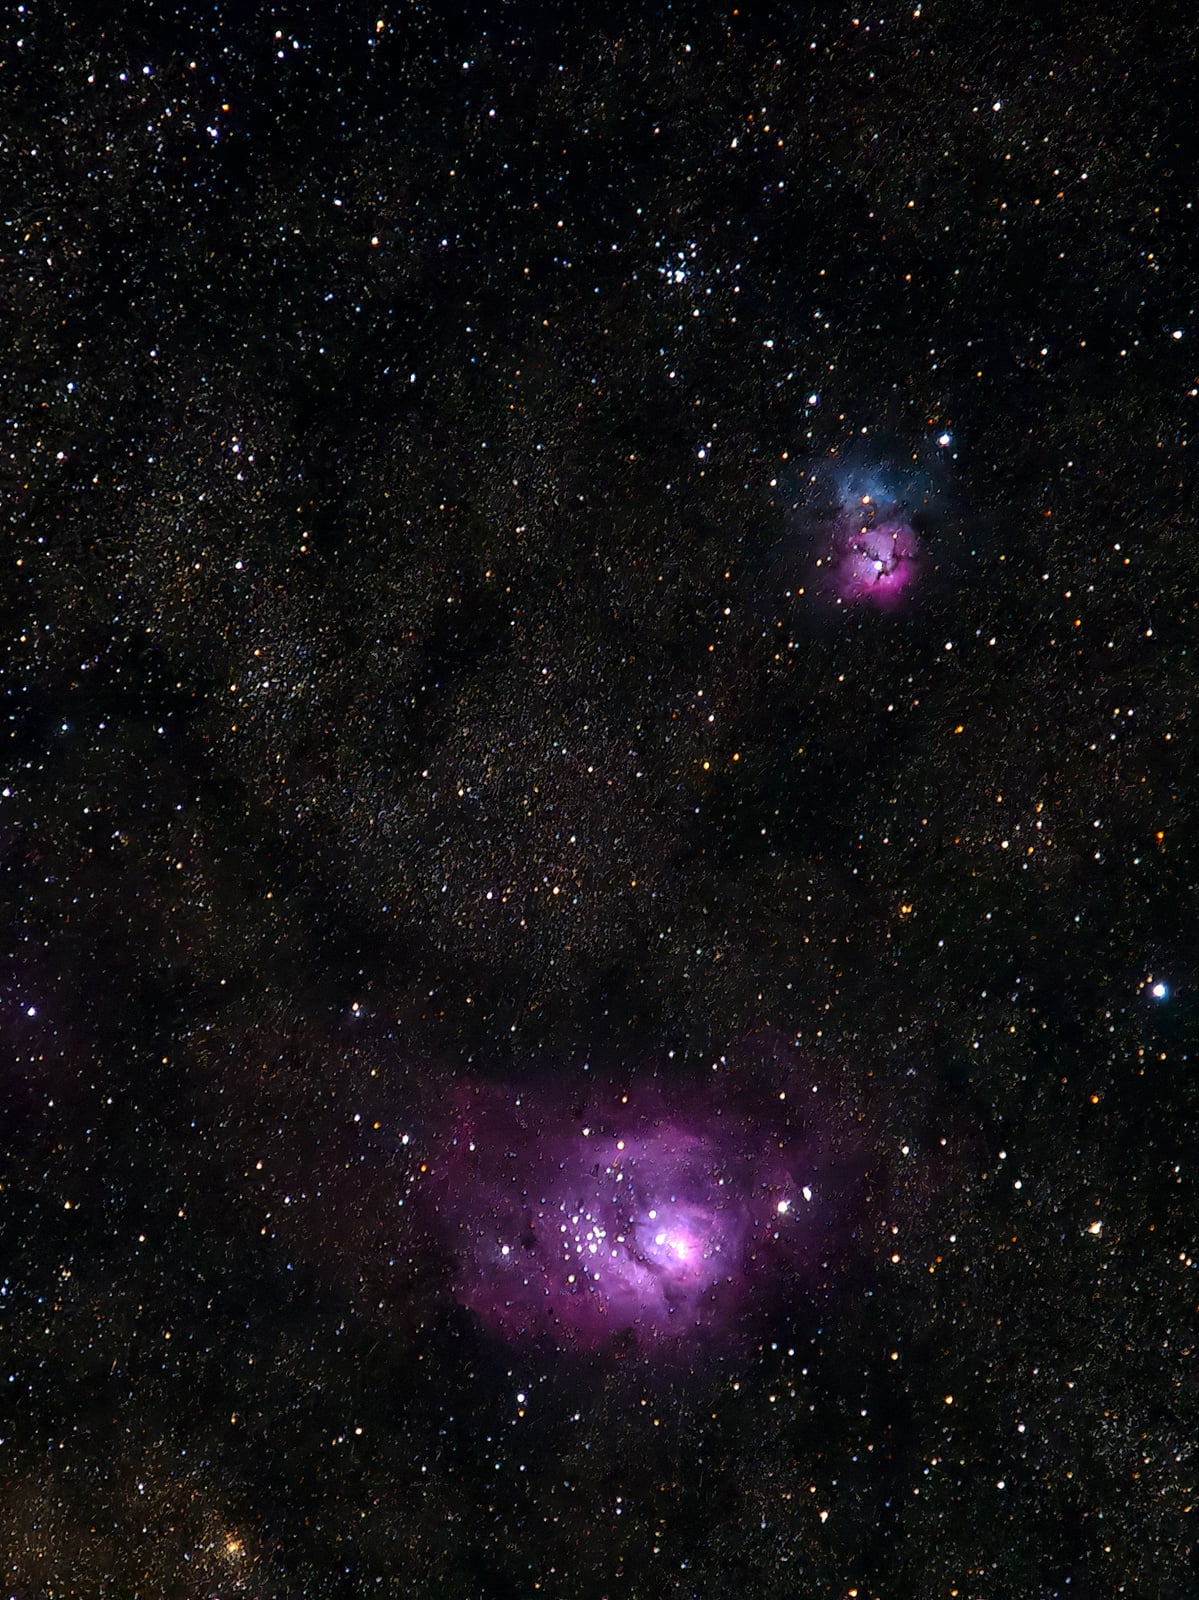
 OM-3 ASTRO • M.Zuiko Digital ED 50-200mm F2.8 IS PRO + MC-14 • 280mm (560mm equivalent) • 20sec • f/4 • ISO 1600
“An astro camera removes that filter, so it captures all of that red light instead of maybe 20% of it,” Suess notes. “The difference on something like the Orion Nebula is night and day.”
The OM SYSTEM OM-3 ASTRO ships from the factory with a modified filter that passes H-alpha through fully, and changes Suess’s approach to his astrophotography.
“This is my first venture with an astro-modified camera, and I’m still learning all about it myself,” Suess reflects. “I know I’m just scratching the surface, but it’s been fascinating. Even with a wide-angle lens on the Milky Way, I’m seeing a lot more color. There are other nebulae embedded in the Milky Way that a standard camera barely registers, and this picks them up. You put a telephoto on, and the difference is even more noticeable.”
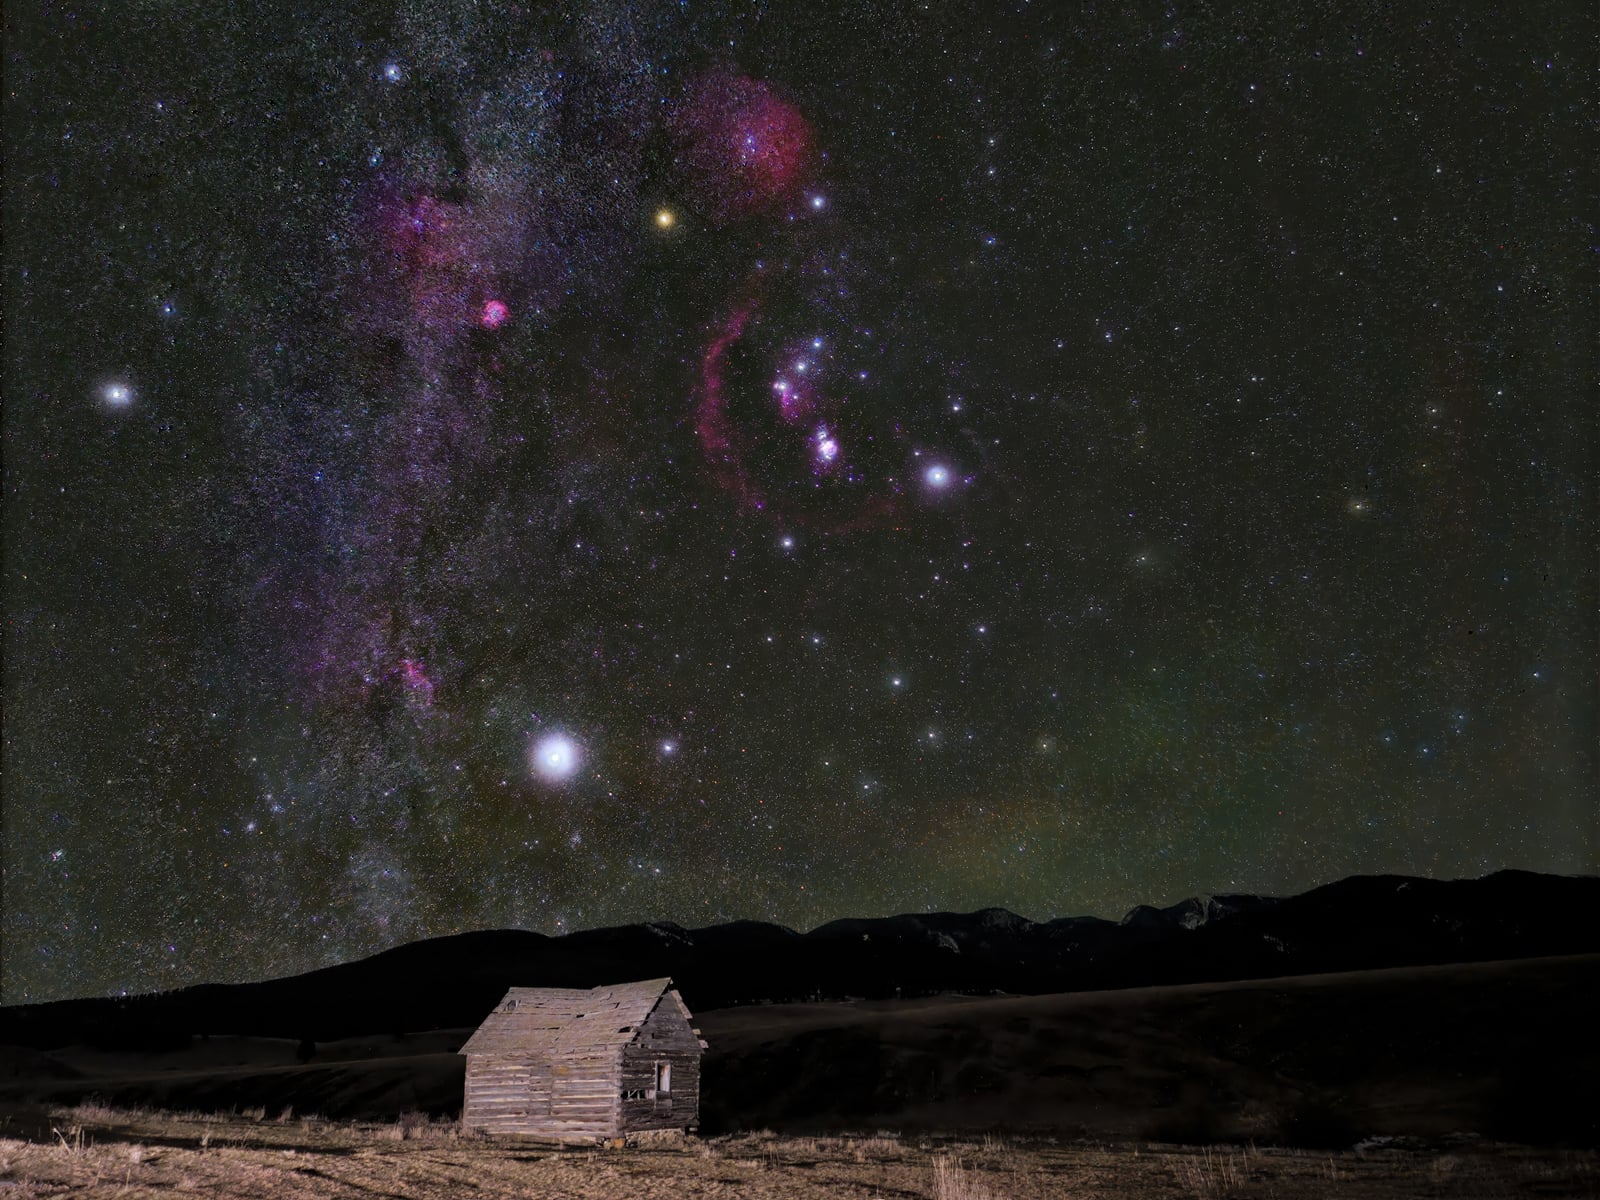 OM-3 ASTRO • M.Zuiko Digital ED 12mm F2.0 • 12mm (24mm equivalent) • 30sec • f/2 • ISO 3200. Listed EXIF is for the foreground; sky captured with Handheld High Res Shot at 40sec, f/2, ISO 2000.
On a tracker, longer exposures give that sensor more time to capture hydrogen-alpha, which saturates the reds in deep-sky subjects like the Orion Nebula. The sensor modification handles one variable. Artificial light is another.
“The body-mount filter system is something I haven’t had a chance to test yet, but the concept is exactly right,” he adds. “A light pollution filter (BMF-LPC01) that sits behind the lens means it works with any lens, including the M.Zuiko Digital ED 8mm F1.8 Fisheye PRO. Try putting a screw-on filter on an 8mm fisheye. It’s not happening.”
The body-mount light pollution filter cuts the artificial light wavelengths from city glow, allowing fainter sky detail to register on the sensor without the color cast that streetlights introduce.
“Once you’ve gotten used to photographing the Milky Way and it’s something you enjoy, going to a star tracker is going to kick up your photos a notch. And then going to an astro-specific camera is going to be a whole other level. That’s when you know you’re committed to this.”
Trust the Histogram, Not the Preview
If you want workable RAW files to edit, one simple rule prevents disappointment at import: the histogram tells the truth, the preview lies.
The histogram is the small graph on the back of the camera that shows how many pixels fall at each brightness level, from shadows on the left to highlights on the right. It is the only way to know, before you leave the field, whether the exposure has real detail in it or whether you are about to spend hours editing noise. Everything Suess does in post starts from what the histogram shows.
“Many astrophotographers I talk to assume more frames means a better final image, but I like to get my astro shots in one or two exposures,” Suess insists. “When you’re only taking one or two, every frame has to be right, and the histogram is how I check. With the noise reduction software we have now, I don’t feel I have to do stacking for those big Milky Way shots. The basic stacking software is really just removing noise, not adding meaningful detail to your wide angle astro shots. Now, deep sky stacking with lights and darks and all those frames, that’s different. That does pull more detail.”
He’s started pushing into more specialized software:
“PixInsight has a whole big learning curve. I’m just starting to dive into it. It’ll stack your photos, it has plugins for star reduction so you can focus on the nebula itself, and it’s what the serious deep space photographers are using.”
Every RAW processor handles files differently, particularly in how they convert sensor data into color pixels, a step called demosaicing. For the high-ISO files his OM SYSTEM cameras produce at night, Suess relies on DxO PureRAW as the first step.
“The first time I compared a high-ISO file processed through PureRAW versus going straight into Lightroom, the difference jumped off the screen,” Suess says. “It kept the star detail sharp while cleaning the noise. Lightroom was smearing it. I have used the same workflow ever since.”
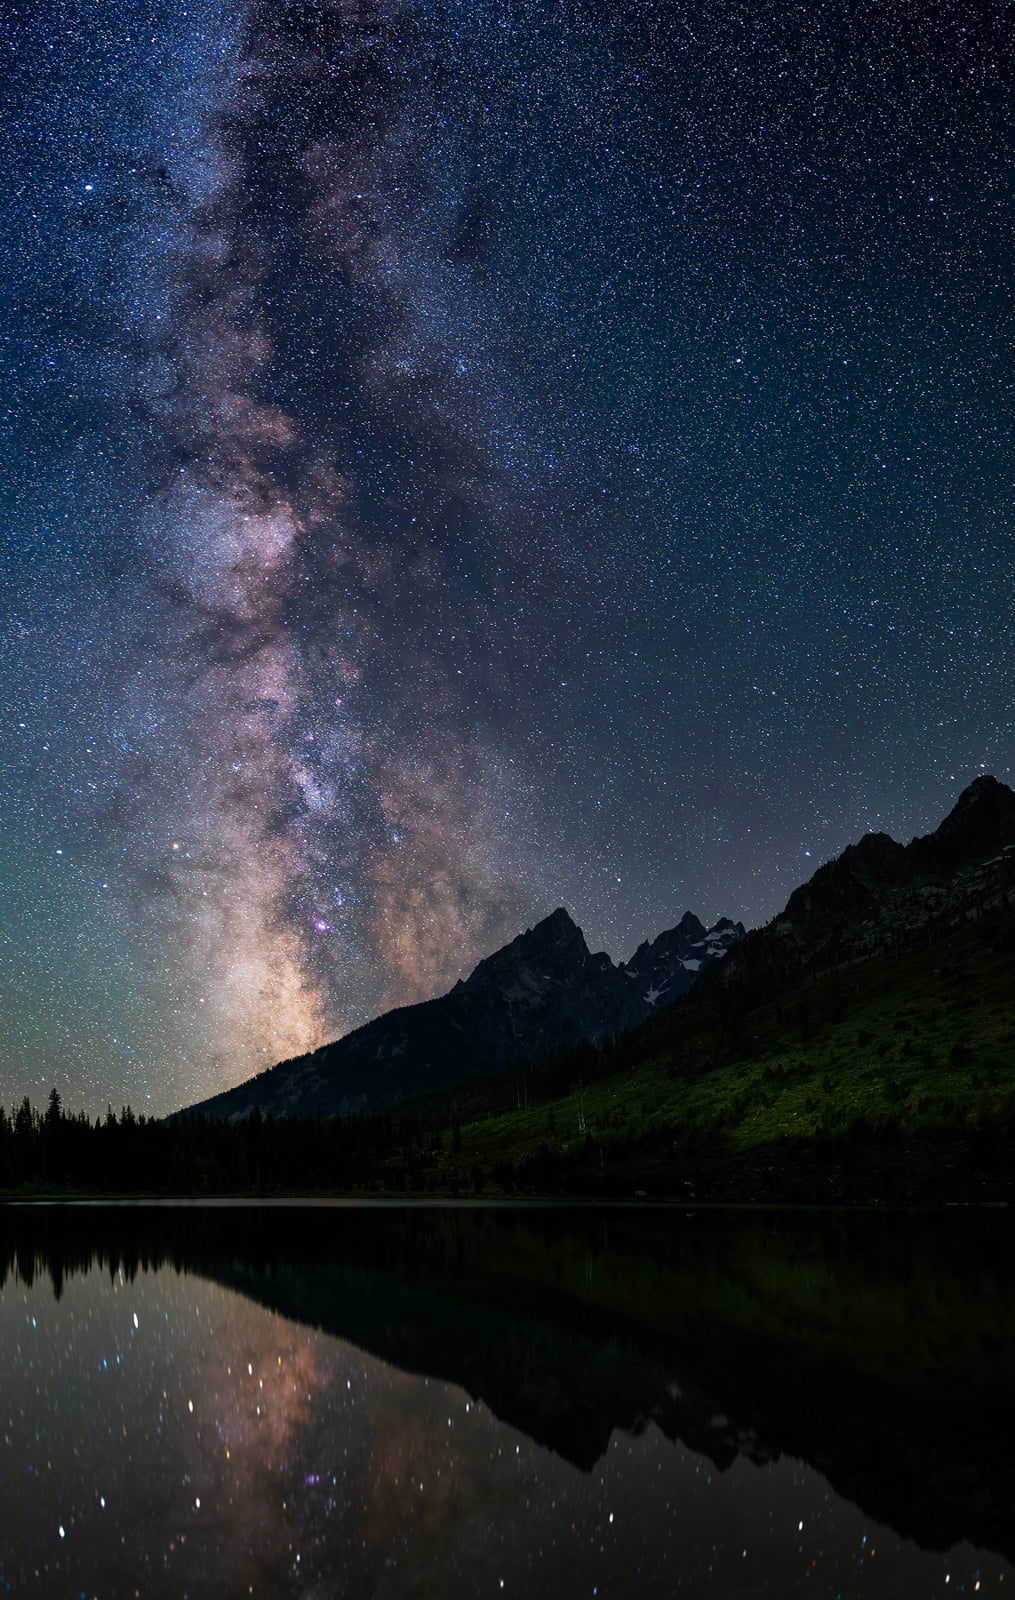 OM-3 • M.Zuiko Digital ED 17mm F1.2 PRO • 17mm (34mm equivalent) • 60sec • f/1.4 • ISO 1600. Stacked multi-photo panorama, no tracker. Listed EXIF is for the foreground (Tripod High Res Shot); sky captured with Handheld High Res Shot at 13sec, f/1.6, ISO 6400.
Suess explains that the secret to good astro edits isn’t just fixing noise. “PureRAW is my go-to for noise reduction, but I also really like the way it demosaics the RAW file and puts its own little color spin on it. Each RAW processing engine handles the demosaicing a little differently, and I like the way it handles color, noise, and the sharpness of the lens.”
From that single exposure, his workflow usually runs through a fixed sequence:
“Once the file is clean, I take it into Photoshop, where I’ll run a high-pass filter, a sharpening technique, to bring out extra detail in the Milky Way core. The last step is DxO Nik Color Efex where I will apply the Clearview and Tonal Contrast filters, which apply localized contrast sharpening to specific tonal ranges in the image to add some clarity and pop.”
Over-processing is the most common mistake Suess sees in workshop edits. “What I see is people pulling harder on data that isn’t there,” he says. “They stack 50 weak exposures and try to brute-force the processing, and they end up with these mottled-looking nebulae that don’t look real. Start with a stronger single exposure, run it through good noise reduction, and let the data speak for itself. You’ll get a more honest result.”
Photograph the Sky While You Can
Almost 40 years before he was teaching workshops under the Milky Way, Suess was a teenager in a Connecticut basement pointing a camera at a sky he couldn’t see clearly.
“I had a black and white darkroom when I was 12 years old, taking photos of trees and landscapes close to my backyard. Back then in Connecticut, the sky was light-polluted, and I never saw the Milky Way. But sometime around my 16th birthday, I tried to aim my camera at the night sky to see what I could get. And in the prints, I was seeing colors in the stars I couldn’t see with my own eyes. Oranges and blues. Before then, I had thought all the stars were white. I instantly became addicted. I even went to school for mechanical engineering thinking I was going to design rockets for NASA. That didn’t happen, but I never lost my fascination with the night sky.”
 OM-5 Mark II • M.Zuiko Digital ED 12mm F2.0 • 12mm (24mm equivalent) • 60sec • f/3.5 • ISO 1600. Live Composite.
That sense of wonder still pulls him outside when he could just as easily stay warm inside.
“One of my favorite things to do is set up two cameras, have one doing a star trail with Live Composite and the other doing a time lapse, and then just sit down in my chair and look up. Watch the shooting stars. Imagine what’s out there. It makes you realize we’re just such a small part of this whole universe.”
What concerns him now is whether future generations will have the same access.
“More satellites, more light pollution, wildfires affecting the atmosphere,” he cautions. “It’s scary to think what it’ll be like in 10 or 15 years. We’re in a really good era right now where anyone can go out and enjoy this. But that window’s not going to stay open forever.”
 OM-5 Mark II • M.Zuiko Digital 17mm F1.8 II • 17mm (34mm equivalent) • 13sec • f/1.8 • ISO 5000
Suess was recently diagnosed with HPV-positive squamous cell oropharyngeal cancer. During his successful cancer treatment this past winter, OM sent him one of the first OM-3 ASTRO cameras. Despite the fatigue he was feeling, he pushed himself to make it outside on the rare clear nights.
“When you can’t go out and shoot, you start to realize how much of what you love about this has nothing to do with photos,” he reflects. “It’s being out there in the quiet, cold air looking up at thousands of stars. Even if it’s millions of light-years away, I can still visit that with my camera. I missed the act of exploring the Milky Way, Andromeda Galaxy, and the Orion Nebula more than I missed the actual photos that I would take. It’s been months that I haven’t really been able to spend quality time behind the camera. I think it will be interesting, looking up at that night sky again and probably seeing it a little bit differently than I used to.”
More from Matt Suess can be found on his website, Facebook, YouTube, and Instagram.
Image Credits: Matt Suess
Full disclosure: This article was brought to you by OM SYSTEM.