
GSMArena Team,
03 November 2025.
1. Introduction, specs, unboxing2. Design, build quality, handling3. Lab tests – display, battery life, charging speed, speakers4. Software, performance5. Camera, photo and video quality6. vivo Professional Photography Kit7. Competition, verdict, pros and consvivo X300 Pro specificationUser opinions and reviewsReview comments (67)
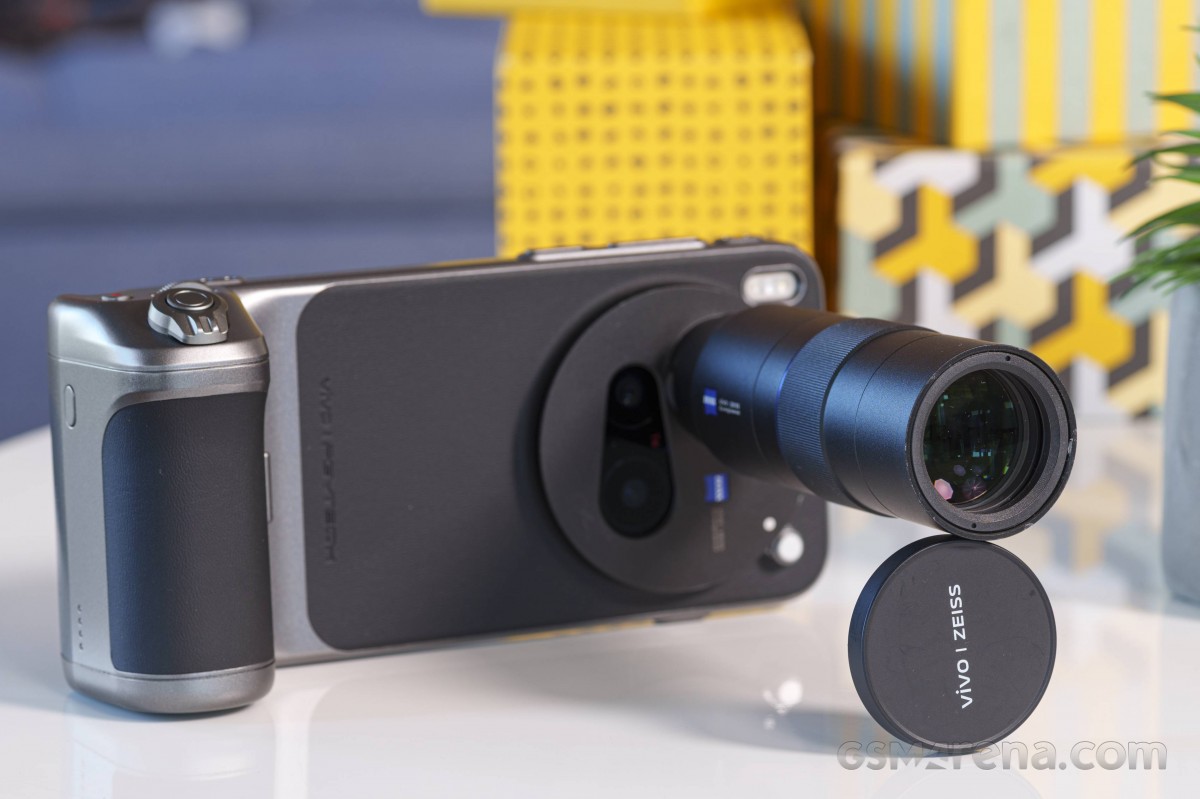
vivo Professional Photography Kit
vivo is no stranger to add-on lenses and we’re already familiar with the telephoto extender kit that was launched alongside the X200 Ultra. Largely the same package is now available for the X300 Pro with a model-specific case for it and some fine tuning.
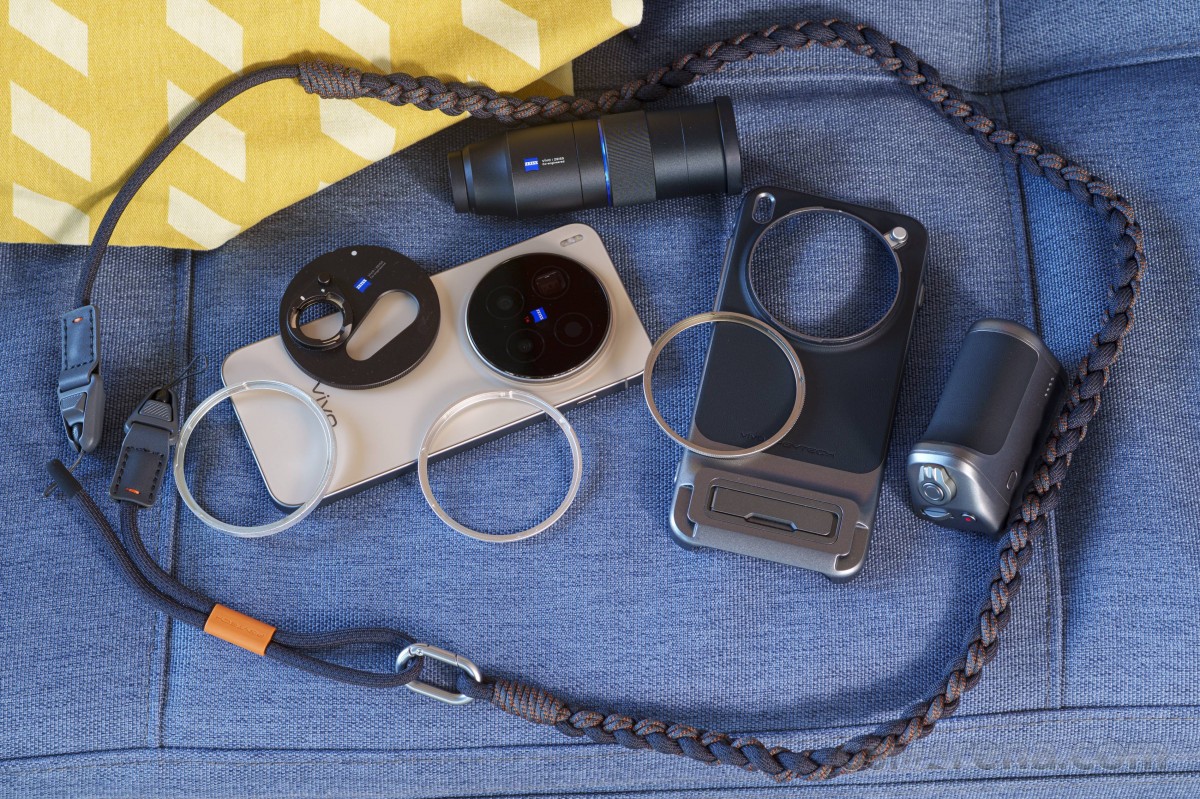
Technically, there are two separate products. The Professional Imaging Grip Kit is the first one and it includes a case, a battery grip, a couple of camera rings and a neck strap, but stops short of adding a lens.
Then there’s the Telephoto Extender Kit which features the telephoto lens itself with its own attachment plate to mount to the case. All of these together make up the full Professional Photography Kit. Or we could be messing up the naming, but that’s more or less the gist of it, and the point is that you could have the first without second, but if you want the second one, you need to also have the first one. That said, in Europe you’ll probably only be able to get the all the bits together.
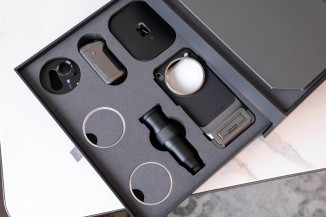
Unboxing the X300 Pro Photographer Kit
While the detachable lens is by all accounts identical, the case isn’t. This one has been made with a slightly improved design of the case itself and tighter tolerances around the area you attach the extra lens, which gives it a bit more stability. They allegedly have a kit for the regular vivo X300, but we haven’t seen it ourselves.
We got a sort of a complete package, with all the bits in one box, but that’s not necessarily what the retail experience would be.
The case is a sturdy and well-made piece and it snaps on positively to the back of the phone (it can be a bit too fiddly to remove, which is probably a good thing, after all). It has a faux leather backing, a kick-up stand for propping up the phone, and two eyelets for attaching the included strap.
The case comes with two different rings, one is just to cover the bayonet mount if you’re not going to be attaching anything of significance, while the other is a 62mm filter adapter ring, so you can attach standard filters. Try and do that on the Oppo Find X9 Pro’s telephoto contraption.
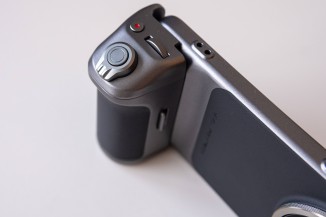
The case has two slide-in attachment points for the battery grip, which latches on in a third spot, inside the kickstand. The grip connects to the phone via the USB-C port, which is not only used for communication but also for charging the phone. The grip has a 2300mAh battery of its own – up from 1,500mAh on the X200 Ultra.
Controls-wise, you get a two-stage shutter button, a zoom lever around it, a control dial, and a video record button.
Once you enable the grip in the camera settings, you get a few extra options that you can control. Pressing the shutter button can take a single shot or a burst series, for example. You can have the shutter button’s half-press action lock the focus and exposure, or it can run in continuous auto focus mode (AF-C).
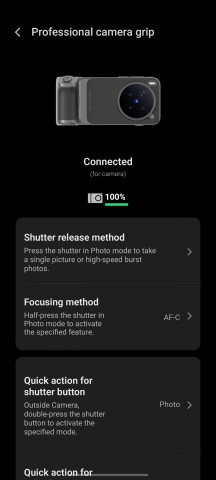
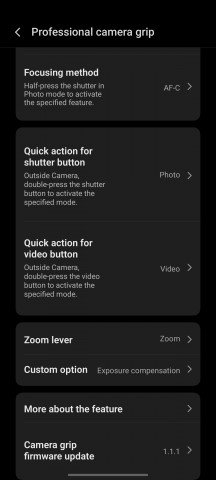
Camera grip options
The zoom rocker around the shutter button moves smoothly between the entire focal range instead of merely jumping between the vivo X300 Pro’s optical focal lengths.
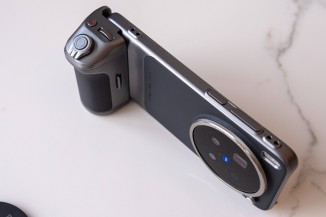
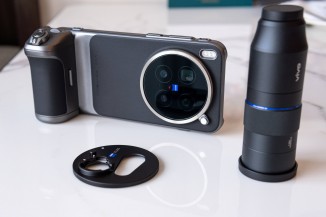
The grip
To mount the extra lens, you need to attach its own special adapter plate first to the case’s bayonet mount. While it’s anything but pretty, the adapter can be left on all the time as it doesn’t interfere with the regular operation of any of the cameras. That’s another one of the ways in which the vivo solution is better than what the Oppo Find X9 Pro’s counterpart offers.
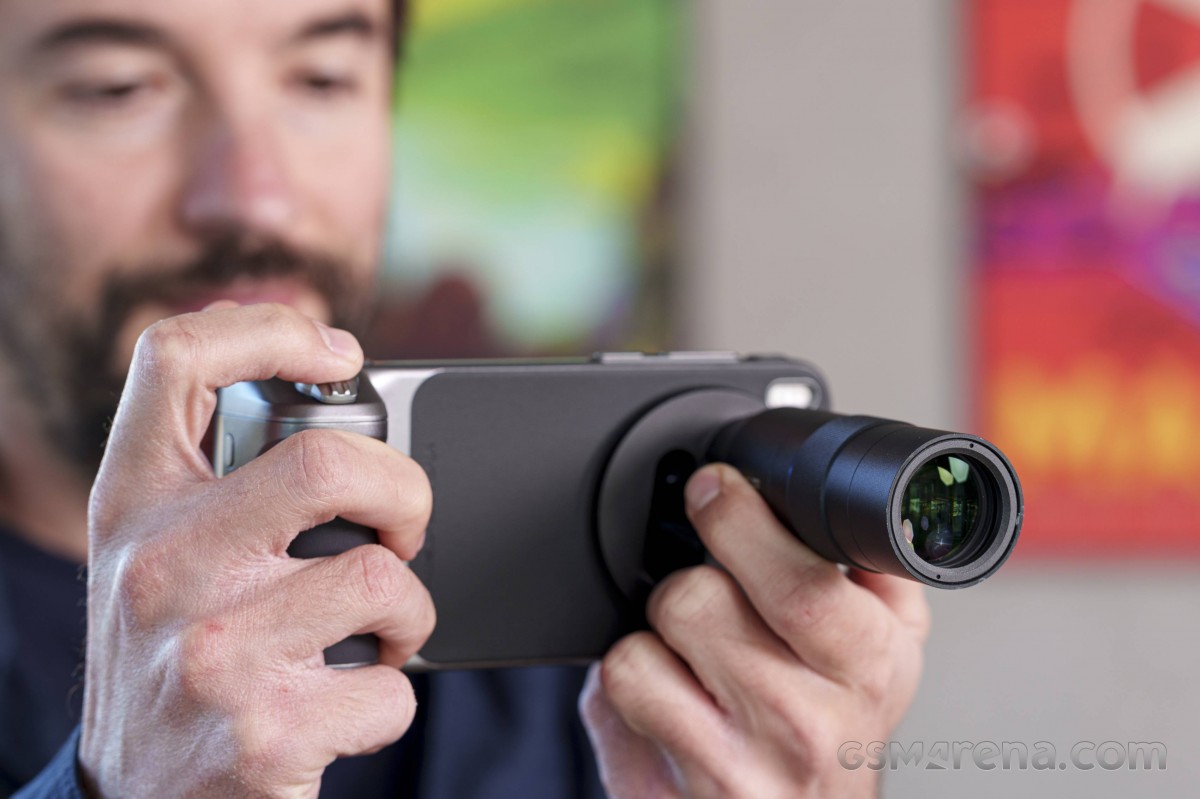
Once you have the telephoto extender bayoneted on, you have to activate it from a shortcut in the camera viewfinder, which is different from the X200 Ultra, where you had to enter a separate camera mode. This way, you can use the various camera modes on the vivo X300 Pro – Portrait Mode, Night Mode, all the video modes, etc, where you couldn’t on the vivo X200 Ultra. That’s another win for vivo over Oppo, too.

Samples
We shot a bunch of samples with the extender on location in China, and you’ve probably already seen those earlier. Once we got the X300 Pro to headquarters, we also did some shooting in more familiar settings. Here are a handful of photos taken at the extender’s native 200mm equivalent focal length – we reckon you’ll agree they’re super nice.


Daylight samples, telephoto extender, 200mm
Things do get a little bit softer at 400mm, but if you manage your expectations and you get the right subject matter, you can still enjoy those.


Daylight samples, telephoto extender, 400mm
Zooming in further to 800mm things get questionable as the AI isn’t great at reimagining car license plates for example, though distant brick walls are still quite alright. !600mm is too much.


Daylight samples, telephoto extender, 800mm


Daylight samples, telephoto extender, 1600mm
Comparing the extender’s results against the phone-only output reveals, unsurprisingly, that optical zoom beats digital zoom (no matter how much AI you slap on top of it).


Daylight comparison: Telephoto extender (200mm) • Phone only (7x, 170mm) • Phone only (10x, 242mm)
In the dark, the extender does an excellent job at its native focal length. Things look acceptable at 400mm but going beyond that isn’t really advisable.


Low-light samples, telephoto extender, 200mm


Low-light samples, telephoto extender, 400mm


Low-light samples, telephoto extender, 800mm


Low-light samples, telephoto extender, 1600mm
Here’s a quick comparison between the extender’s 200mm output and the phone’s results without the add-on lens.


Low-light comparison: Telephoto extender (200mm) • Phone only (7x, 170mm) • Phone only (10x, 242mm)