
Capturing the best pictures using just your iPhone does not have to be something you need to stress over when you know where to look. Your camera is extremely customizable, and many hidden (and overlooked) features play a big part in how you use it.
Regardless of your iPhone model, some essential settings can change how your final shot looks. Finding the best camera settings for your taste can take some time, but in the meantime, use these features and tweaks to upgrade the look of your photos.
1
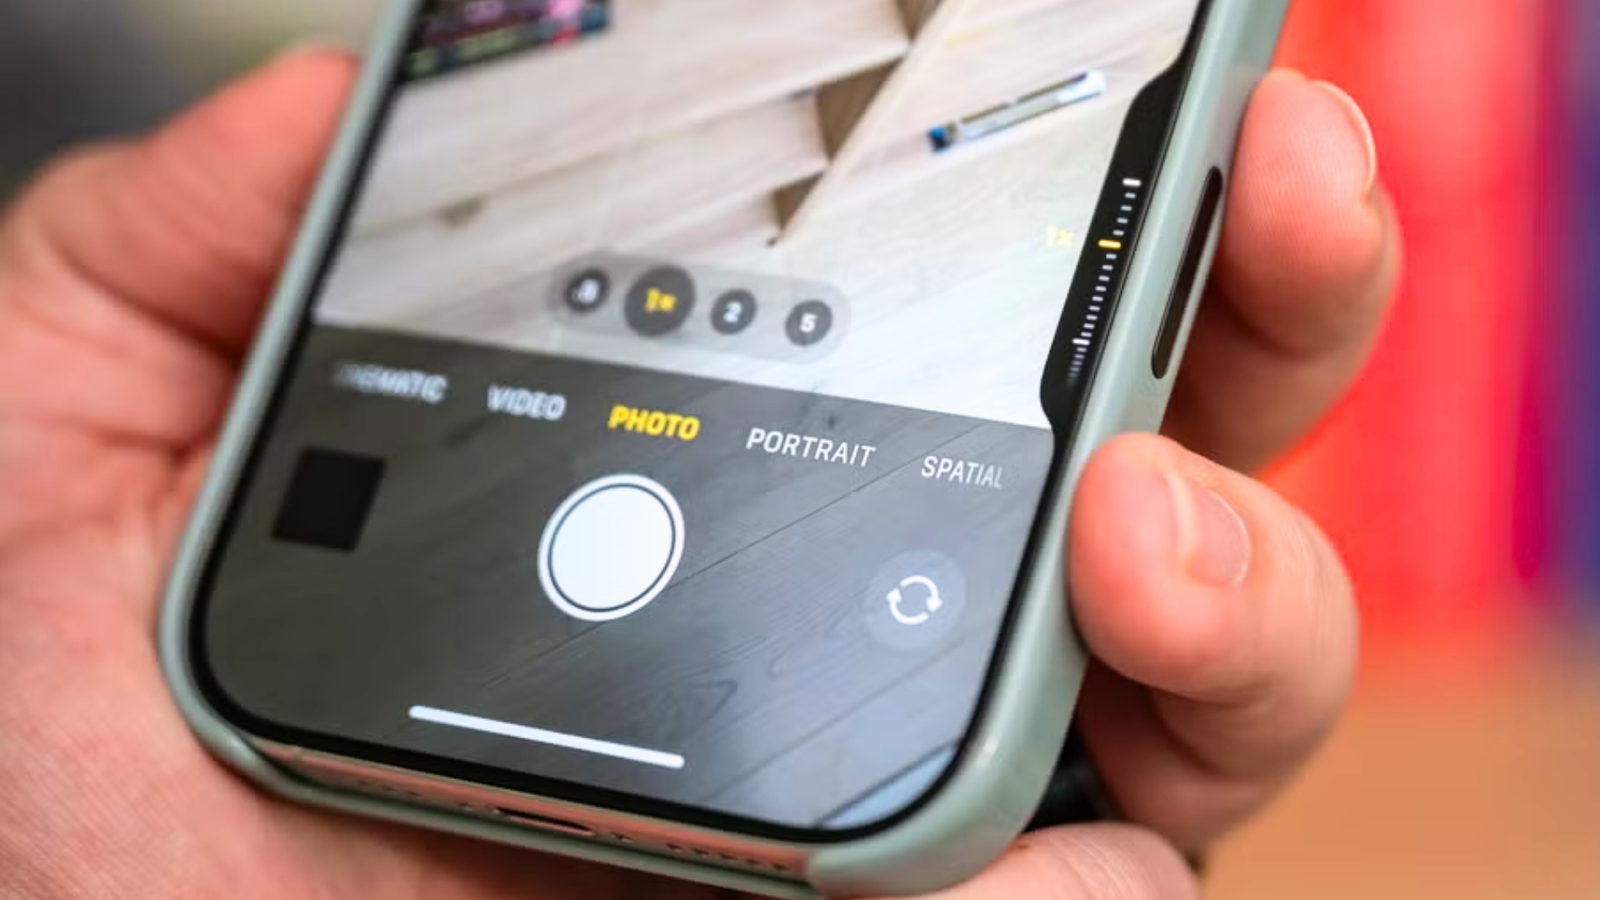
Personalize your photo composition
The most important thing to do when you take a photo on your iPhone is to figure out how to set up your ideal shot.
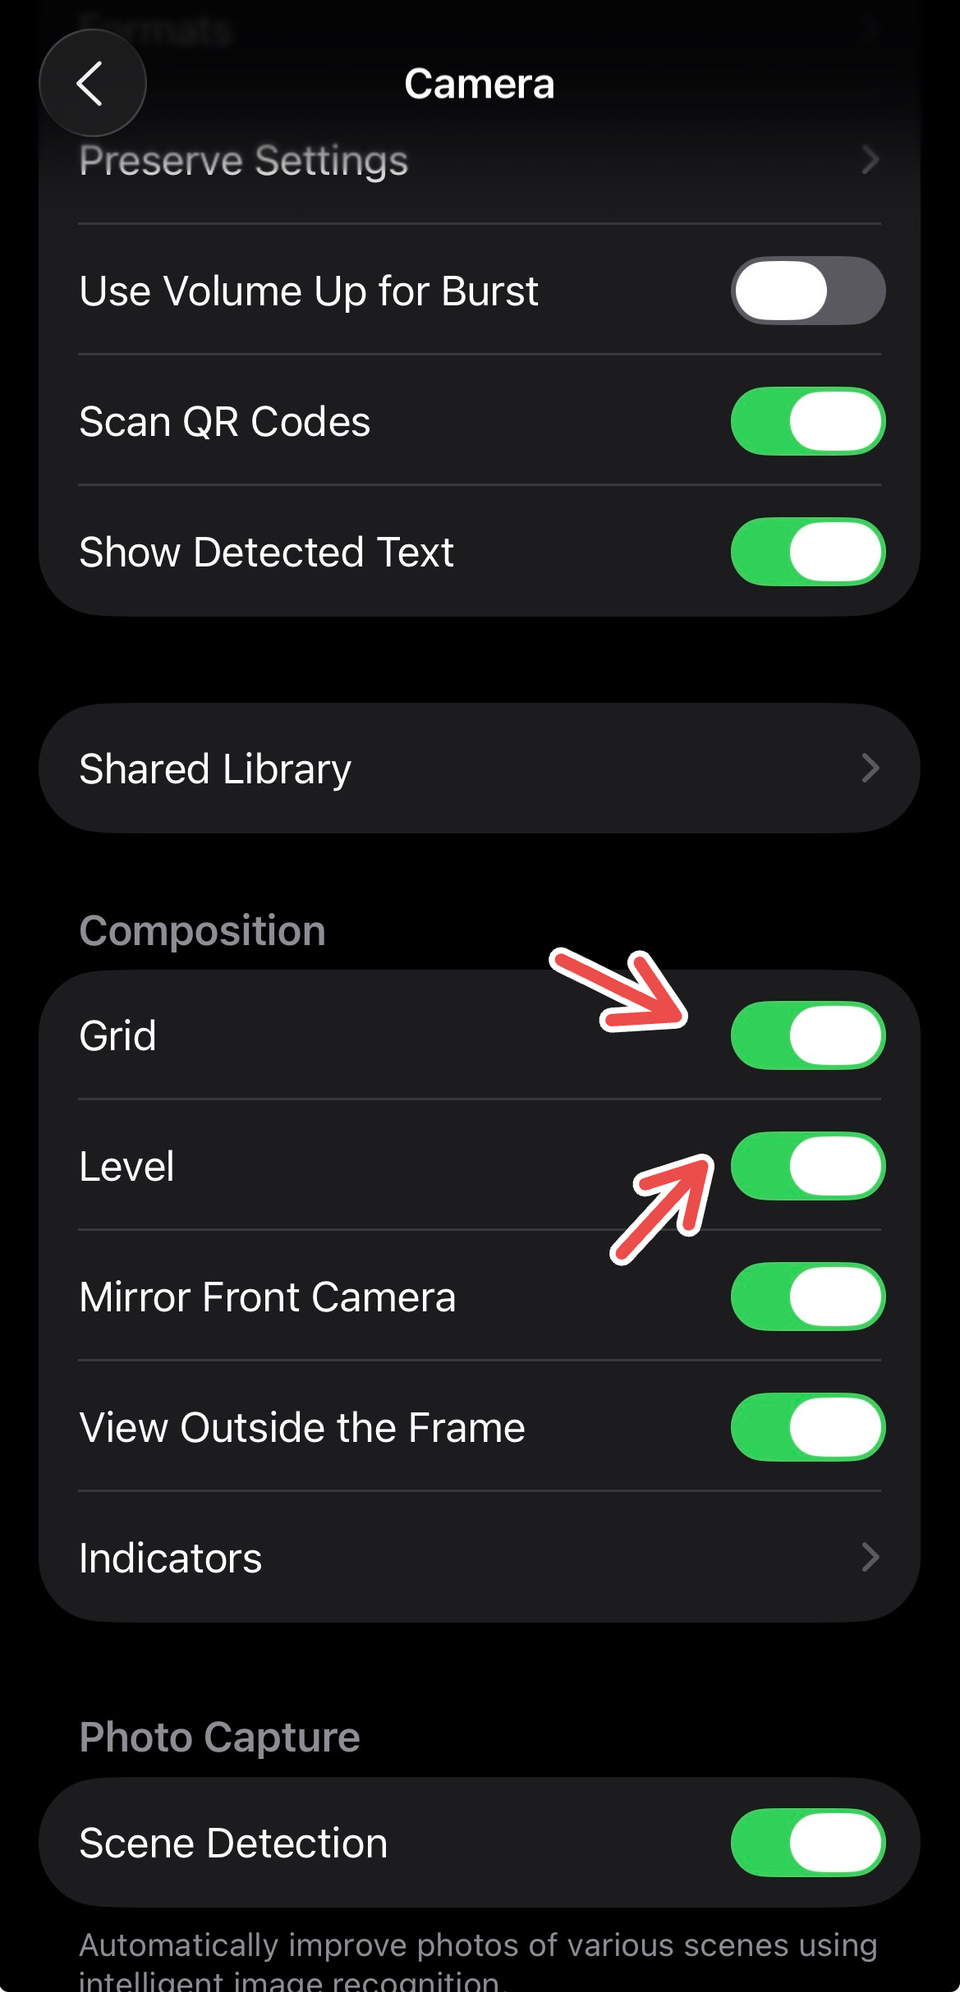
To get the most out of your shot, an important feature that you may neglect is the grid and level. These composition tools help you straighten your shot and, if you’re a stickler for an ideal composition, stick to the rule of thirds. The level feature has helped me correct skewed shots multiple times, especially if I’m not shooting from a comfortable position.
If you cannot see the grid or level lines in your Camera app, go to Settings > Camera and toggle on “Grid” and “Level.”
2
Customize Camera Control settings
For eligible iPhone models, users can take advantage of the Camera Control button (located in the lower right corner of the phone) to quickly access the camera and snap pictures. The button can be clicked once to open the camera app and another time to take a picture, or held for longer to take a video. If you’ve only used Camera Control to take pictures or videos, you can improve the experience by adjusting Camera Control settings.
Once you open Camera, press the Camera Control twice lightly to open an overlay that shows the available settings for that camera mode. Then, slide your finger on the Camera Control to scroll through the settings choices, and lightly press to select the setting you want. You can again slide on Camera Control to adjust the setting.
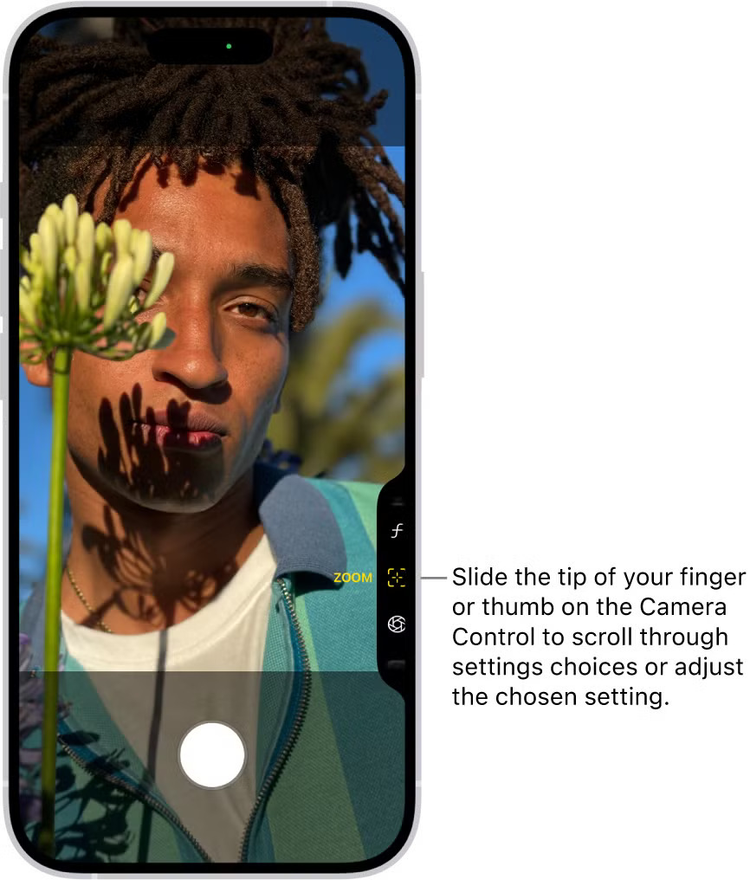
Credit: Apple
To make using Camera Control more personalized, you can change which camera settings are displayed (and in what order) in the settings overlay. For this, go to Settings > Camera > Camera Control > Customize.
You can use Camera Control if your iPhone model is iPhone 16 or later.
3
Preserve your camera settings
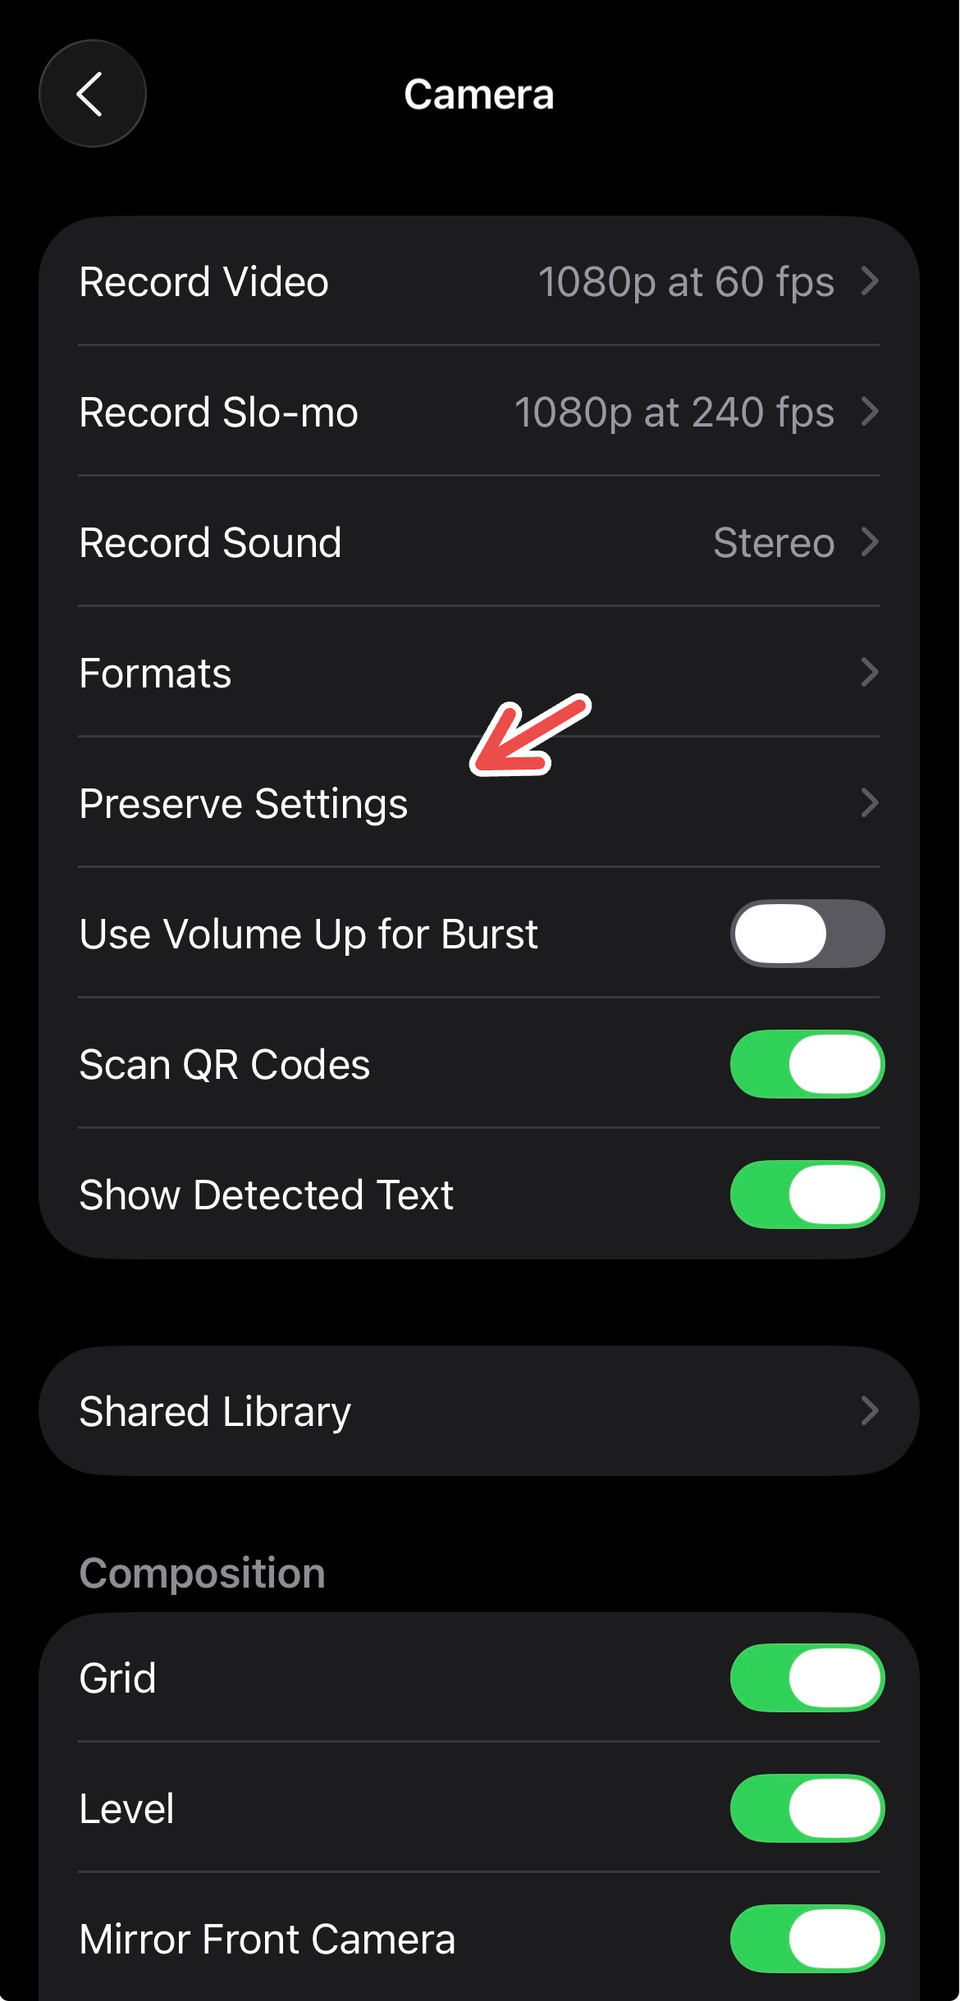
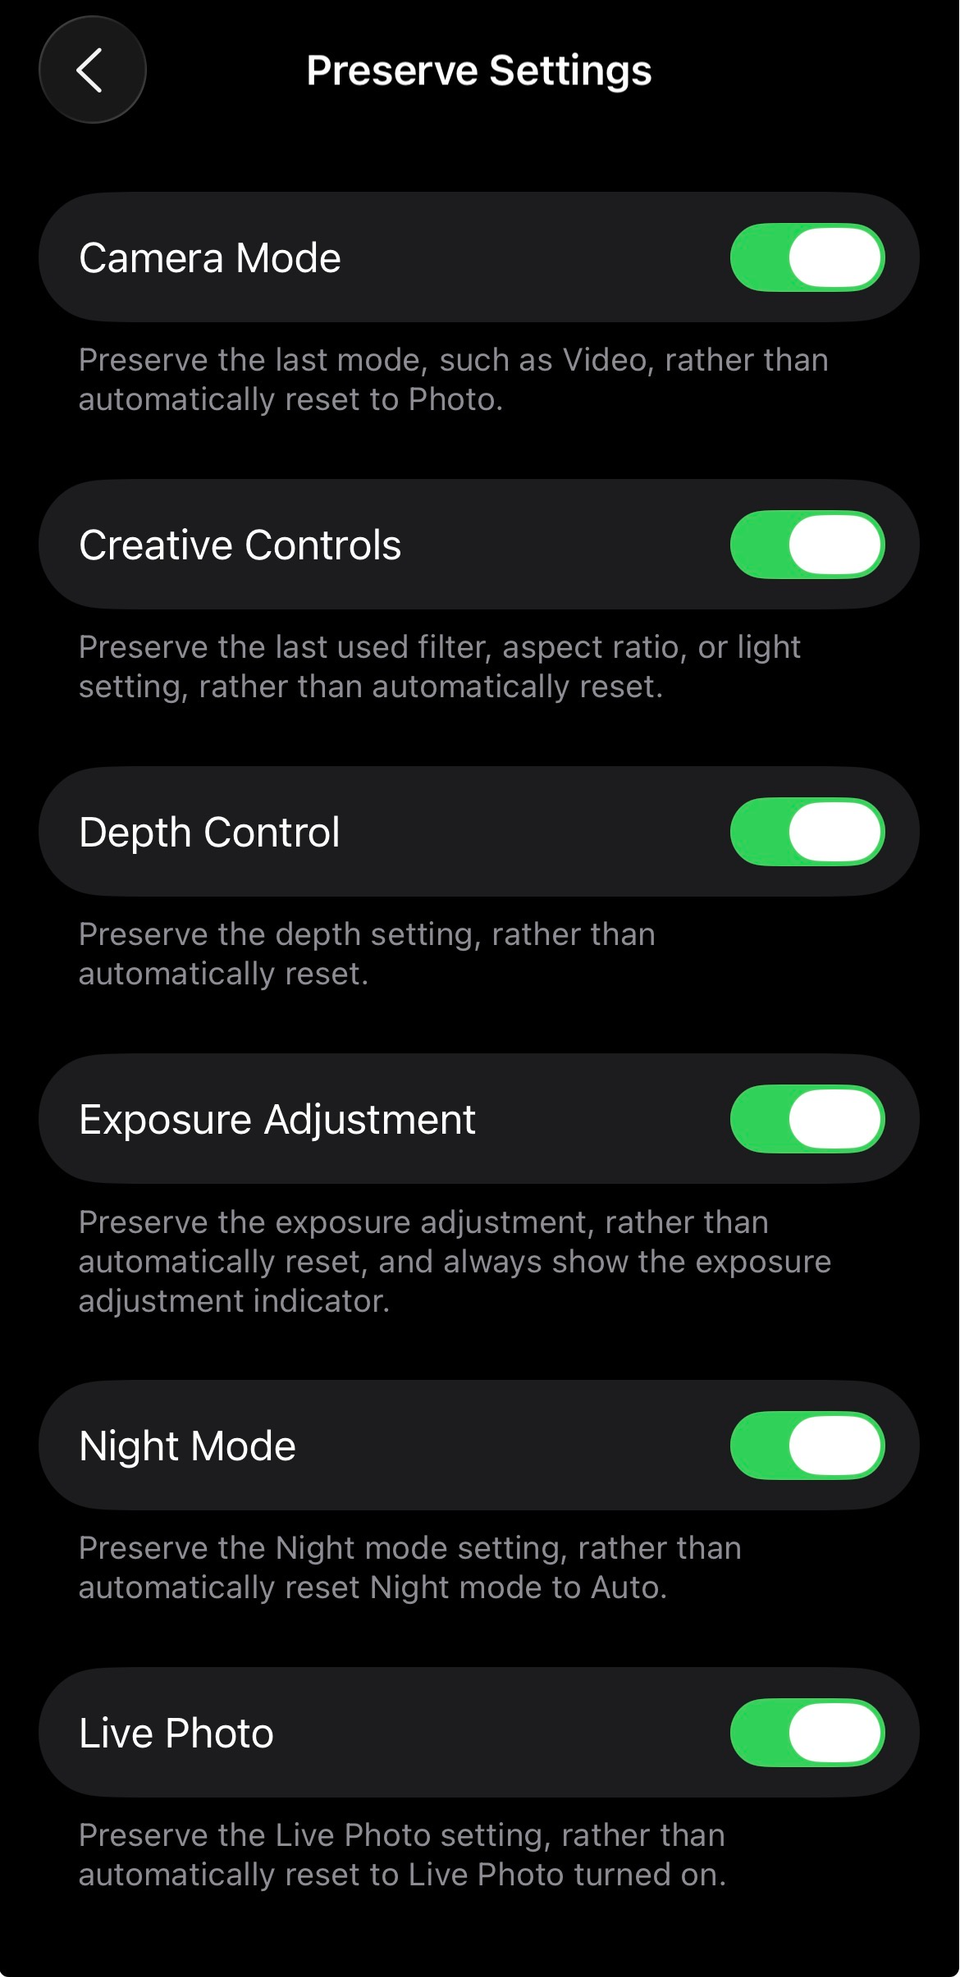
A good way to keep your photos and videos consistently turning out the way you prefer is to preserve camera settings. This saves your camera mode, filter, lighting, and other settings you last used, so they’re not reset when you reopen the Camera app.
Go to Settings > Camera > Preserve Settings. From here, you can toggle on (to preserve) or off several settings, such as:
Creative Controls (preserve the last used light setting)
Photographic Style (preserve the last used Photographic Style), available for supported iPhone models
Depth Control (preserve the last depth control setting you used in Photo, Portrait, and Cinematic modes)
Macro Control (preserve the Auto Macro setting instead of automatically using the Ultra Wide camera to capture macro photos and videos), available for supported iPhone models
Action Mode (keep the Action Mode setting turned on rather than reset to off), available on supported models
ProRAW & Resolution Control (save the Apple ProRAW setting) for supported Pro models
Apple ProRes (preserve the Apple ProRes setting), available on supported models.
4
Make good use of Photographic Styles (or filters)
An underrated iPhone camera feature to use regularly is Photographic Styles (for iPhone 13 and later) and filters (for iPhone 12 and earlier).
Photographic Styles help create a customized look for your shot by adjusting specific colors. You can pick the best contrast, tone, and vibrance for the shot and automatically apply it to the photos you take, so you don’t have to make any adjustments from the Photos app.
To apply a Photographic Style to your photo, open the Camera app and swipe up from the camera modes at the bottom of your screen. Tap on “Styles” and scroll through the options available. After you select the style you like, customize it using the scroll bars (to adjust intensity, tone, and warmth) or the box (to adjust the tone and color simultaneously). To finish, tap the “X” (close) to shut the menu.
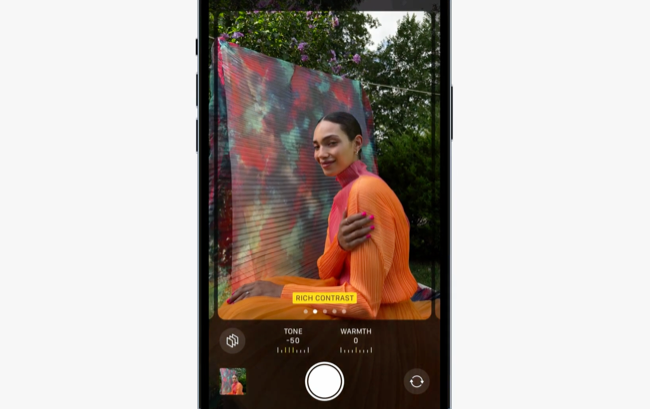
Credit: Apple
And if you have an iPhone 16 or later, you can also use advanced Photographic Styles that aren’t available on earlier models.
iPhone filters, which are available in the Camera and Photos apps, add a color effect to your shots. Although not as customizable and advanced as Photographic Styles, filters are still helpful if you’re trying to switch up the tone and contrast of your photos.
To use filters in the Camera app, open Photo or Portrait mode. Then, swipe up from the camera modes (or tap the camera options icon in the upper right corner) and tap “Filter.” Swipe sideways to see filter options and choose one. Take the photo, then tap the “X” (close) to shut the filters’ menu. You can always remove a filter on a captured picture from the Photos app.
5
Choose the best format options
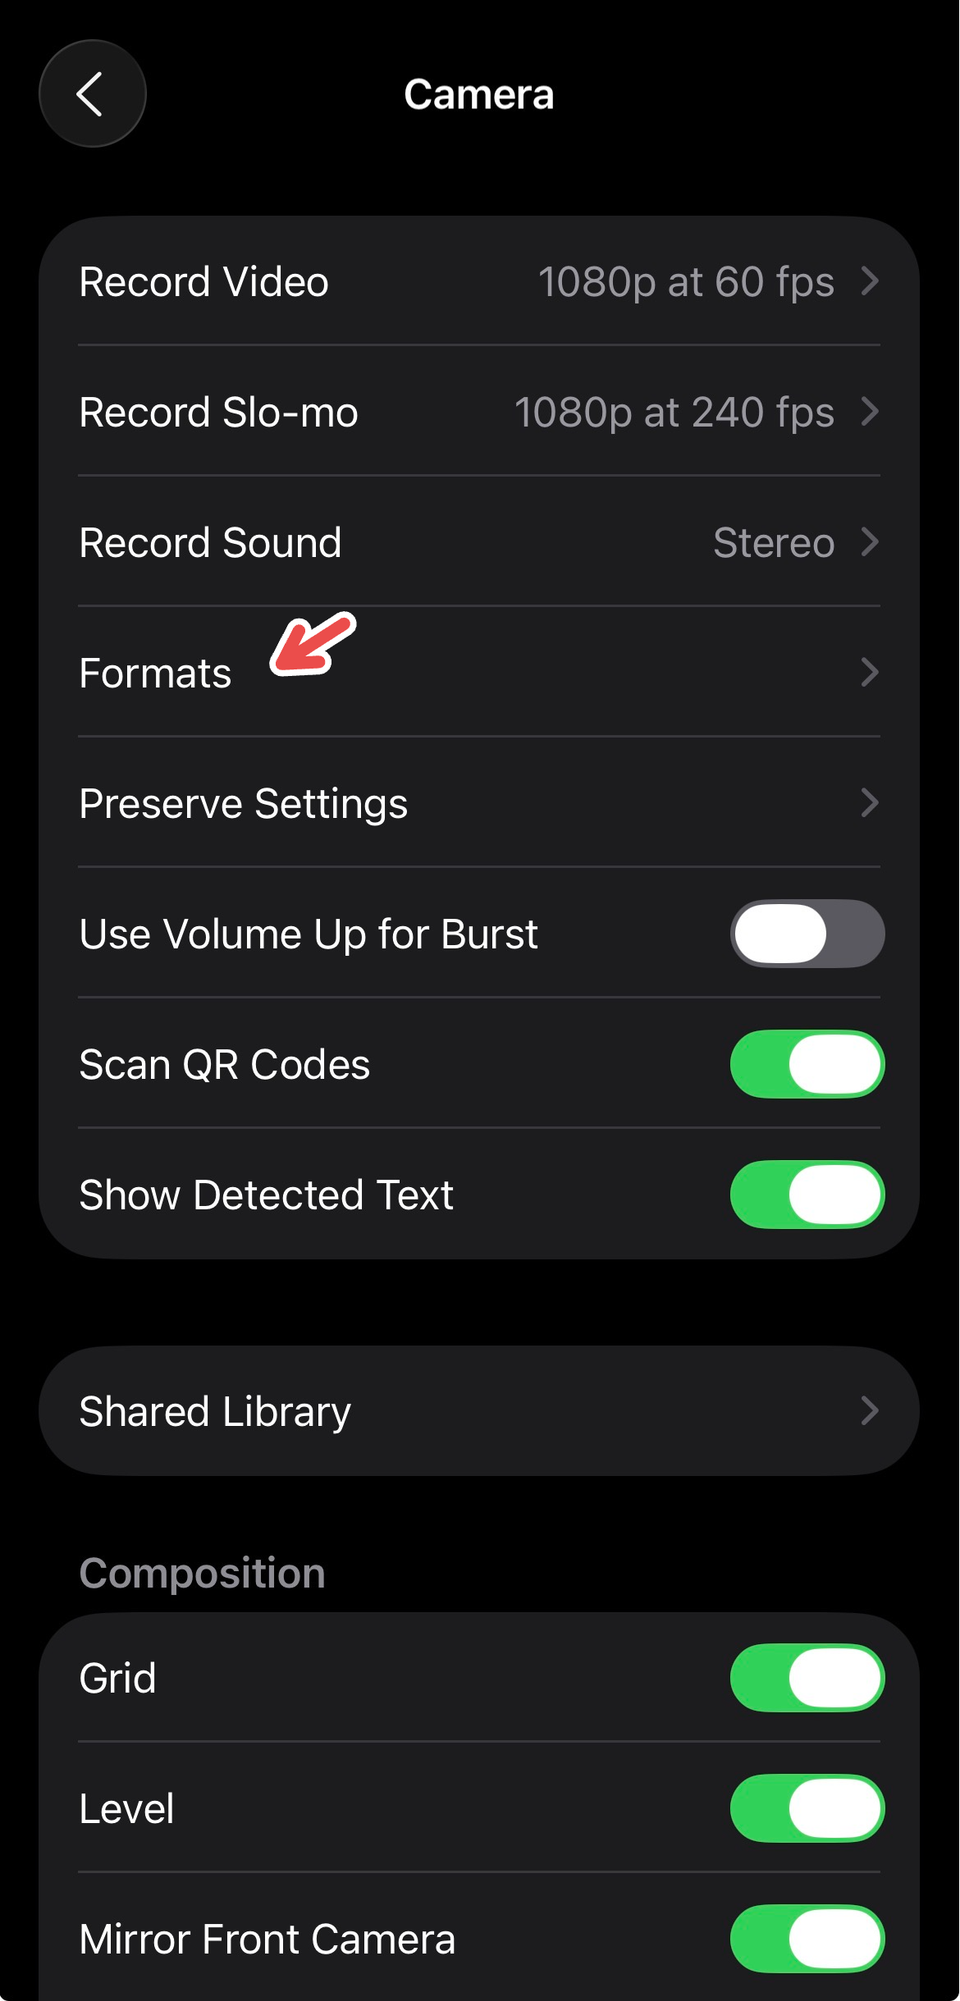
Before you begin shooting better photos, there are some simple format tweaks you can make in your camera settings that will ensure that your shots and videos are captured with higher detail.
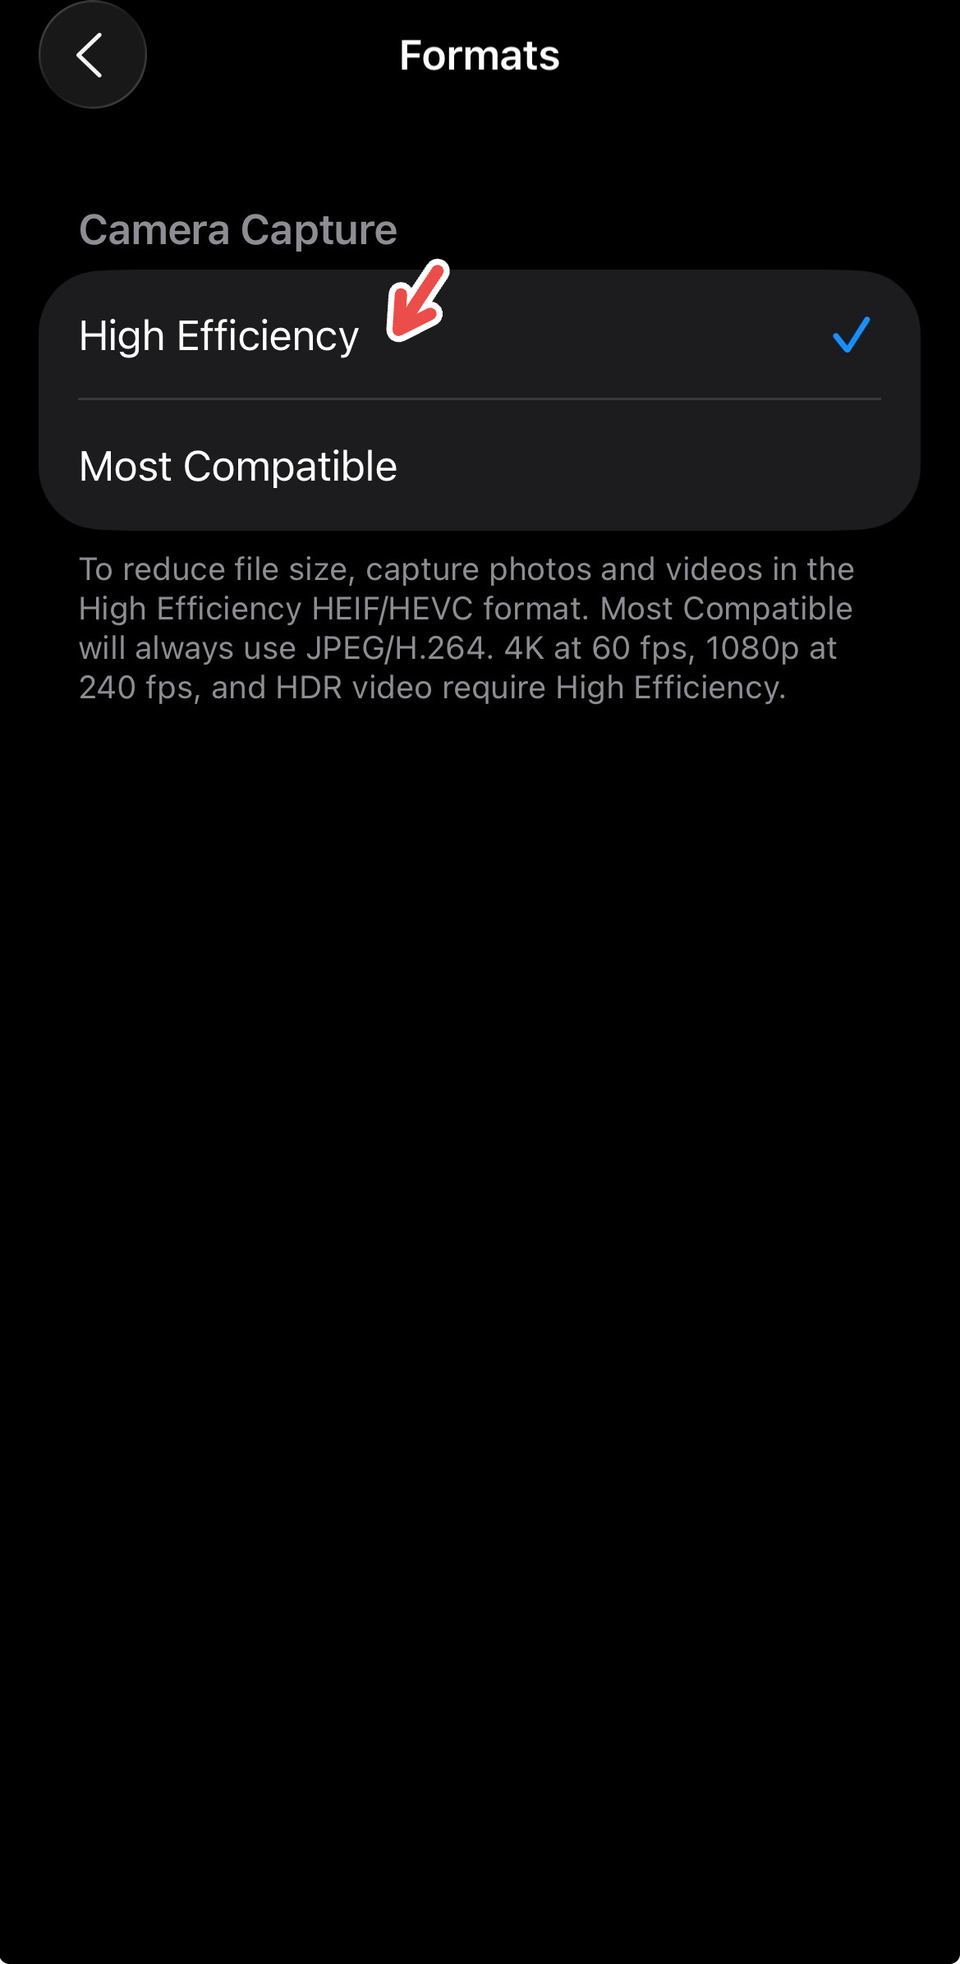
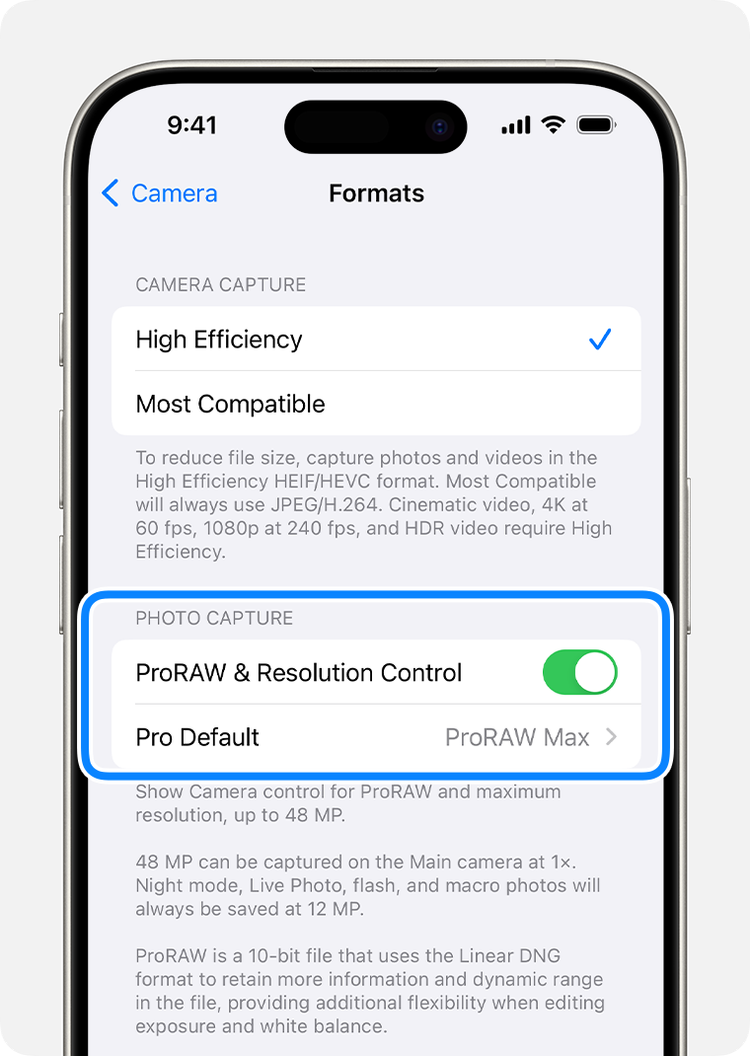
To adjust the format for Camera, go to Settings > Camera > Formats. Tap “High Efficiency” under “Camera Capture.” High Efficiency reduces your file size while also shooting HDR videos and 4K at 60 fps.
Further, on iPhone 14 Pro and later Pro models, you can capture Apple ProRAW images at two resolutions (12 MP and 48 MP, with 48 MP retaining better details in image files). To switch the resolution, go to Settings > Camera > Formats > Photo Capture and turn on Apple ProRAW to reveal the resolution options.
Credit: Apple
6
Adjust the aspect ratio
Another camera composition feature to keep an eye on when you’re taking a picture is to find the correct aspect ratio for your shot.
A photo of a person standing, for instance, looks more complete with a 16:9 ratio, while pictures that you want to post for a clean and compact feed on Instagram would call for a square 1:1 ratio. The Camera app offers three aspect ratios (1:1, 4:3, and 16:9) that you can pick from.
To adjust the aspect ratio of your shot, open the Camera app and swipe up from the bottom of your screen or tap the camera options button from the upper right corner. Then, tap “Aspect” to choose your ideal ratio. Click the screen outside to exit the menu and frame your shot.

7
Adjust and lock exposure
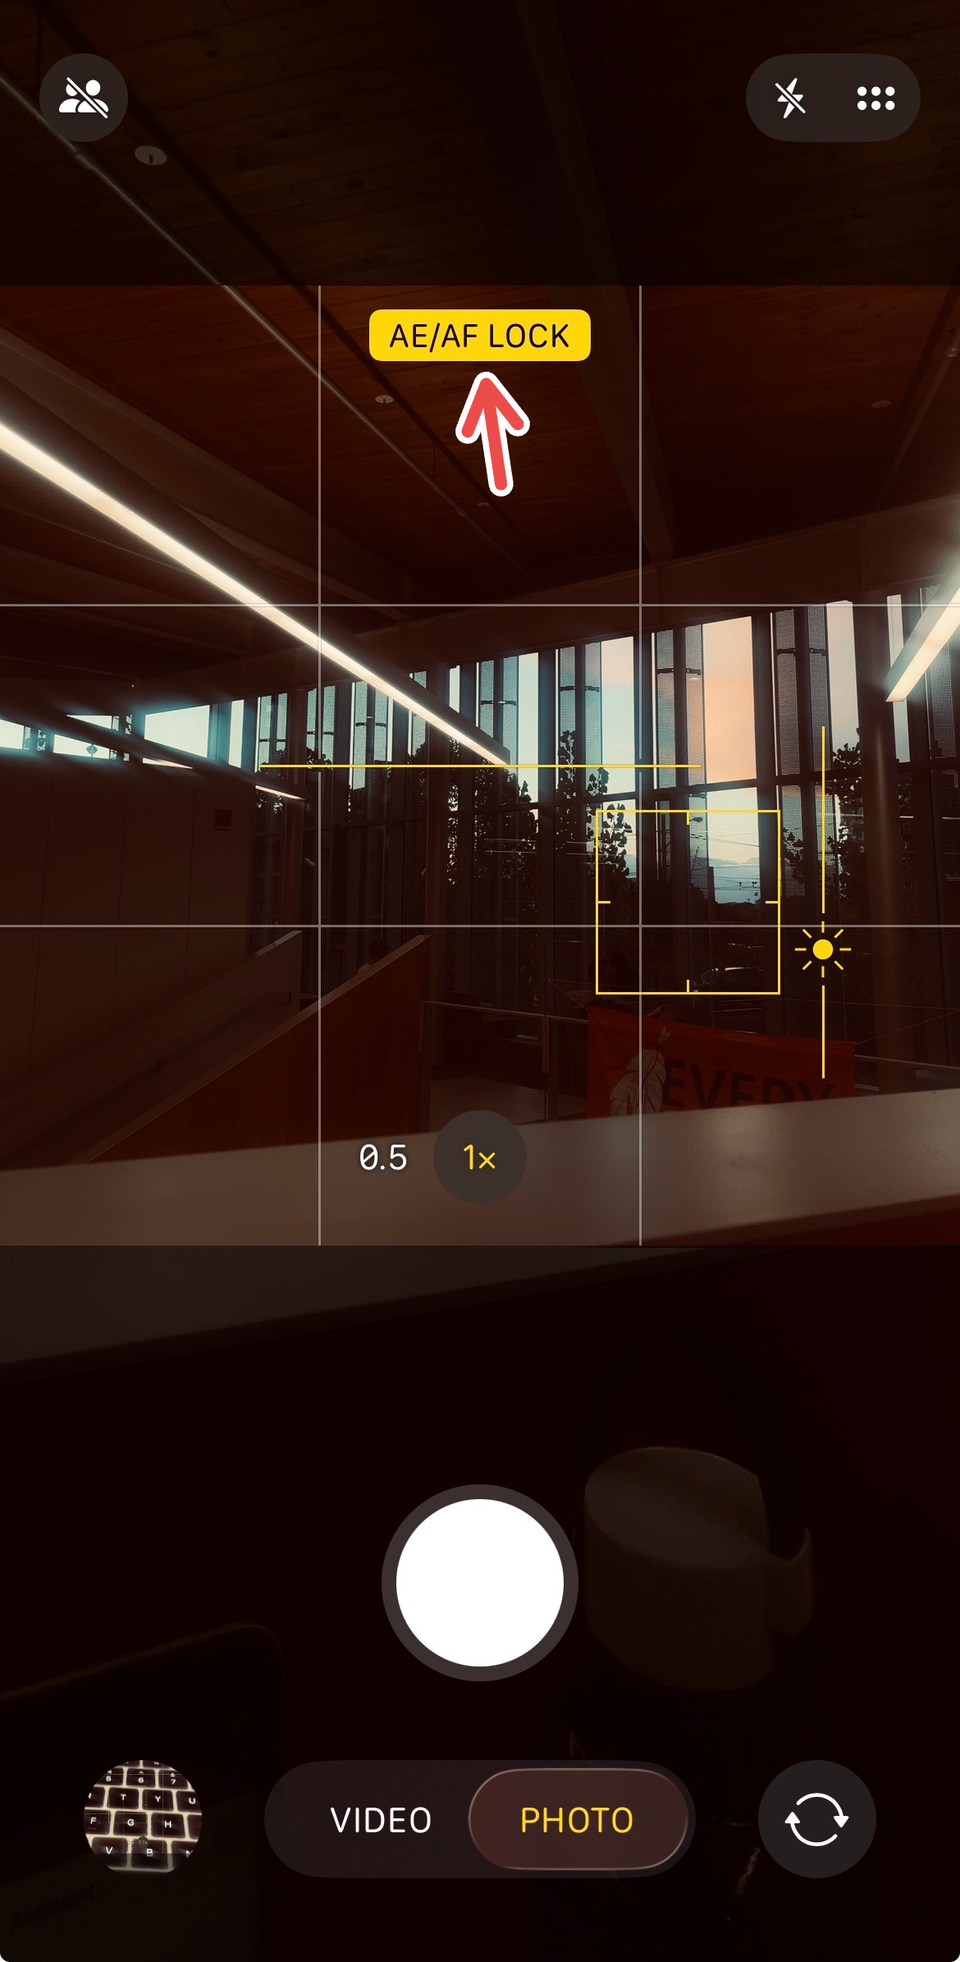
A simple setting that can transform the look of your shots is available inside your Camera app. Once you find the right exposure for a frame, you can lock it so it stays stagnant for multiple pictures without auto-adjusting to the external light.
To adjust your camera’s exposure, simply tap a subject on your camera’s frame. Drag the sun icon up or down the scroll bar to increase or reduce the exposure. To lock your manual focus and exposure settings for upcoming shots, touch and hold the focus area until you see AE/AF Lock. You can tap the screen to unlock settings.
If you want to finetune your captured photos, you can still use the Photos app’s editor to touch up details that you may have overlooked when setting up your shot. There are also many free iPhone photo editing apps that you can use for advanced edits.