
Blending modes in Photoshop decide how layers interact, shaping composites, color work, and detail control across your images. Understanding them lets you replace messy selections with clean, flexible control over light, shadow, and color in complex edits.
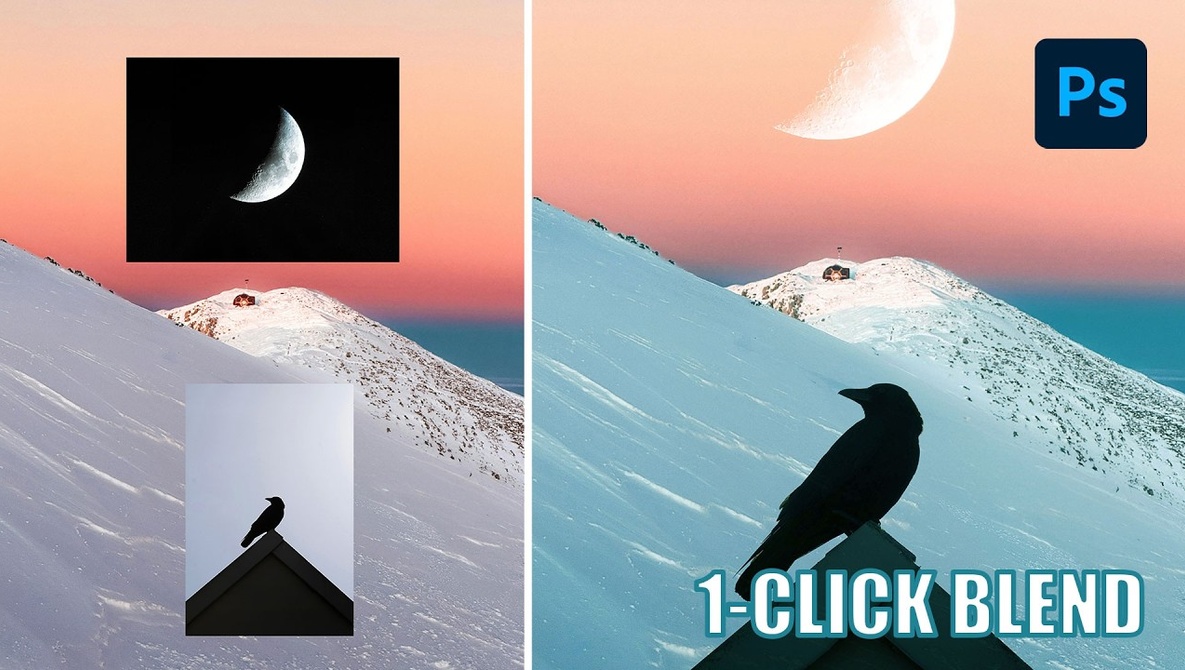
Coming to you from Aaron Nace with Phlearn, this practical video walks through blending modes in a clear structure so you can stop randomly clicking through the menu and start making specific choices. You see how each main group behaves, from Normal to Darken and Lighten, and why some options like Multiply or Screen solve everyday problems fast. Simple examples like dropping a moon into a sky without masking show how choosing Screen instantly removes black while keeping bright detail. The lesson stresses that you do not need to memorize all 27 modes to get real results. You focus on a small set that consistently works while keeping the rest available when you want to push further.
Next, the tutorial pushes you to test blend modes instead of guessing, using quick shortcuts that keep your hands on the keyboard while you refine the look. Cycling through modes with the Move tool active and Shift plus or minus lets you land on the right effect in seconds. A crow composite demonstrates how Multiply reveals dark subjects and hides lighter skies, and why slightly gray backgrounds still show through. You watch Levels used to brighten those near whites so Multiply fully drops them out, which is a far cleaner method than hacking away with erasers. The approach builds your instincts so you recognize when tone, not tools, is the issue and start planning shots with that control in mind.
The demonstration also shows how blending modes shape color and mood without complicated setups. A Solid Color fill on top of the stack, combined with Soft Light or Overlay, tints the entire composite while preserving texture and contrast. Small adjustments to hue, saturation, or luminosity shift the atmosphere from cool night to warm dusk without repainting anything by hand. You see how different mode groups are suited to different goals, like using Overlay for subtle punch and leaving Difference and its neighbors for more experimental looks.
Use this as a guided sandbox. Follow the same steps with your own images: stack a sky, a subject, a texture, and a color layer, then rely on Screen, Multiply, Overlay, and Soft Light as your core tools while riding the shortcuts to explore alternatives. Notice how exposure decisions during capture affect which blend modes work cleanly, such as shooting dark silhouettes on light backgrounds when planning to use Multiply. Pay attention to how small tonal tweaks in Levels or Curves make backgrounds vanish or colors snap into place, instead of assuming you need complex selections. Keep an eye on the categories of blend modes, so the menu turns into a labeled toolbox instead of a guessing game. The full tutorial moves further into creative stacks and subtle color tricks that reward pausing, rewinding, and testing alongside your own files. Check out the video above for the full rundown from Nace.