

I’ve been on the lookout for a notes app that I can use without having to rely on a third party or cloud service to keep my notes in sync with different devices. I want to be able to work with my notes at my desk or anywhere else in my house via a laptop.
There are plenty of options for this, but I wanted to use Linux as my server, and I found Trilium fit the bill to perfection. The only caveat to Trilum is that there is no official mobile app. There is a Trilium app you can sideload from outside the Google Play Store, but I don’t recommend sideloading apps on Android because you never know what you’re going to get.
My setup used Ubuntu 24.04 as the server and desktop apps on Linux (Pop!_OS) and macOS. Once I had everything up and running, it clearly became my notes setup of choice. No, I can’t access it outside of my LAN (mostly because my ISP doesn’t allow it), but if I’m on my home network, I can access it from anywhere.
Why Choose Trilium for Self-Hosted Notes?
Outside of it checking all of my OS boxes, Trilium has all the features I need, including:
Tree-like structure for storing notes
WYSIWYG editor, which includes tables, images, math, and markdown autoformat
Syntax highlighting
Note versioning
Querying and advanced scripting
OpenID and TOTP support
Self-hosted server
Sharing to the public
Strong encryption for all notes
Relation maps
Sketching diagrams
Mind maps
Geo maps with location pins and GPX tracks
Automation via REST API
Touch-optimized
Dark and light themes
Evernote and Markdown import/export
Customizable UI
Metrics
As you can see, Trillium includes all the features you need in a note-taking app, and it’s this feature list that sold me on setting it up.
Speaking of which, let’s do just that.
What You’ll Need for Installation
To deploy Trilium as a server, you’ll need an OS that supports Docker and Docker Compose. As for the desktop, you can install that app on Linux, macOS or Windows. Make sure to download the correct installer from the Trilium releases page.
As for Docker/Docker Compose installation, how you do that will depend on the OS you use. For my purpose, I can cheat and install both Docker and Docker Desktop from the standard Ubuntu repositories with the command:
sudo apt-get install docker.io docker-compose -y
sudo apt-get install docker.io docker-compose -y
Once that’s complete, add your user to the Docker group with:
sudo usermod -aG docker $USER
sudo usermod -aG docker $USER
Log out and log back in so the changes take effect.
Let’s deploy our server.
Deploying the Trilium Server Container With Docker
You can deploy the server with a single command, which pulls the latest release of the Trilium server, sets a hostname, maps external port 8080 to internal port 8080, mounts the volume and sets the LOCALE.
That command is:
docker run -d \
–name trilium \
–hostname HOSTNAME \
-p 8080:8080 \
-v trilium-data:/root/trilium-data \
-e TZ=LOCALE \
zadam/trilium:latest
docker run -d \
–name trilium \
–hostname HOSTNAME \
-p 8080:8080 \
-v trilium-data:/root/trilium-data \
-e TZ=LOCALE \
zadam/trilium:latest
Where HOSTNAME is the hostname you want to set for the instance, and LOCALE is where you are (such as America/New York). The command will pull the latest image for Trilium and set about deploying the container. When the command finishes, you’ll see the container ID reported.
You can then access the web-based UI by pointing your browser to http://SERVER:8080 (where SERVER is the IP address of the hosting server).
Connecting Your Desktop App to the Trilium Server
I don’t know about you, but I’m not a fan of opening yet another browser tab when there are perfectly good desktop apps to use (such is the case with Trilum). Given that the desktop apps are able to connect to the server, so all of your instances are in sync with one another, this makes perfect sense. It’s very important that your desktop apps and server app are the same version. If you’re using the latest server and an older desktop client, they will not be able to sync.
First, you have to install the desktop app on your OS. That should be fairly straightforward. Once you have the app installed, launch it from your desktop menu. When the first page of the setup wizard appears (Figure 1), select “I have a server instance already, and I want to set up sync with it.”
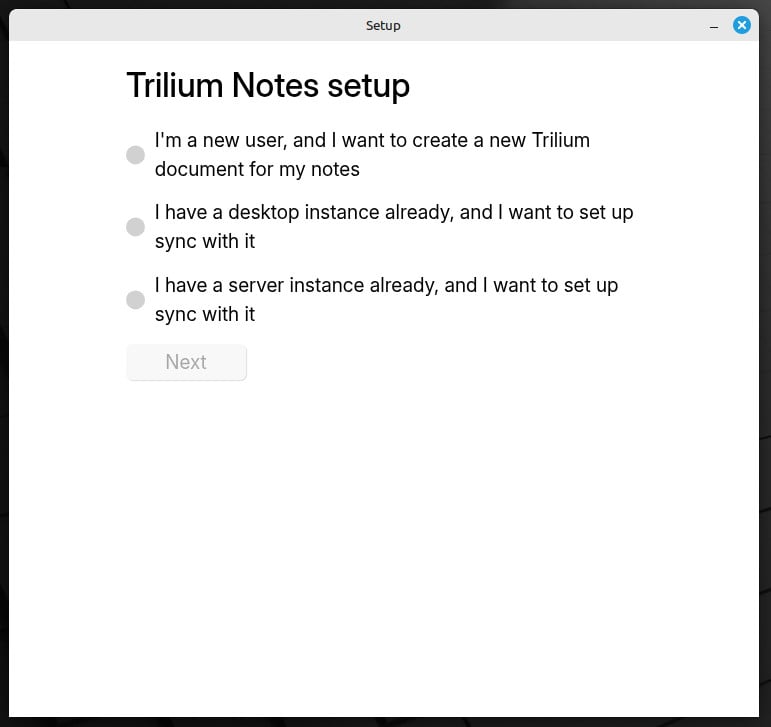
Figure 1: The Trilium setup is very simple.
Click Next, and on the resulting page (Figure 2), fill out the necessary information, which will be the Trilium server address (http://IP_ADDRESS:PORT, where IP_ADDRESS is the address of the hosting server and PORT is 8080). As well, you are required to set a password for this instance.
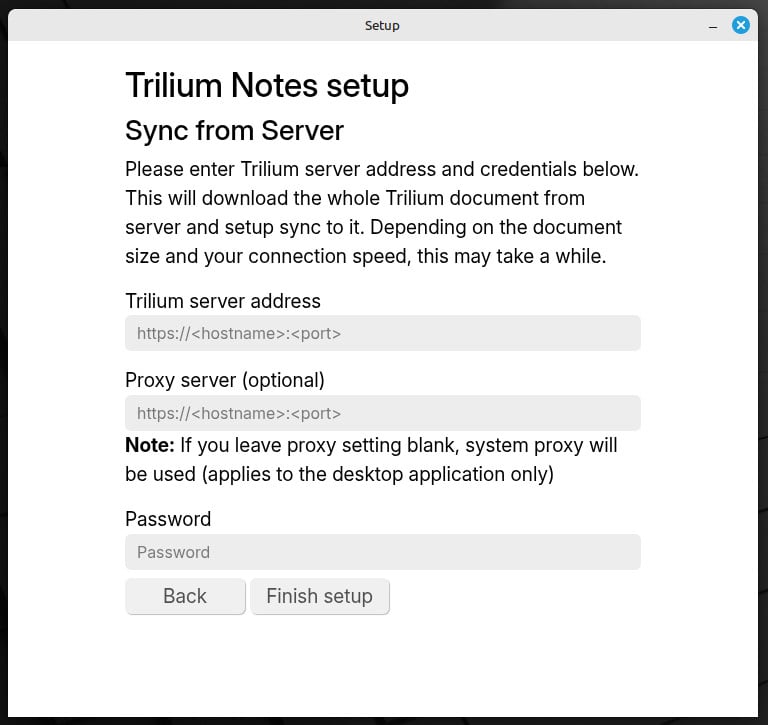
Figure 2: You can also set up a proxy server, but we won’t need that for our LAN setup.
Click Finish setup, and the connection should be made. The setup wizard will auto-redirect you to the Trilim main page, where you should see any notes you’ve previously added (Figure 3).
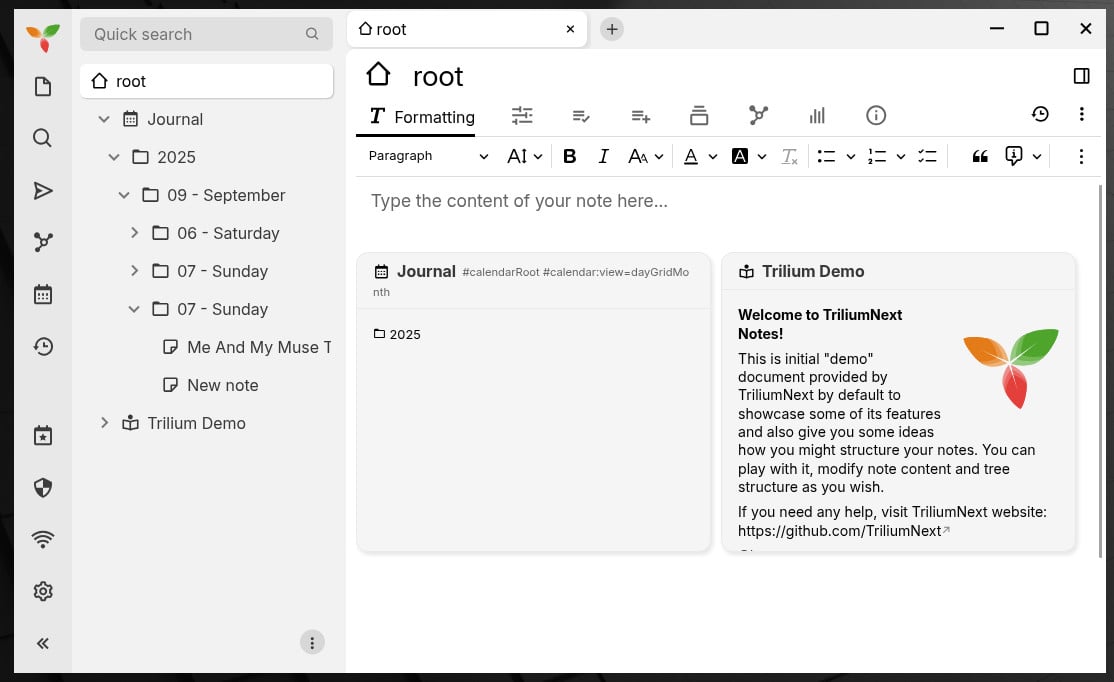
Figure 3: Make sure to view the Trilium Demo note, so you can get a feel of how the app works.
And that, my note-taking friends, is all there is to deploying your own, in-house syncing notes service. I’ve found this combination to be very effective for my needs, and I’m confident you’ll feel the same way.
YOUTUBE.COM/THENEWSTACK
Tech moves fast, don’t miss an episode. Subscribe to our YouTube
channel to stream all our podcasts, interviews, demos, and more.
SUBSCRIBE
Group
Created with Sketch.

Jack Wallen is what happens when a Gen Xer mind-melds with present-day snark. Jack is a seeker of truth and a writer of words with a quantum mechanical pencil and a disjointed beat of sound and soul. Although he resides…
Read more from Jack Wallen