
I don’t know a single person who hasn’t had the experience of getting on a bus or subway to discover someone’s phone is absolutely blaring and ruining everybody else’s commute.
Whether it’s a call being taken on speakerphone, or something more frivolous like TikTok or YouTube, it’s a real bummer when you’re stuck in a small space with someone so desperately inconsiderate of their surroundings.
If you want to make sure you’re never in a position where you have to be “that person,” take advantage of Android 16’s Live Caption feature.
Related
7 Android accessibility features that make your device easier to use
Give these accessibility features a go
Live Caption on Android 16
A cool feature since the beginning
![]()
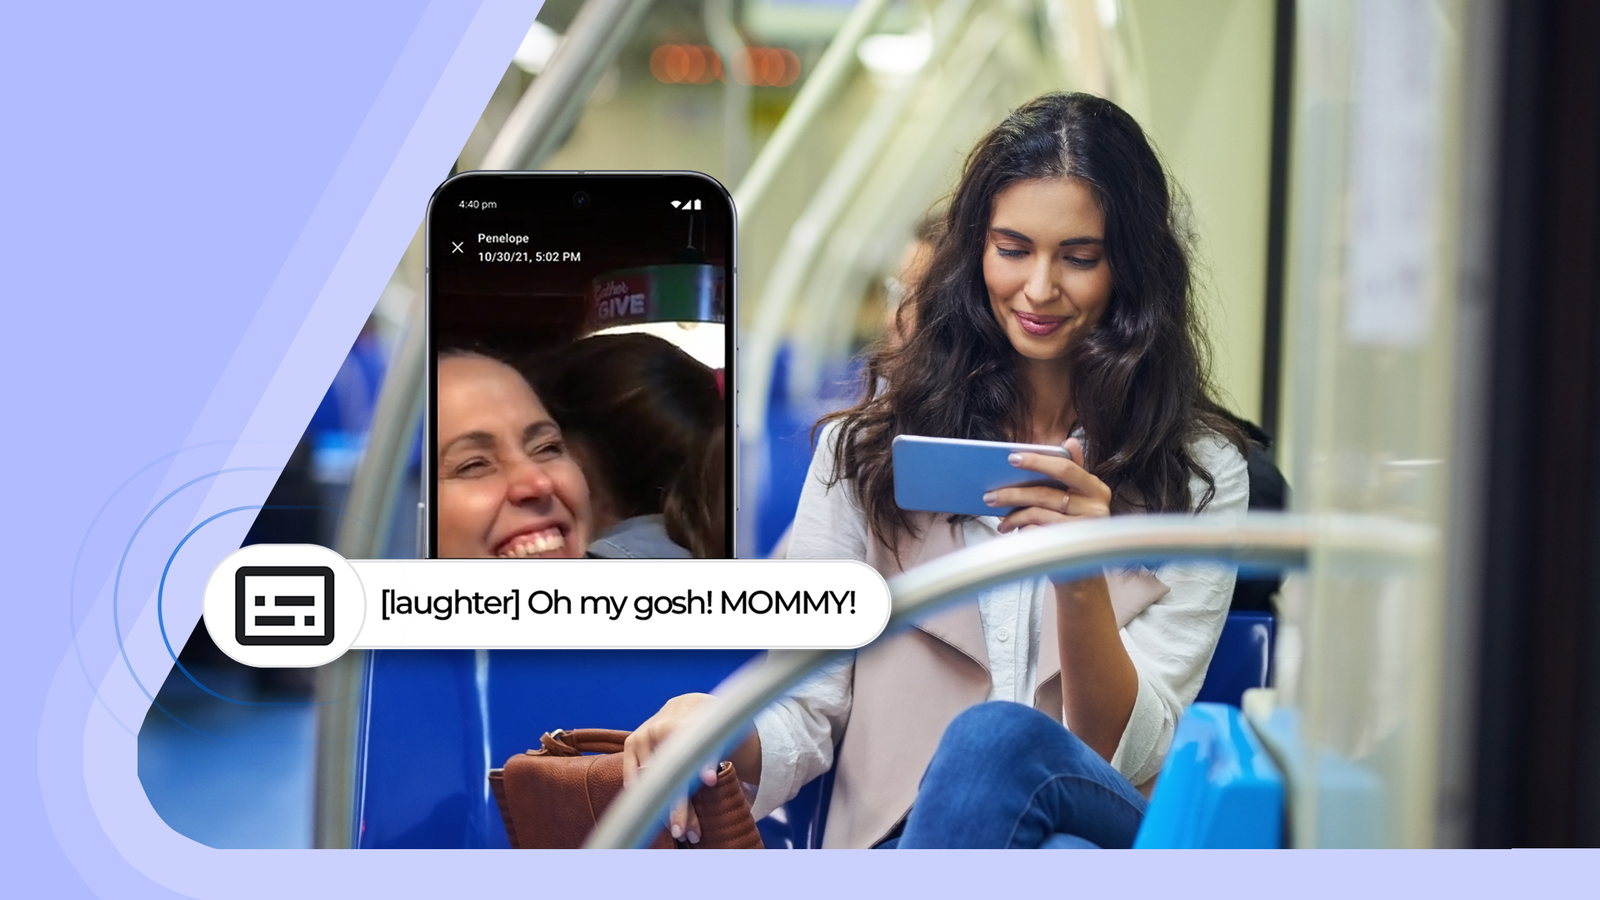
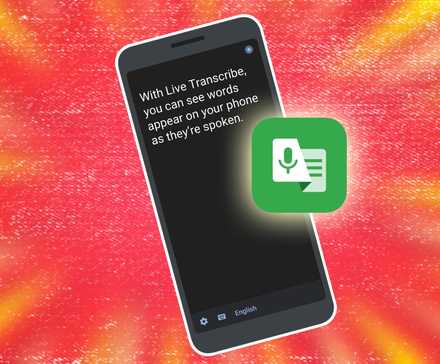
Live Caption itself has been around since 2019, and it’s been a massive accessibility win for Android. It can automatically caption any speech on your device, including videos, podcasts, phone calls, and audio messages.
Live Caption has added some seriously cool capabilities for devices running Android 15 and above. Expressive captions can capture emotions using real-time AI. It can also convey the duration of longer, drawn out words, and bursts of sounds like sneezes and gasps.
These additions are great in theory because they allow for a more immersive experience, even without audio.
What does this have to do with public transit?
I’m so glad you asked

Credit: Ashton Bingham / Unsplash
Not only is it annoying for your fellow passenger to have to hear whatever you’re doing on your phone, it can also be distracting for the driver.
Here’s the best part for public transit users. These features mean that even if your phone’s earpiece is broken, and you’ve forgotten your headphones, there is absolutely no reason to be taking calls or playing media out loud on public transit.
Most apps that feature video content already have captioning options, anyway. But if you’re not up for going through the settings on each individual app, Live Caption is perfect for you, because when it’s on, it works on media across all your apps.
Getting started with Live Caption
Enjoy a quick and easy setup

Credit: Pixabay
There are a couple of simple ways to set up Live Caption on your Android device.
Press the volume button.
Tap the caption icon under the volume bar to toggle Live Caption on and off.
If you want to take the long way, you can find Live Caption by opening Settings, selecting Accessibility, then selecting Live Caption.
Alternatively, you can search for Live Caption in Settings to get directly to the toggle and menu for additional settings.
You can also turn Live Caption off by dragging the caption box off the bottom of your screen.
When you turn on Live Caption for the first time, make sure you’re connected to Wi-Fi or have enough cellular data to download the default language pack.
How to utilize Expressive captions
Tone and non-speech sounds? No problem
Credit: Google
Expressive captions focus on the message beyond the words. It helps you to understand the tone of speech, and detects non-speech sounds like applause and laughter to really set the scene.
Within the Expressive captions menu, there are toggles for each of the additional caption features, making it a remarkably customizable feature.
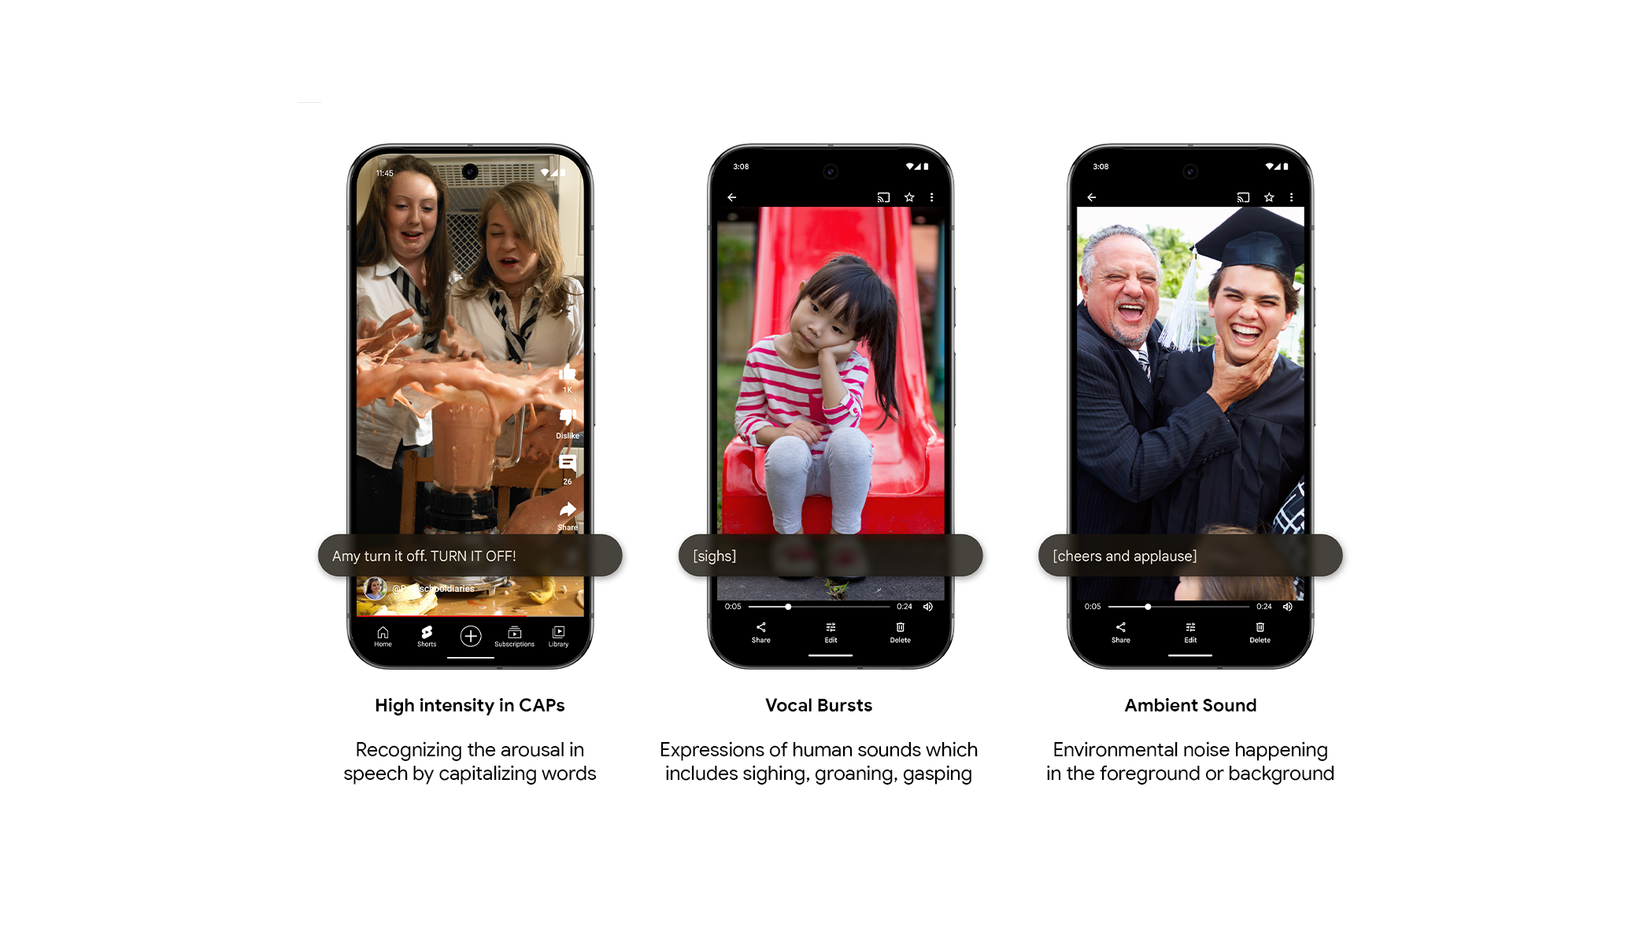
Add styles to captions: Formats caption text to better convey tone. For example, it uses capital letters when a speaker is shouting.
Show sound labels: Labels non-speech sounds like laughter and applause.
Show speech emotion: Tags the emotional tone of speech in square brackets.
Lengthen words: Conveys intensity by lengthening words when a speaker emphasizes them.
Not everybody understands tone in the same way. Whether you struggle with reading emotions or gauging intensity, you’re able to pick and choose which expressive components to boost.
All without disturbing anyone in your vicinity by blasting the volume on your phone.
There’s no point in captions if they suck to read
Adjusting the caption box

Credit: CHUTTERSNAP / Unsplash
Beyond the actual content of the captions, you can also change the size and style of live captions.
There are a handful of style presets, but by selecting Custom, you get specific with things like font family, background opacity, and even the edges of the text.
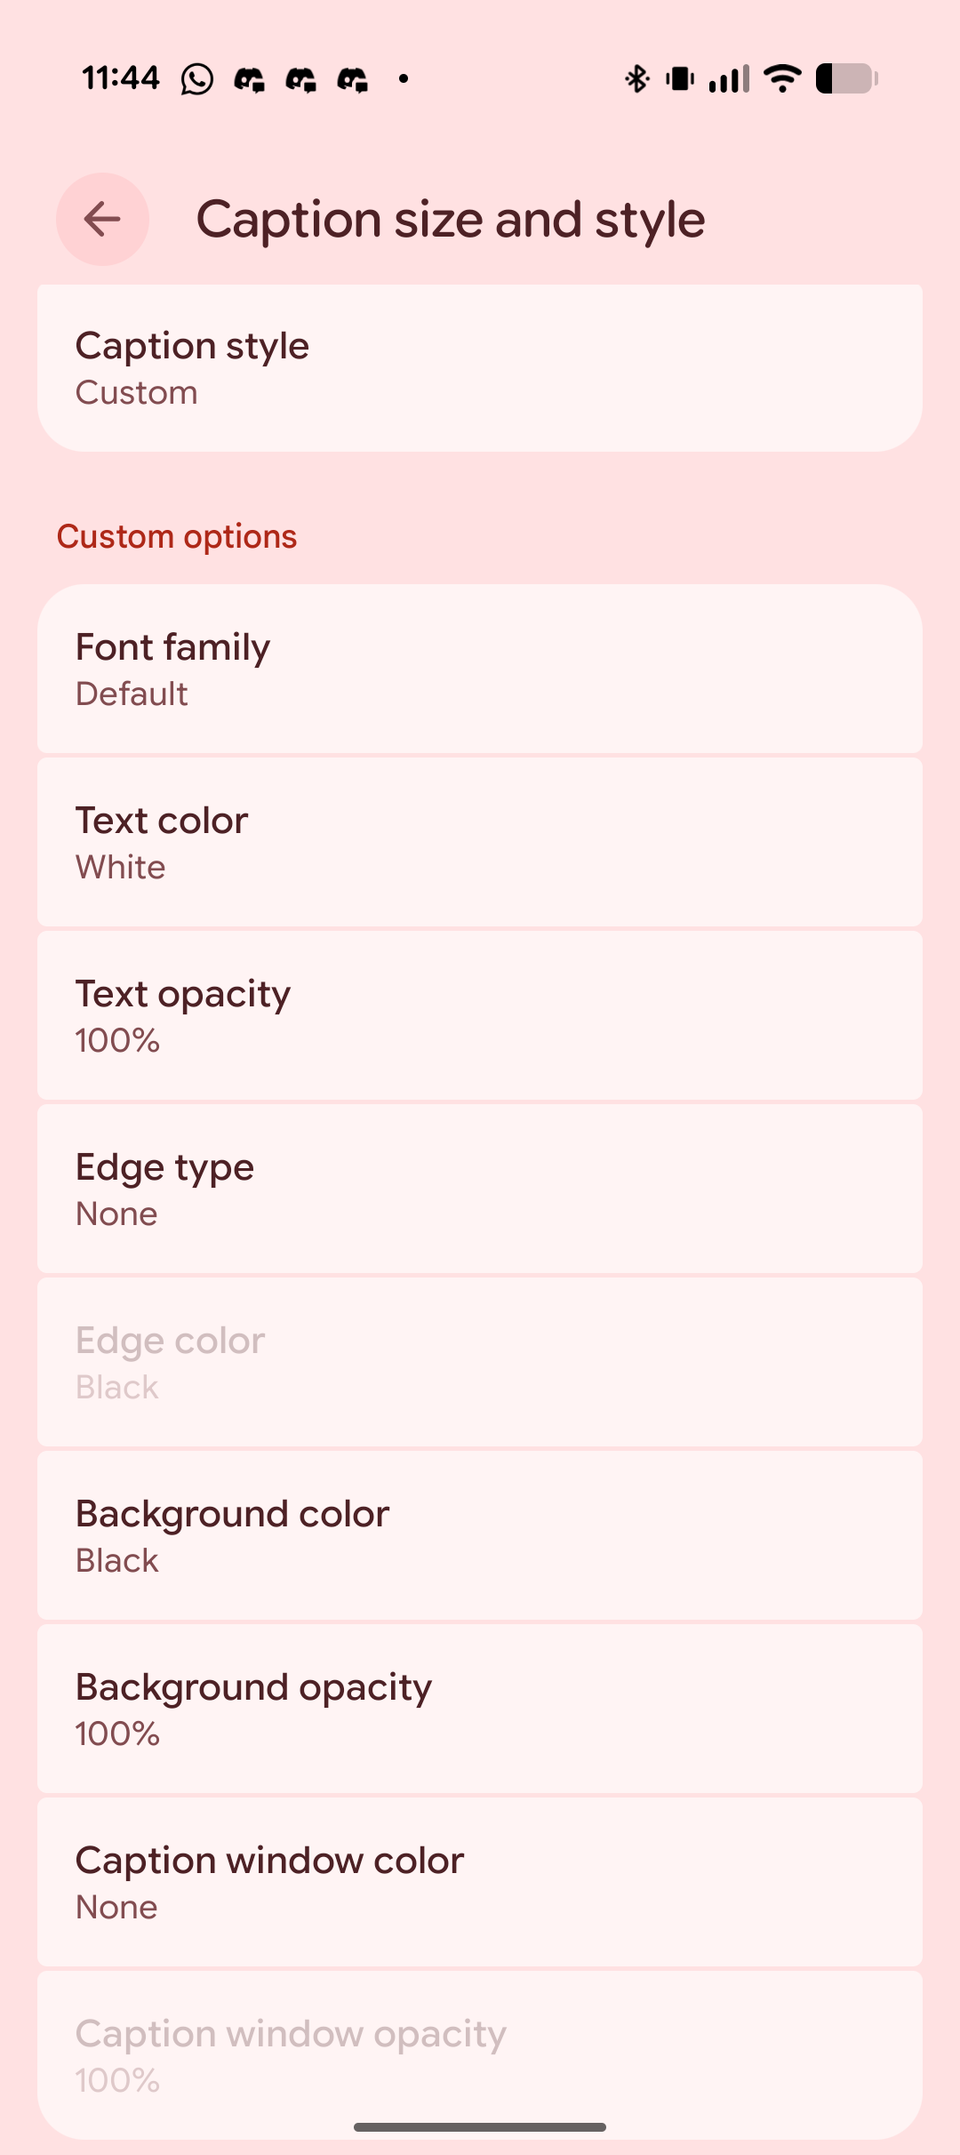
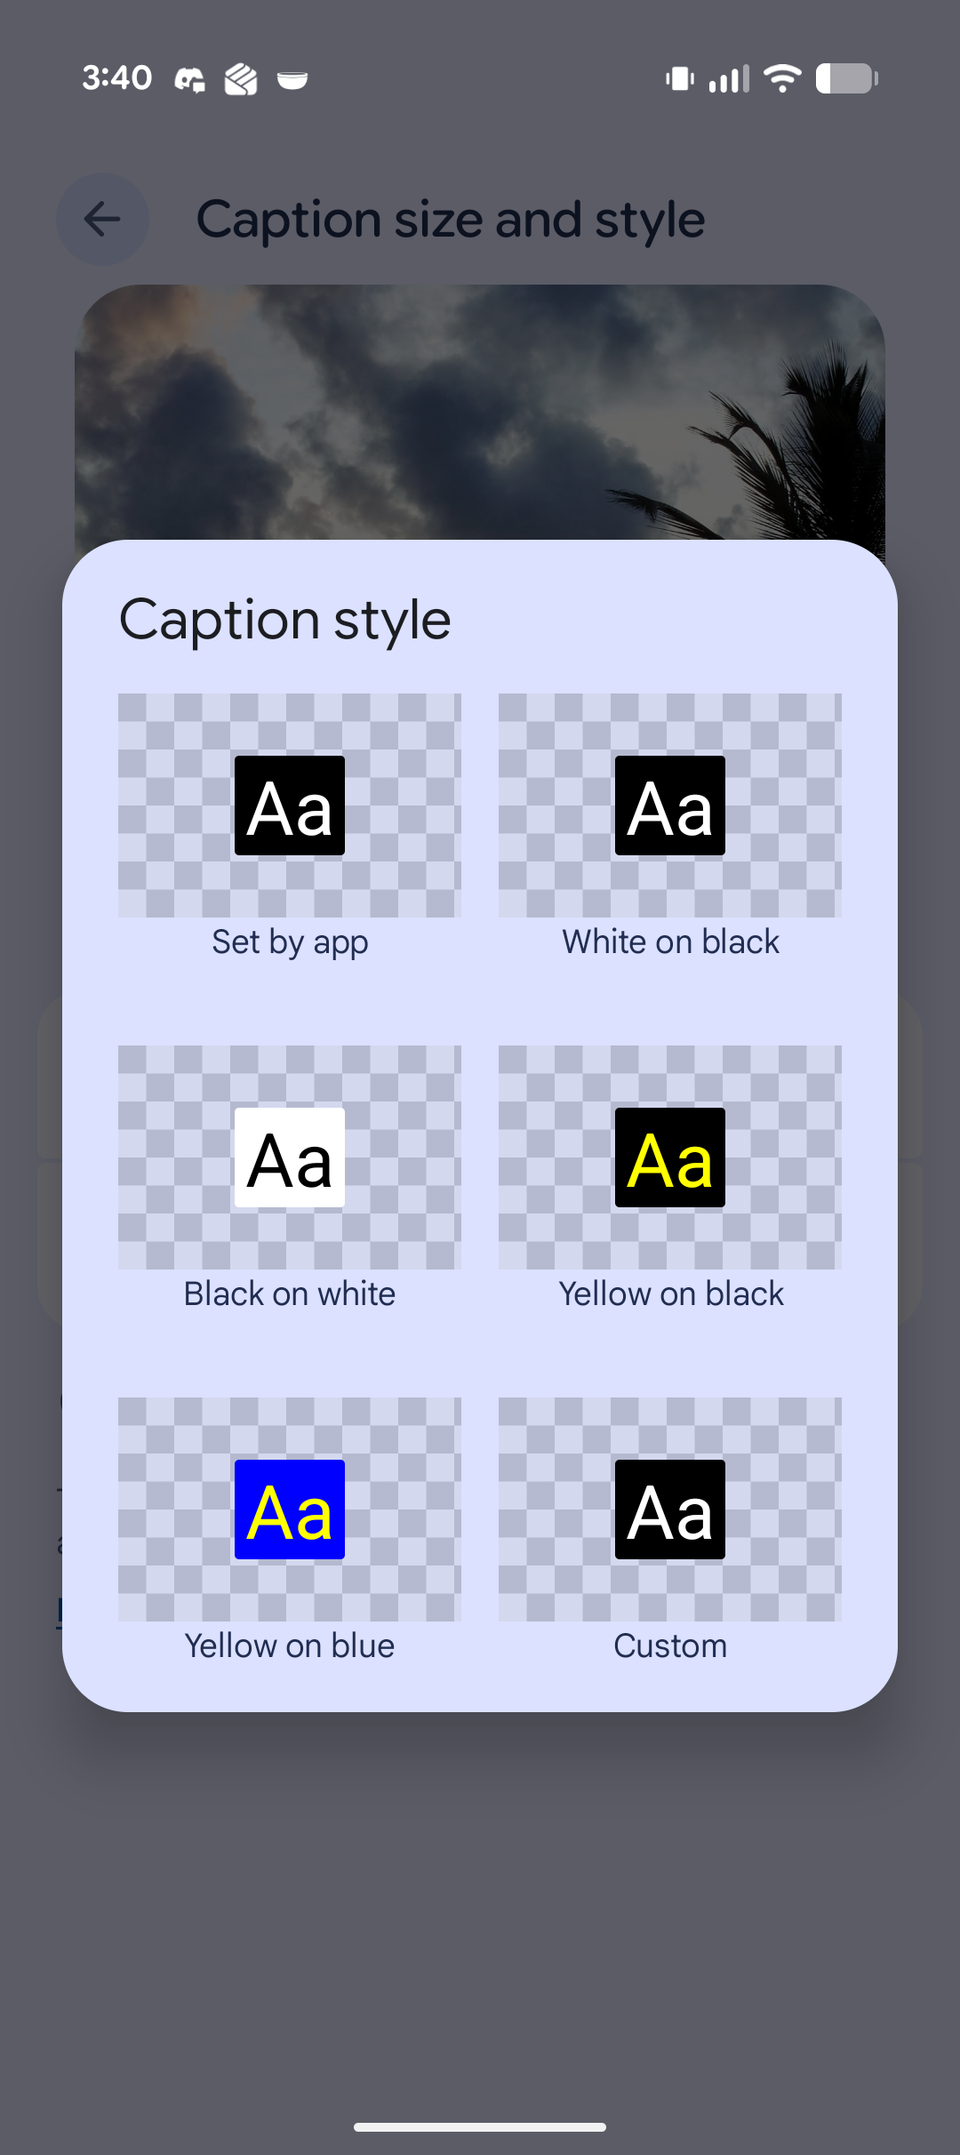
This can be helpful if you have difficulty reading the text due to the color or contrast of the content you’re watching, especially if you have colorblindness or any other visual impairments.
To adjust the caption box, select Caption Preferences from the Live Caption menu.
After trying it out, here’s what I think
It’s kind of just fine
I took a couple phone calls and did some silent scrolling on TikTok and found that everything seemed to work pretty well except for the emotion tags.
For about an hour of scrolling, I only saw maybe two or three emotion tags the whole time.
Even in videos where a strong emotion was obviously being expressed, I just didn’t see nearly as much emotion tagging as I expected.
The captions handled slang pretty well, but I noticed a high volume of errors on speakers with accents, even lighter, more subtle accents.
Non-speech sound labels and capitalizations for emphasis seemed to be quite spot on most of the time.
I think in general, the expressive captions were a bit more of an annoyance than anything for me, but I don’t really struggle to gauge emotion or tone on a video without audio.
Live Caption on its own is a solid feature. It may have been better to keep it simple with the expressive captions, but at least they’re customizable.
Be the change you wish to see on the subway
Live Caption may not be the kind of tool I need in my everyday life. As an audiophile, I have a collection of headphones charged and ready to go at all times.
But if the day ever comes where I find myself on public transit with no headphones and a broken earpiece, I know I have a solid backup plan.
Live Caption is a great tool to avoid ever having to be the bane of every other passenger’s existence.