
When you’re just getting started as a DP, you’ll make mistakes, and that’s okay. You’ll look back at your work and nitpick everything that you did wrong.
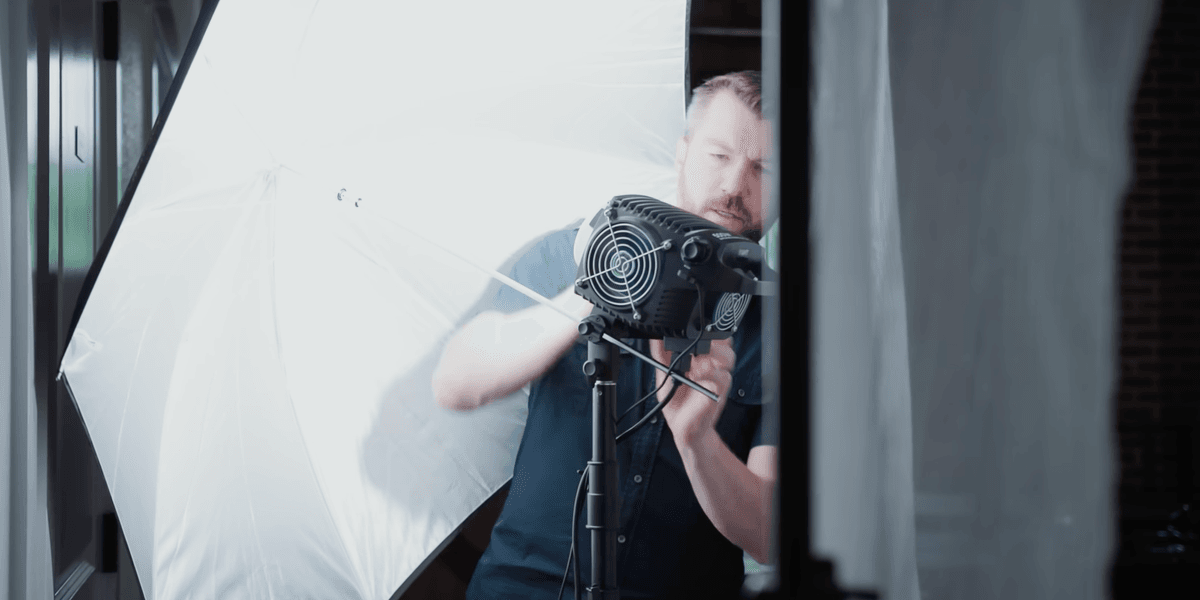
But as a beginner, you can also look at the common pitfalls of others, and make a concerted effort to avoid those specific mistakes. That’s why we love videos like the one Curran Sheldon just put out about the six lighting mistakes he used to make.
He’s an ASC award-winning cinematographer, Oscar-nominated, and a two-time Emmy winner. Rules, he says, even in lighting, exist to occasionally be broken intentionally, but there’s a difference between deliberate creative choices and amateur mistakes.
Check out his video below.
– YouTube www.youtube.com
Broadside/Flat Lighting
This is one of the most common mistakes you’ll see. A scene is just blasted with light, there’s no contrast or texture, and it ends up looking super flat.
“Broadside lighting is when you light your subject from the same side as your camera,” Sheldon says. You’re positioning your key light (the primary light source illuminating your subject) this way.
As he points out, lighting this way washes out the image, leaving it with no depth or life.
To a beginner, it might make sense to light this way. Why wouldn’t you have a light where the camera is? You need to see what you’re filming.
The solution, he says, is reverse key lighting.
“Place your key light on the opposite side of your subject from your camera. This creates shadows on the side closest to the lens, adding depth, dimension, and drama.”
This isn’t the same as traditional backlighting (where the light sits directly behind the subject, creating a rim or halo effect). Reverse key means directing the light toward the opposite side of the character from the camera, so light falls across the subject’s face rather than hitting them head-on.
This technique is super common in professional work. Once you know it, you’ll see it everywhere.
Learn more about three-point lighting.
Background Exposure Issues
How about when you get your subject perfectly lit, but then everything in the background is totally blown out? It looks bad. It’s an issue of exposure.
“This happens when your subject is properly exposed, but the background is way too bright and completely overexposed. It’s distracting, and it looks amateur.”
The viewer’s attention is going to go right to those overexposed areas.
The opposite mistake is matching interior exposure (how bright or dark your image appears) to bright windows.
Sheldon suggests practical fixes like ND filters (neutral density filters, essentially sunglasses for your lens that reduce the amount of light hitting the sensor without affecting color) outdoors.
If you’re inside, “close down your aperture to bring those highlights down.”
If you’re working with practical, motivated light from bright windows, worry less about blown-out light. It’s fine—it’s how reality looks.
“There’s almost no scenario in the history of the natural world where the light within a room is brighter than a sunny day,” he says.
Our eyes expect a significant brightness difference between interior and exterior light, and trying to eliminate that difference creates an artificial, flat look. Sheldon points to works like Prisoners and Succession, which show white-hot light in windows often.
 Prisoners Credit: Warner Bros.
Not Lighting Spaces, Just Faces
When you’re a cinematographer, you’re a painter with light and shadow. Not like in the Thomas Kinkade way, but the Gordon Willis or Dean Cundey way. The whole frame is your canvas. It’s your job to create light in layers so that we can see depth and texture and warm and cool.
“There is a saying in lighting,” Sheldon says. “Light spaces, not faces.”
That means that you should light the environment, then bring the subject or actor into it.
If you’re lighting just the person in the scene, you risk that aforementioned flatness, or the opposite, which would be a character lit in a vacuum.
In nonfiction work, the focus is obviously going to be more on the subject. But this doesn’t mean you disregard lighting the setting, too.
Your key light might be positioned for the face, but you should also consider fill lights (secondary lights that soften shadows created by the key) or background lights that define the space and add depth to your frame. Find the middle ground.
Using Too Many Lights
We get it. If you’re in film or TV, you’re probably a gearhead who loves playing with filmmaking toys. Lights are no different. There are so many different ones.
Beginners might think the more, the better, not realizing you can light an entire film with tube LEDs if you need to. You have a dozen lights—why wouldn’t you use them all at the same time?
“But the great cinematographers know that sometimes restraint is the best way forward,” Sheldon says.
Resist the temptation to use every light you have access to, especially with RGB LEDs (lights that can produce red, green, and blue colors in any combination, allowing you to create virtually any color).
Sheldon points to Deakins again, who says he tends to use just one or two lights in most setups.
“The more lights you use, the more skill you need,” Sheldon says, because the setups are going to be more complicated. “And if you’re just starting out or in amateur territory, it may be best to get really solid results with just a light or two.”
Master simple setups first. Try one or two lights and a quality softbox.
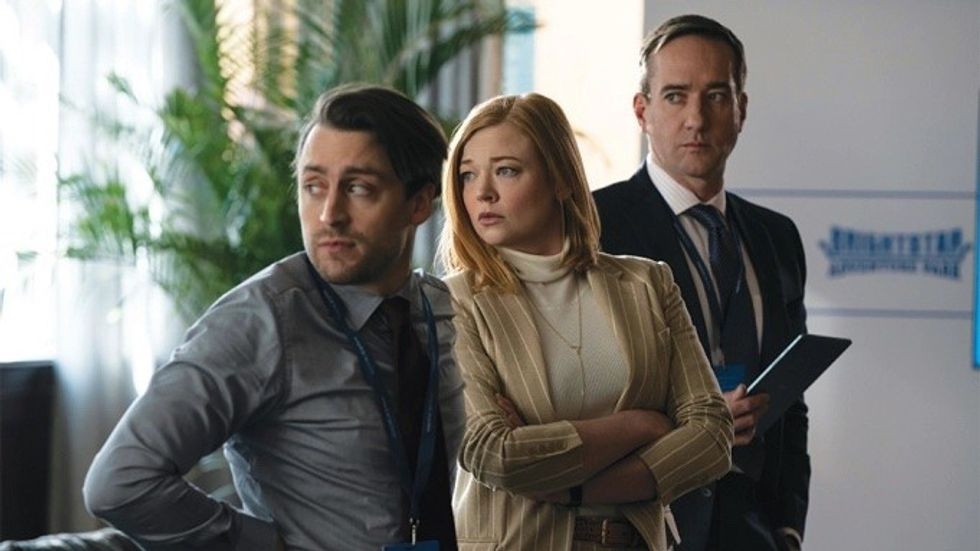 Succession Credit: HBO
Ignoring Practical Lights
A huge tip from Sheldon is to not ignore practical lights you have in a setting.
“Practical lights like lamps, candles, or neon signs are more than just props,” he says. “They’re an opportunity to add depth, atmosphere, and realism to your scene.”
The common mistakes, he says, are not using practicals at all, or leaving them in frame without controlling how they look.
“Use your practicals intentionally. If there’s a lamp in your frame, make sure it’s turned on and balanced with your other lights. And don’t be afraid to tweak the bulb.”
What he means is to use dimmers (devices that control brightness) or dedicated cinema bulbs to control intensity and color temperature (the warmth or coolness of light, measured in Kelvin).
Practical lighting can, he says, ground scenes in reality while adding visual layers and character details. A warm lamp in the background, for instance, can suggest comfort and domesticity before a character speaks. A big, cold light can indicate an institutional setting.
Lighting Without Intention
When you’re a cinematographer working with lights, you’re contributing to the story in countless ways. You’re helping create tone, character, genre, setting, and more. Every decision you make should point the audience toward the goal you have with the screenwriter and director.
If you don’t have any of this in mind, what do you expect the audience to take from watching your project? Sheldon calls this “lighting without intention.”
“This happens when you’re just throwing lights around because you think you’re supposed to, without asking yourself, ‘Why am I lighting this scene this way? What mood am I trying to create? What story am I trying to tell?'”
As he points out, lighting isn’t just about making things visible. You’re guiding the audience’s eye and creating atmosphere.
“Before you even touch a light, think about the purpose behind it.”
Warm and inviting? Cold and tense? Should the character be partially in shadow or fully visible? These decisions communicate something to the viewer, even if you might think they don’t.
If you’re just getting started, check out our lighting terms glossary and our guide to lighting techniques.