
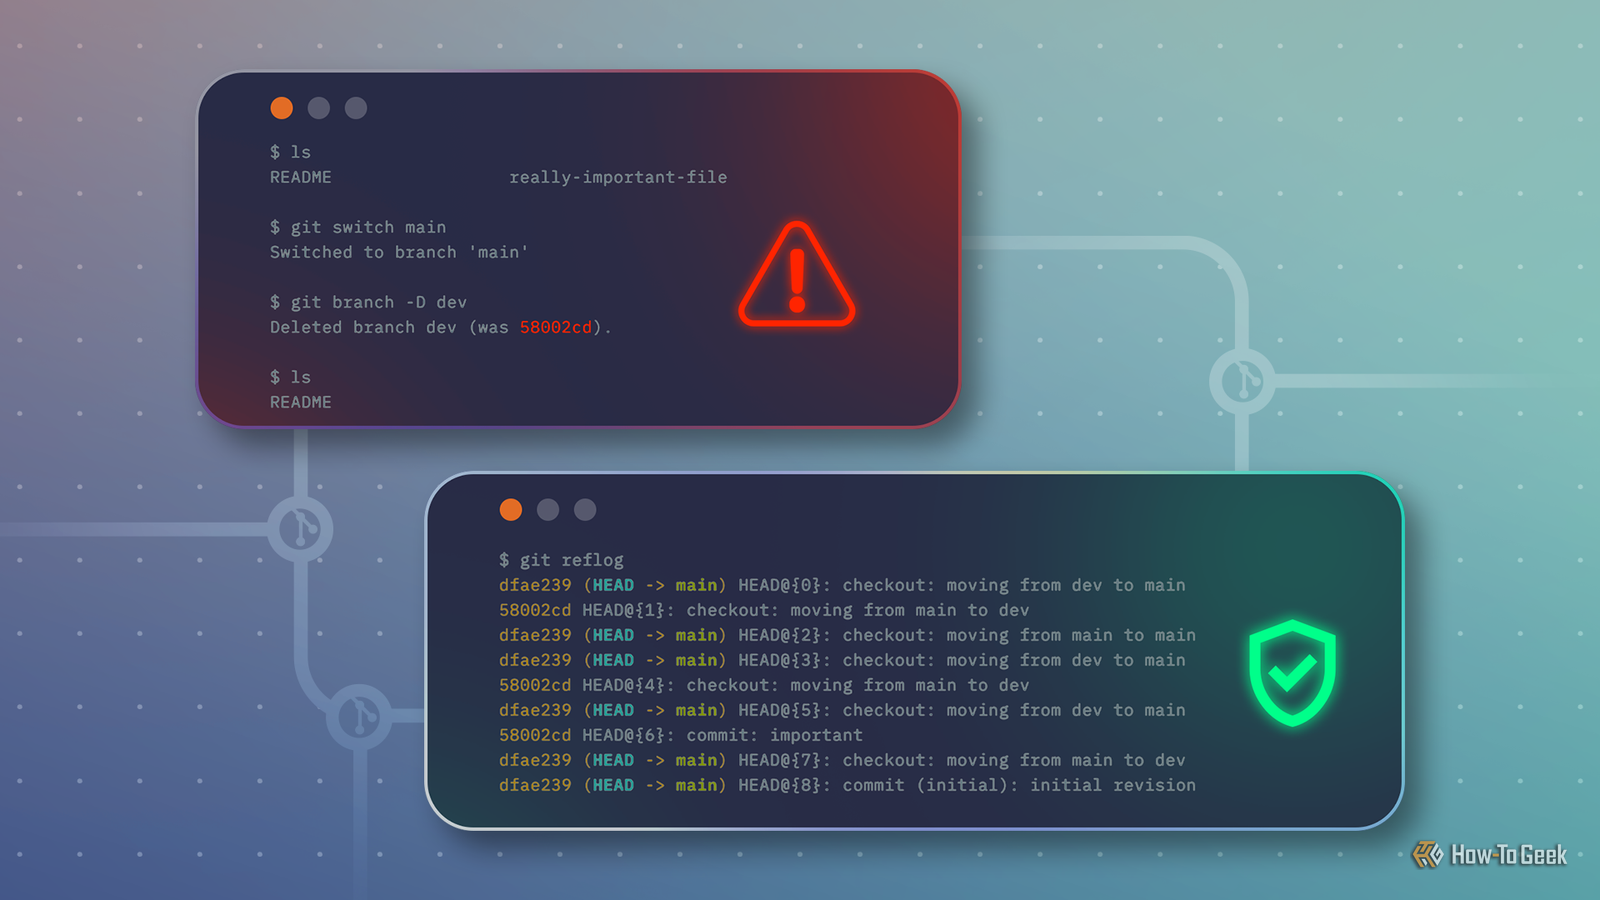
It’s fair to say that git is one of the most complicated commands you have installed on your machine. With over 180 subcommands (in version 2.55), it’s also a pretty good bet that there are one or two you’ve never even heard of, let alone tried out.
The reflog subcommand is one of these: use it, and you can recover from all sorts of otherwise catastrophic mistakes, but you’re probably not using it. However, with a quick introduction and a small amount of practice, you’ll be able to deploy this safety net and avert disaster with one command.
git reflog: like git log, but for everything
This subcommand reveals a record of all previous local actions
Git can sometimes give off the impression that it records everything you do, and—for the most part—that’s pretty accurate. But the standard git log doesn’t tell you the full story, so where do you go to find out more? Reflog.
It’s important to understand the differences between git log and git reflog because you can get very different output from the two. For a trivial, one-commit repository on your local machine, the two are basically the same:

But with a much older repository, cloned from a remote, you’ll see big differences:
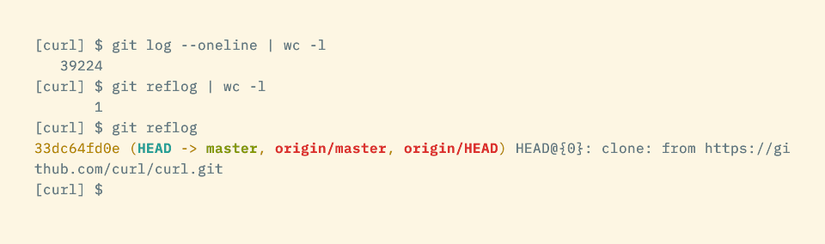
What’s going on here is that git log is showing you a history of commits that are reachable from your current commit. Meanwhile, git reflog shows a log of reference actions in the local repository. Actions can be things like a commit, a merge, or a rebase. They also include some interactions with a remote, like cloning or pulling from upstream.
The basic git reflog command is a shorthand for the default git reflog show subcommand. This is actually a synonym for a specific call to git log, namely:
git log –walk-reflogs –abbrev-commit –pretty=oneline
Here, –walk-reflogs shows reflog entries instead of commits, –pretty=oneline shows each entry on one line, and –abbrev-commit produces much shorter commit IDs (e.g., “771eb26” instead of “771eb26cc738ab21d9d4e3ec7e3b27c51fb0fa56”). But “reflog” is much easier to remember than all that, and there are several additional subcommands for maintenance, including list, delete, and expire.
You can make commit hashes even shorter using –abbrev=n to specify the minimum length, which is 7 by default and can be as low as 4.
An example: undoing an amend
How to recover from a potential catastrophe with the right detective tool
Git’s reflog command is so useful because it provides access to local actions that were never pushed to a server. These are fragile since there’s no record of them, other than on your local machine. The reflog command doesn’t do any recovery itself, but it enables it by revealing the SHA1 hash of a commit that might otherwise be irretrievable.
Take a common example that can result in data loss: amending changes. Using git commit –amend, you can change the last commit, rewriting its message or altering the file changes it contains. For example, you might immediately spot a typo that needs correcting:
git add .
git commit -m ‘bug fix for #672’
git commit –amend -m ‘bug fix for #673’
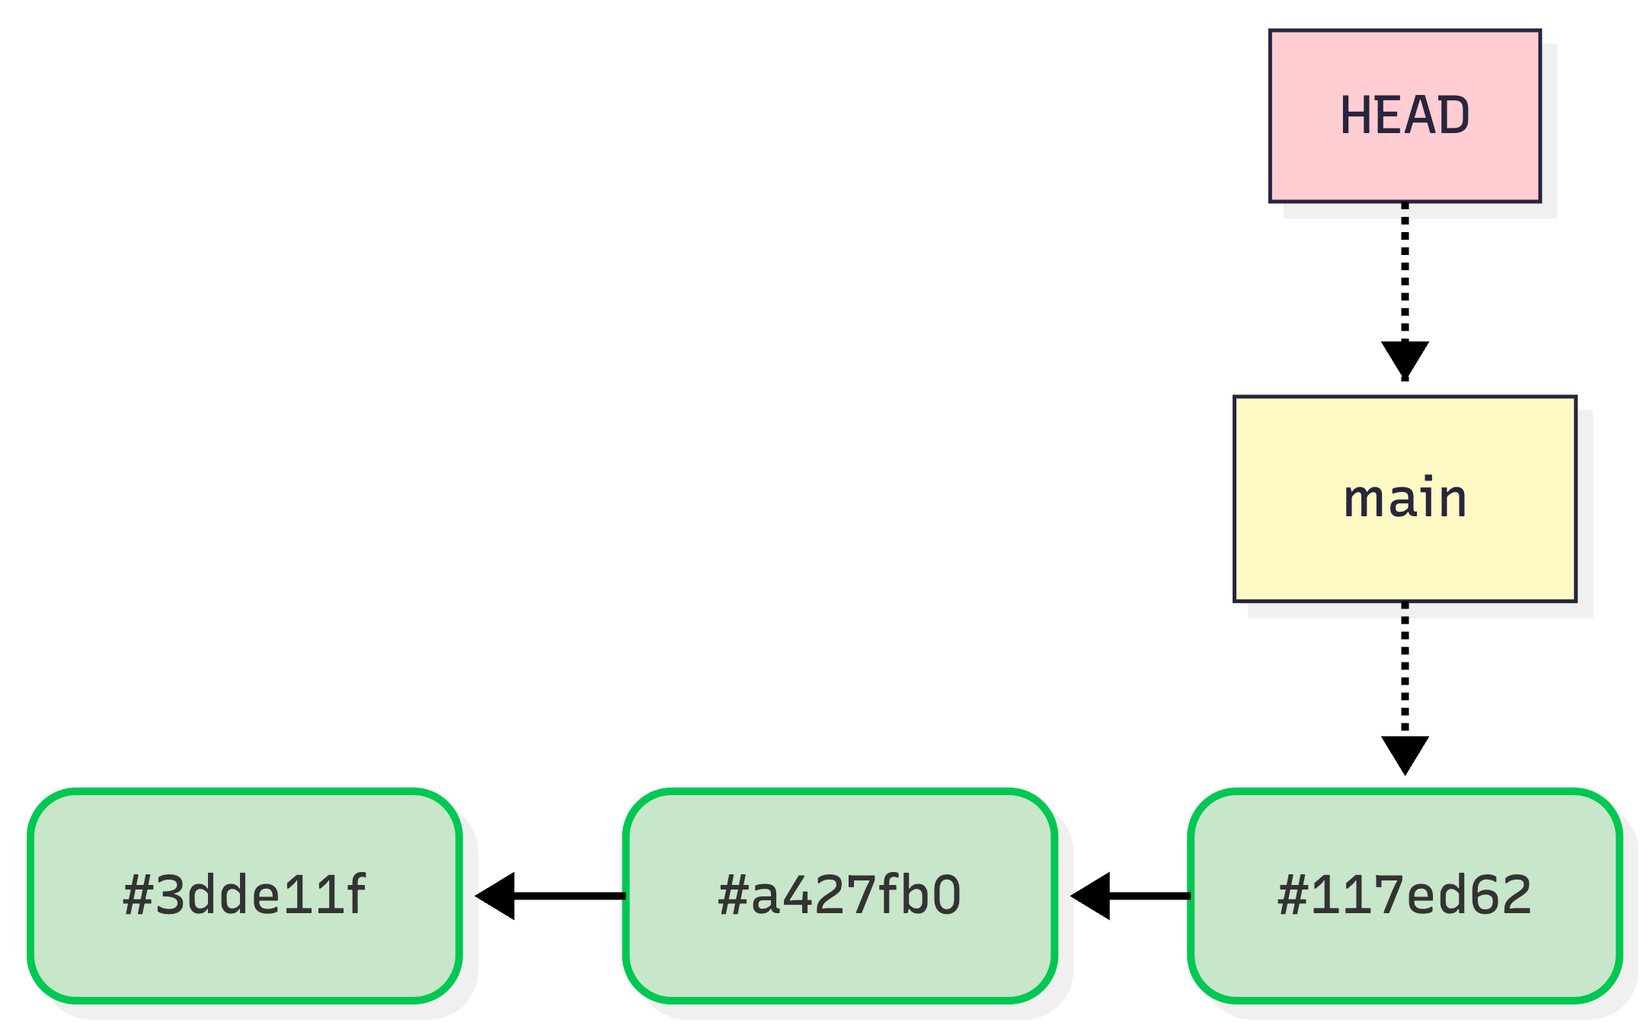
This is a great feature, but you need to be aware of what’s going on in the background. When you use –amend, git creates a new commit to replace the previous commit. If you start with something like this:
You’ll end up with the following: a new commit in place of the old one, which itself is left unreachable:
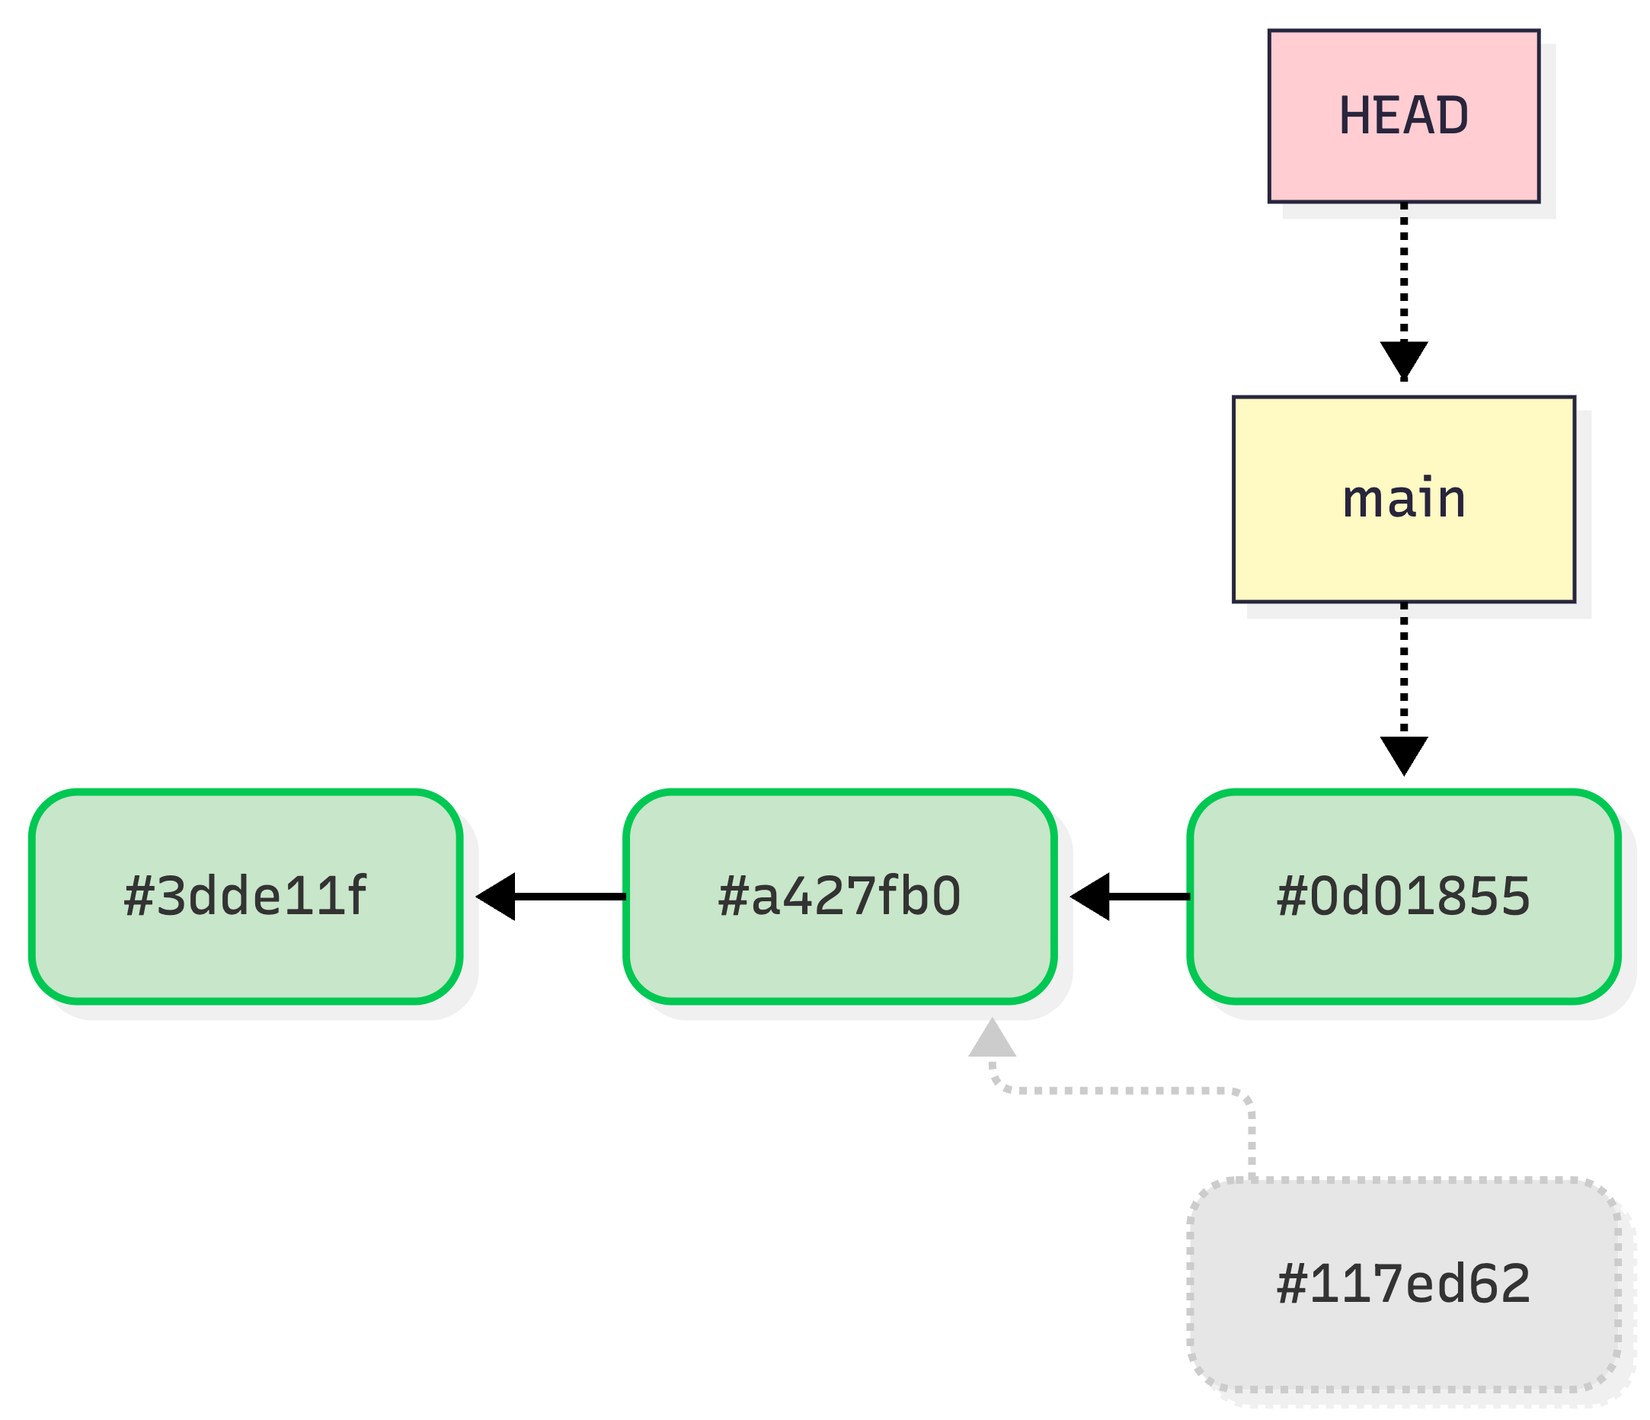
In this situation, though, git reflog can help you locate that lost commit, in case you amended but later decided you didn’t mean to. To begin, run git reflog and identify the SHA1 hash of the lost commit:

With the SHA1—117ed62—in hand, you can now use git-checkout to revert the change:
git checkout 117ed62
Note that git log now reports the original three commits, without the amend:

Meanwhile, git reflog produces even more information than before:

Using reflog identifiers
Most commands support alternatives to commit IDs
Many git commands work with the SHA1 hash to identify a commit ID, like git log 3dde11f. However, git reflog prints relative IDs, like HEAD@{4}, alongside each action. These IDs let you identify a specific action with greater granularity than just a commit ID.
You can use reflog IDs with many git commands, including diff, log, … When used with git log, they can reveal otherwise unreachable commits, much like reflog does. You can omit the prefix before the @ to default to the current branch.
If you’re looking for reflog IDs in a long log, try using git reflog –oneline –no-decorate. The –no-decorate option prevents reflog from labelling references like branches and tags, so IDs will align and be easier to read.
The reflog subcommand is your ultimate recovery tool
OK, reflog doesn’t directly recover anything for you, but it empowers you—via other git tools and commands—to do just that. With the SHA1 of any unreachable commits, you can recover from almost any git action, however destructive it may have seemed at the time.