
The new generative AI tools in Photoshop offer powerful features that can streamline your workflow and unlock new creative possibilities. In this article, I show you how to make the most of them.
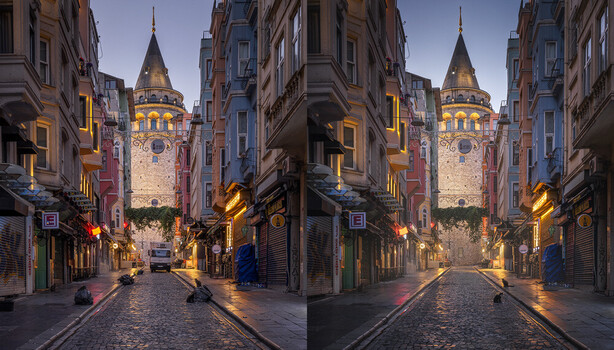
We’ll focus on an editing task that can take a lot of time without generative AI: retouching. For my landscape and cityscape photos, I try to keep retouching to a minimum. Still, in most photos, I find objects that don’t help the image. If removing those distractions doesn’t compromise the photo’s integrity, I’ll do it. With generative AI in my toolbox, I can get better results more quickly.
There Is a Price
But first things first. Not all the tools are free. As you would expect from Adobe, they introduced yet another subscription for their premium AI feature. Those also include access to Google’s Nano Banana Pro, which works best for the type of retouching tasks I show in this article.
Now, spending more than $10 a month just for generative AI in Photoshop is not worthwhile for many users. You can hardly spend the amount of so-called generative credits you get if you’re just editing a few photos per month. As part of their basic subscription, you get 2,000 credits, which would allow you to make 50 generative fill calls using Nano Banana Pro. The prices for other models vary. And between recording the feature video and writing this article, they also changed. So, if you decide to get a subscription, keep a close eye on those costs, as they might increase in the future.
A much more user-friendly approach would have been for Adobe to also allow purchasing credits separately from a subscription. Then non-power users like me could just use them when they require those features.
The compromise I found is the following: I collect images that require advanced generative AI treatment for some time, then get a one-month subscription. I can then do some batch-like retouching and cancel the subscription again. I did this once now to record the feature video and prepare a selection of photos for print. And I will do so again in the future, but no more than once or twice a year.
Advanced Retouching
The reason I don’t just ignore those tools is that they improve advanced retouching workflows. By this, I mean situations where free tools like the Healing Brush, the Clone Stamp, or even the AI-powered Remove tool aren’t sufficient to achieve convincing results.
Take this photo from Fanad Lighthouse as an example. The dark mood of the blue hour, combined with the streaking clouds, makes this image interesting to me. Yet there was one small distraction near the edge of the frame in the original photo, drawing the viewer’s gaze.
A light in the building on the right shone bright in the night, and I decided to switch it off. Using conventional retouching tools, this would have been a lot of work. Using Nano Banana Pro, it was a simple square selection of the building and a single prompt: “Switch off the light in the building.”
In this case, the result was perfect right out of the box. In general, you will need to make some additional adjustments to achieve a perfect blend between the generated pixels and the original photo. The examples from the feature video show how to do this using different adjustment layers in Photoshop.
To find and use the new generative fill models, first select the area you want to edit in your photo. Then go to the menu and choose “Edit – Generative Fill…” In the dialog that appears, look at the bottom toolbar and click on the second button to open a list of available models. Select “Gemini 3” from that list. If you wish to swap in areas from another image, use the first button to add a reference image. For most retouching tasks, I find adding a reference image unnecessary and stick to using the tool directly on the selected area.
One very important thing I don’t mention in the feature video is the importance of square selections when using Nano Banana Pro. To avoid the need for transformations like in the video, always hold down the Shift key when creating the selection. You’ll get a pixel-perfect match this way. The only edit required afterward is usually adjusting the brightness and color of the generated pixels.
Another use of generative AI is to improve a photo’s details. This is the typical use of software such as DXO PureRAW or Aiarty. But even with Nano Banana Pro, you can perform such improvements on a small scale. In the dune photo from Huacachina, a man was walking along the crest of the dunes. I made the mistake of using a slightly longer exposure time, which created unwanted motion blur.
Note that I already tried to do some manual retouching using the clone stamp to minimize the movement. But the result, especially around the feet, didn’t look very convincing.
Again, a simple square selection around the man walking the dune, combined with a simple prompt, did the trick: “Remove the motion blur from the man walking along the dune.” This prompt made the person more defined and added some detail. It’s similar to the results you get when using AI for upscaling, but here it’s applied only to the photo’s important details.
Conclusion
Generative AI can be a valuable tool for improving the look and quality of your photos. And using it on a smaller scale during retouching can help maintain the integrity of your images.
You can certainly debate that this is cheating, and to an extent, it is. The name “generative” AI already tells you that the information it creates is made up. But the same can already be said about conventional retouching. So, it’s up to you to decide whether the shortcut AI offers is something you want in your workflow, or if you would rather keep the original pixels, even if they interfere with the story you want to tell with your photos.
It’s also good to know that you’ll initially have a few credits to use with the premium models. So you can do a quick test using one or two generations to see their power. And don’t forget to also play around with Adobe’s own Firefly models. For some retouching, they do a good enough job, and here, you don’t need an extra subscription.