
Backlit scenes are a trap: the background looks fine, your subject falls into shadow, and global sliders only make the frame feel fake. If this keeps happening, the fix is less about “more exposure” and more about controlling where the light appears to land.
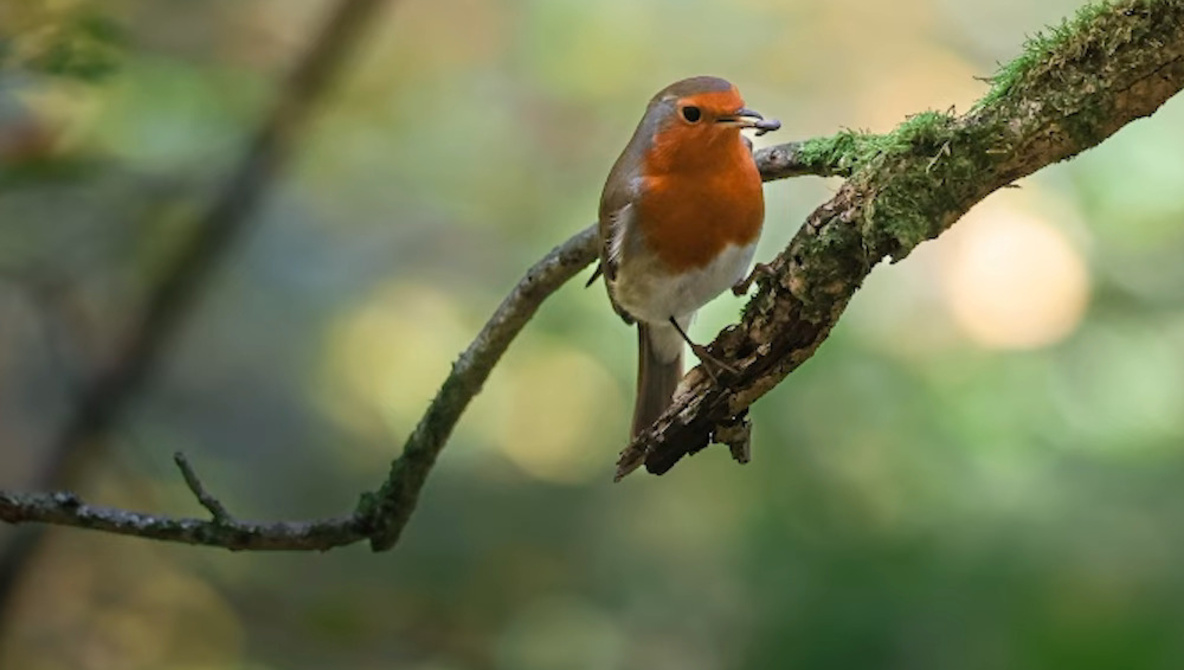
Coming to you from Gareth Evans with Park Cameras, this practical video starts with a single bird photo and a mistake you have probably made when trying to rescue it in Lightroom. Evans shows why simply raising overall exposure makes the background blow out while the subject still looks wrong. He also tries the familiar “highlights down, shadows up” move, and you can see how quickly the image turns flat when you lean on global sliders. Then he pivots to the real point: shaping light locally so the scene feels believable instead of “edited.”
The edit is built around masks, but not in the way people usually teach it. Evans starts by getting the base file under control, with small moves to shadows, highlights, contrast, clarity, texture, and vibrance, then he commits to targeted adjustments. He uses a subject mask to lift the bird without lifting everything else, then layers gradients to darken and brighten different parts of the frame so your eye lands where it should. One of the smarter parts is how he keeps the background changes from bleeding onto the subject by intersecting a gradient with the background, which stops the common “halo and haze” look you see in rushed wildlife edits. He also calls out a real constraint: he is working from a JPEG, so you get a useful sense of what can be saved even when the file is not raw.
Once the light feels shaped, he shifts to color and makes it obvious how small hue choices can change the mood without turning the image into a cartoon. He walks through the color mixer and nudges autumn tones toward richer oranges and reds while keeping greens from drifting into that sickly yellow zone. The key takeaway is that he treats color as part of the lighting plan, not a separate “make it pop” step. He also experiments with a large inverted radial mask to lower exposure around the edges and push attention back to the bird, which is easy to overdo if you are not watching transitions. The video includes quick before-and-after checks, so you can judge whether the realism is holding or slipping.
The part you will want to watch closely is how he stacks masks to suggest a direction of light, then adds a subtle shadow that gives the perch and the bird more depth without making the scene look staged. He builds a brighter area from the top right, slightly warms it, and even uses negative dehaze in a targeted way, which is a move that can go sideways fast if you do it globally. He also drops a short wildlife tip that has nothing to do with Lightroom: stop chasing the bird and start choosing the light, then wait for the bird to enter it, which changes what you bring home before editing even starts. Check out the video above for the full rundown from Evans.