
They say that bird photography is all about the gear—that as long as you turn on burst mode, you’ll be fine. While most of these statements are true, many other factors come into play when photographing birds, especially when your main subject is a hummingbird.
You will find that photographing birds—any bird—when they are perched still isn’t all that hard. Nor will you need the most advanced gear. The challenge comes when you’re trying to capture birds in flight, especially when they move fast. Hummingbirds fit into this category. They almost never sit still and are always flying around at full speed. So, yes, gear plays a fundamental role if you want to get a sharp, beautiful hummingbird image, but so do your skills.
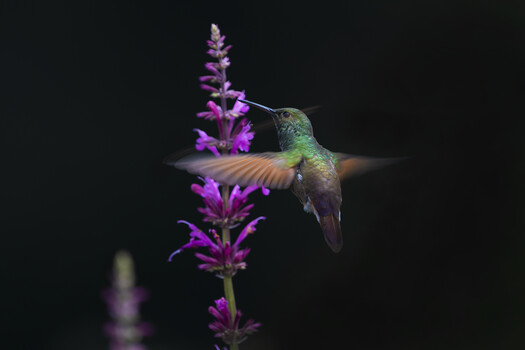
A berylline hummingbird flying towards pink lemon balm flowers.
Over the years, I’ve been fortunate enough to try out a variety of cameras. When I started out as a photographer, I was shooting with a Canon 60D paired with a Canon EF 400mm f/5.6 prime lens. The good part about this combination was that the lens had a supersonic autofocus motor. Yet the camera itself couldn’t really keep up with that speed. That doesn’t mean it failed miserably when shooting wildlife and birds in flight; it just meant that, sadly, more than 50% of my final photos, even when using burst mode and fast shutter speeds, came out blurry.
So this is when the statement that “bird photography is all about the gear” proves to be true. And while it is recommended that, as you start and progress through your photography journey, lenses should be a priority over the camera, you do have to keep in mind that sooner rather than later your camera won’t be able to keep up with your lenses, especially those with supersonic autofocus.
After some years, I was able to switch to the Canon RP, offering more frames per second in burst mode and keeping up better with my lens’s autofocus than the 60D. As a wildlife photographer with a special interest in birds, the upgrade was necessary. With this combo, I was even able to photograph one of the tiniest hummingbird species in America, the bumblebee hummingbird (Selasphorus eloisa).
Bumblebee hummingbird flying towards colorful verbena flowers.
The Pricier The Camera, The Better?
I’ve switched brands since then and have had the pleasure of shooting with several Sony cameras, including the legendary a1. This camera offers photographers 30 fps in burst mode. The new a1 II offers the same fps, which can really support those who haven’t mastered shooting fast subjects. However, for more experienced photographers like myself, capturing hundreds of photos of the same exact moment could prove a bit cumbersome. After all, once you master shooting animals with fast shutter speeds, frames per second aren’t really essential for great photography. The battery life for these cameras is also short when using burst mode.
I also tested the a9 III—which offers photographers a whopping 120 fps—for a few months, and I felt the same way I did with the a1. Fortunately, for both models, you can reduce how many fps you get while in burst mode. But in that case, I’d rather go for “cheaper” cameras like the a7C (and its successors) or the a7 IV or the a7 V, offering better battery life when using burst mode, a decent amount of fps, and still offering photographers breathtaking results.
Left: Photo taken with a Sony a1. Right: Photo taken with a Sony a7C. Once you master your photography skills, the camera you’re using doesn’t really matter when it comes to getting beautiful results in your hummingbird photography.
As mentioned above—and aside from all these fps—pricier cameras do the exact same thing as more budget-friendly models, meaning you don’t really need the most recent and expensive camera to get beautiful images of tiny birds. As long as your camera can keep up with your lens’s autofocus (I use the FE 200-600mm F5.6-6.3 G OSS), that’s more than enough. Full frame cameras, however, work better with supersonic autofocus lenses than APS-C bodies. With all this in mind, all you have to do now is sharpen your skills.
Best Tips for Hummingbird Photography
When photographing hummingbirds, the gear is indeed important. However, if you don’t use this gear correctly and input the right settings, your photos are still going to be bad. So in the end, the winning formula for stunning hummer imagery is the gear plus your experience as a photographer. Practice does make perfect.
A berylline hummingbird flying toward pink lemon balm flowers. The Sony a7C’s electronic shutter created an interesting smudging of the bird’s wings. This effect happens when using older camera models’ electronic shutters with high shutter speeds in some Sony mirrorless cameras.
The golden rule for hummingbird photography is to use shutter speeds of 1/1,200 s or higher and activate burst mode to freeze the bird in flight. Look at the above photo and try to guess which settings I used before reading on.
For this particular image, I used a shutter speed of 1/1,600 s, an ISO of 500, as the day was overcast, and an aperture of f/6.3. The blurred and smudged wings could make you think I used a slower speed, but that’s the thing with hummers: extremely high speeds are needed for a completely frozen wing. Personally, I like to keep a bit of motion blur on the wings to make my photos look much more dynamic. As such, I rarely go beyond a speed of 1/2,000 s.
The smudged streaks come from the Sony a7C’s electronic shutter creating this effect at fast shutter speeds. However, if you activate your mirrorless camera’s mechanical shutter (regardless of whether it’s an older model), or if you’re using some of the newer models with the global shutter and large CMOS image sensors, this “effect” won’t happen anymore.
Another useful tip is to activate your camera’s continuous autofocus setting. This is also why full frame cameras work better for hummingbird photos: the continuous autofocus settings are faster and more precise than in APS-C cameras. The continuous autofocus will have your camera and lens continually focusing on your subject as it moves and changes position, as long as you do not release your shutter button or the autofocus lock button on your camera. This makes it much easier to track a hummingbird’s flight.
Sparkling-tailed hummingbird feeding off of a verbena plant. The photo was captured using the continuous autofocus setting.
Next, if your camera possesses this feature, activate the autofocus to search for “bird subjects” or “bird eyes” in the auto/manual focus menu (this depends on the brand and model that you use, but it should say something similar). This will make it easier for your camera to focus on the birds instead of the surrounding branches, for example. Narrower apertures like f/8 or f/11 will also make it easier for your camera to track and focus on the birds.
Keep in mind that as you continue to increase your shutter speed to freeze your subject, and if you choose a narrower aperture, you will have to adjust your ISO accordingly to prevent underexposed shots. Alternatively, you can also play around with your settings and go for slower shutter speeds to create some motion blur. Your imagination and creativity are the limit.
Lastly, try to shoot either during the early morning or after the midday sun has dimmed a little. Even though we’re using fast shutter speeds, intense lighting can result in some ugly-looking shadows. Overcast days, for example, create softer shadows and somewhat ethereal lighting. I prefer to shoot then rather than during clear, sunny days.
The above photo was taken during an overcast day. The light is diffused, and the hummingbird’s plumage still shines brightly, avoiding harsh shadows. In the bottom image, taken at midday with harsh sunlight, the bird is almost obscured by a dark shade caused by the harsh lighting.
Best Tips For Finding Hummingbirds
For some easy hummingbird encounters, try looking for tubular, bright-colored flowers in your area. You really don’t need to travel far to find some hummingbirds as long as you’re on the American continent. These tiny birds can be found in yards, gardens, and even urban parks, as long as there are flowers they can feed off of.
A female broad-billed hummingbird is feeding off of bright red tubular flowers. Hummingbirds of most species prefer these types of flowers.
Once you find your perfect spot near some flowers, it’s time to wait. Try some test shots with your current settings to check exposure and ensure that the autofocus is working correctly. You can use a tripod so that you don’t get tired holding your heavy lens, or you can go handheld. With high shutter speeds, it really doesn’t matter; it mostly comes down to your comfort. Finally, remember to keep some distance between you and the birds to avoid stressing them, and have fun while practicing your hummingbird photography.