
Canyons and slot-like rock corridors can trick you into thinking your camera is broken when the shadows go black and the bright areas go blank. If clean detail and believable color matter in high-contrast scenes, the approach in this video will push you to shoot differently and edit with more control.
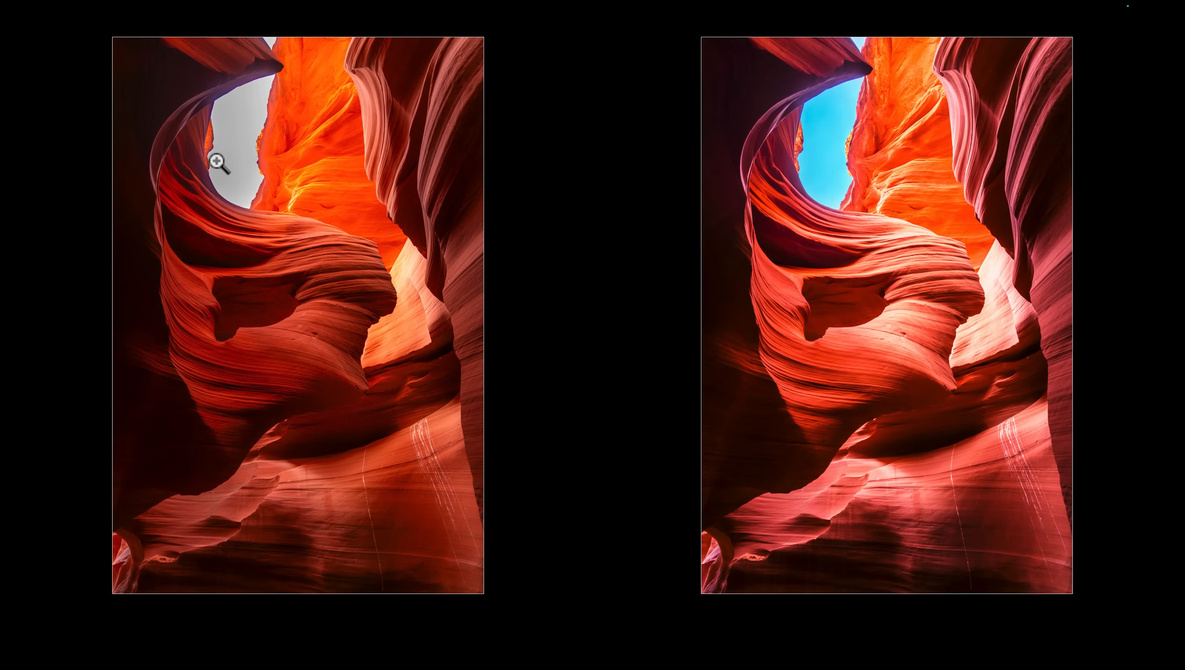
Coming to you from Serge Ramelli Photography, this ambitious video starts with Ramelli chasing a story about a single landscape photo selling for $6,500,000 and using that as fuel to go after a similar kind of image. He frames it as obsession in a good way: seeing a shape in the rock, wanting a very specific look, then committing to the process instead of hoping for luck. He shows the core problem fast: a normal exposure drops detail in the bright areas, while an HDR version holds more texture where the light hits. The point is not “HDR looks better,” it is that certain scenes contain more contrast than one frame can hold without sacrifices. You also get the promise up front that the files are hard to retouch, mostly because color and tonal balance get weird when the scene includes deep darkness right next to harsh sun.
Ramelli then shifts into a practical Lightroom workflow and uses an easy image first, which is a smart move because you see the building blocks before the hard stuff. He resets the photo to the raw starting point and shows how quickly clipped highlights appear once you start opening shadows and pulling highlights down. He admits a burned area has no information left, then shows a real decision: crop tighter to put attention on the rock shape he calls “the bull,” or accept the flaw and keep working. He uses a black point check with the Option key on Mac and the Alt key on Windows, which is useful if you tend to set blacks by feel and end up with flat shadows. Then he pushes the white slider to open the image, and you see how that can reveal texture while also making the brightest section more annoying.
After that, the video becomes less about sliders and more about shaping light in a way that still feels natural. He builds a diagonal “light ray” with a gradient, adds a little exposure, then uses negative clarity to diffuse it so it does not look like a hard overlay. He takes it further by subtracting the subject so the light sits behind the main rock form, which is the kind of small detail that sells the illusion. Then he moves into brush work with settings that keep edits from looking painted: high feather, moderate flow, moderate density, and repeated passes instead of one heavy stroke. He calls out a common mistake where brush settings make you think nothing is happening, then the result looks harsh once it finally shows up. He also introduces simple dodge and burn, brightening and darkening in selective spots to give the rock more volume without outlining edges.
The harder segment is the three-exposure HDR merge, and it is where capture discipline shows up as editing freedom. He explains the underexposed, normal, and overexposed frames and why slow shutter speeds push you to a tripod, plus a remote or a two-second self-timer so you are not touching the camera during the bracket. He also warns to turn stabilization off on a tripod, and he stresses focus choice so the final merge stays sharp across the frame. Once merged, he runs into edge problems that show up when you pull highlights down hard, including color fringing along high-contrast boundaries. He demonstrates cleaning that up with chromatic aberration removal and profile correction, then makes a small but telling adjustment: sometimes the fix is not “more correction,” it is backing off the sky darkening so the edge stops looking cut out. He finishes by copying the HDR edits onto a single normal exposure to show the difference, and the comparison makes it clear why bracketing is valuable. Check out the video above for the full rundown from Ramelli.