
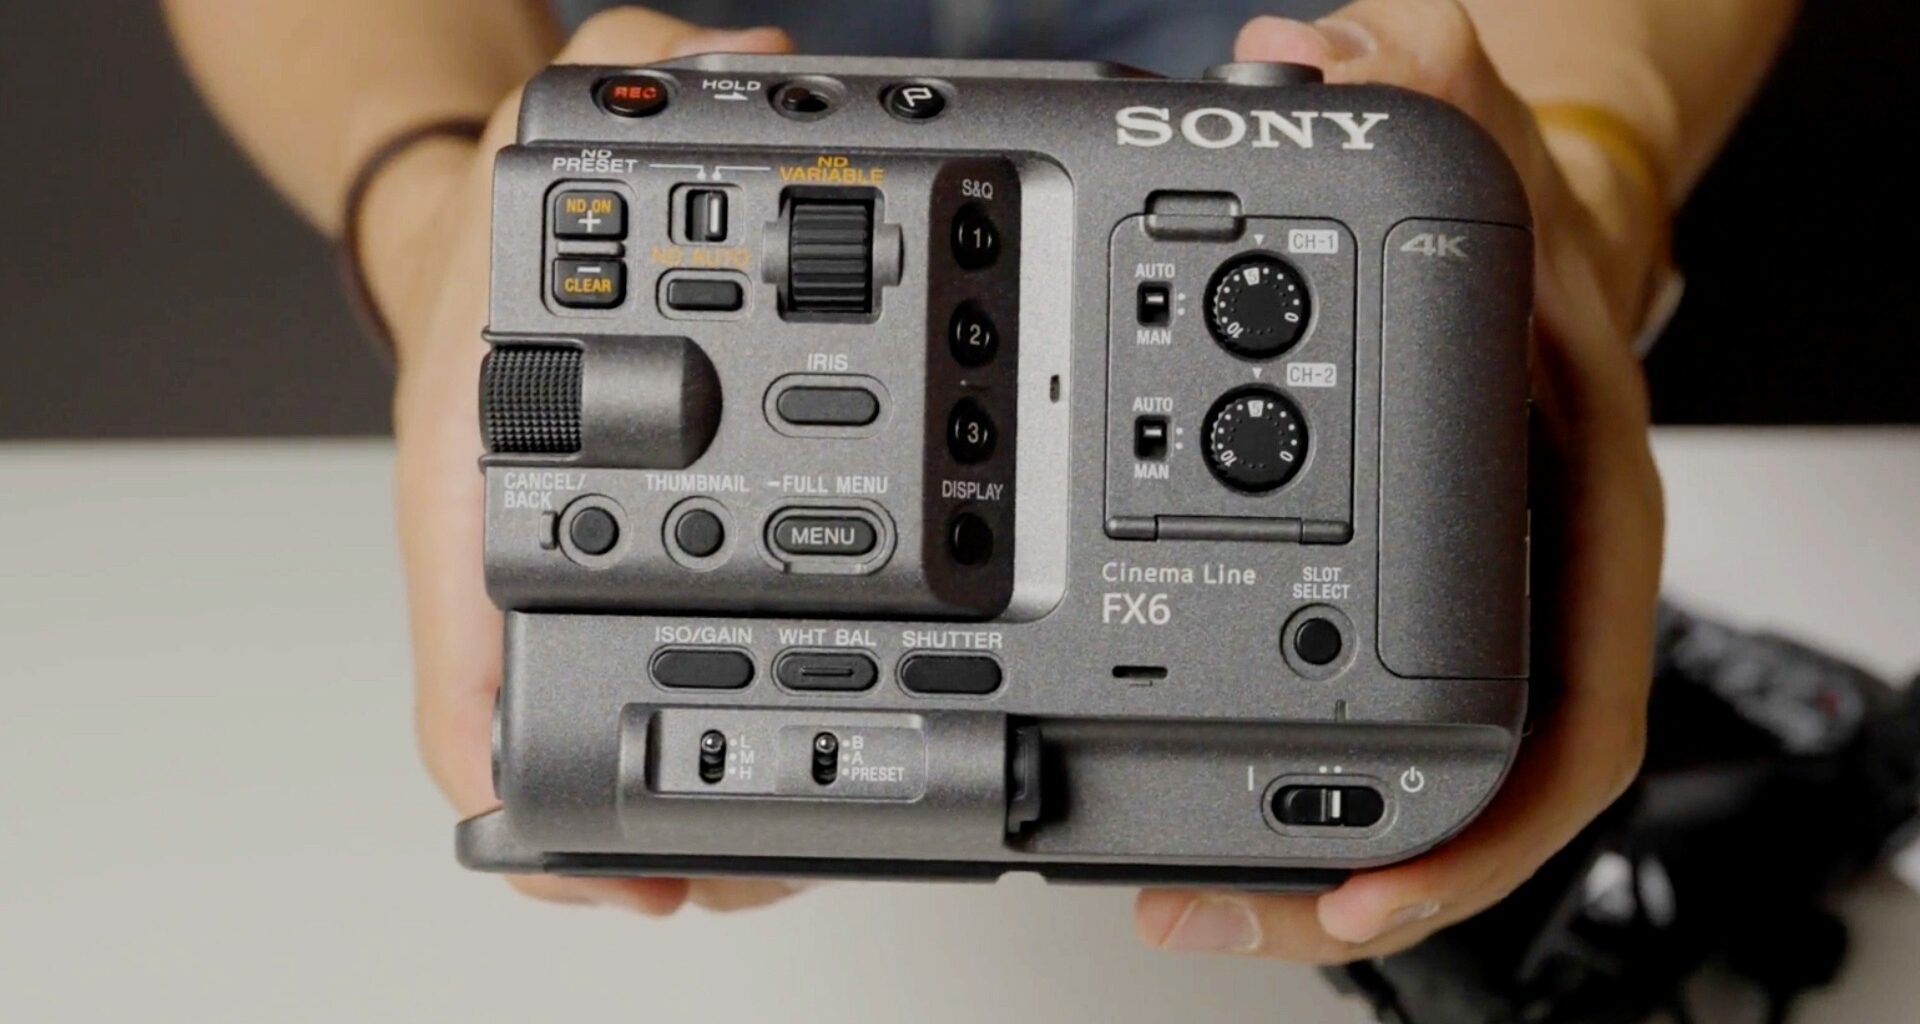

Sony Independent Certified Expert/Ambassador and long-time CineD friend Alister Chapman has produced a new video for Sony explaining how to use the Cine EI mode correctly on Sony’s F-series Cinema Line cameras. The tutorial cuts through the confusion between ISO and Exposure Index and makes a strong case for Cine EI as your default shooting mode when maximum image quality is the goal.
Cine EI is Sony’s professional exposure workflow, borrowed from high-end cinema cameras like the Venice 2, and it is available across the Cinema Line from the FX3 and FX6 through to the FX9. We have covered Alister’s deep dive into the FX6’s CineEI mode before, and he has also delivered a free 90-minute FX6 masterclass covering broader camera operation. This latest Sony-commissioned video condenses the essential Cine EI principles into a focused, accessible explainer that applies across the whole F-series range.
ISO vs. Exposure Index: clearing up a common misconception
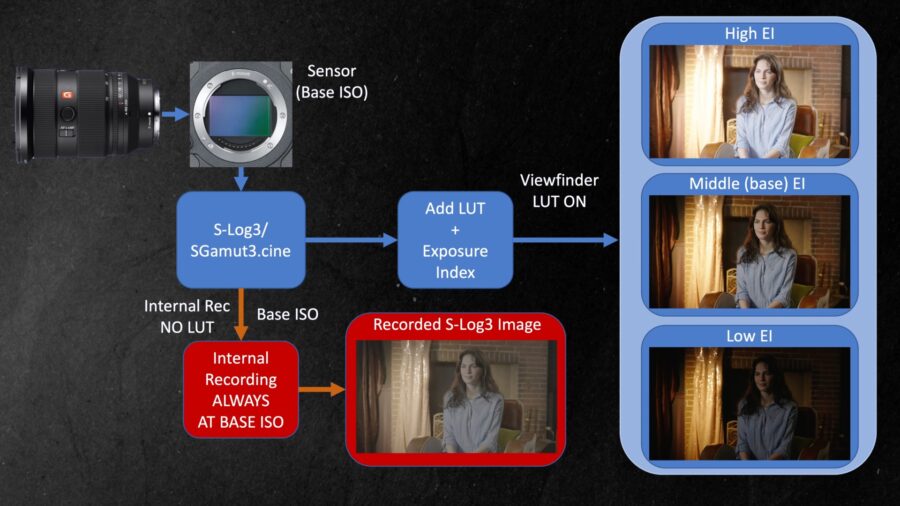
One of the most frequent points of confusion for shooters new to the Cinema Line workflow is the relationship between ISO and Exposure Index (EI). Alister is direct: they are not the same thing. ISO is the recording sensitivity of the camera, a fixed technical parameter. EI, on the other hand, controls the brightness of the monitoring LUT applied to the output, not the actual recording. A high EI value makes the LUT brighter; a low EI value makes it darker. Critically, neither adjustment changes what the sensor records at the hardware level.
Cine EI locks the camera to its base ISO, the setting at which the sensor delivers maximum dynamic range and minimum noise. Raising the ISO through flexible ISO mode does increase apparent sensitivity, but it also adds gain, which introduces noise and compresses dynamic range. Alister acknowledges that flexible ISO has its place in very dark environments where Cine EI simply cannot provide enough exposure, but he is clear that using it comes at a measurable cost to image quality.
 Sony FX6. Credit: CineDHow EI shifts the exposure midpoint
The mechanism behind Cine EI is elegant once understood. When the camera is locked to base ISO, the EI setting shifts the apparent brightness of the LUT image in the viewfinder or on a monitor. If you set the EI lower than the base ISO, the monitoring image appears darker, prompting you to compensate by opening the aperture, removing ND, or adding light. The result is more photons hitting the sensor, producing a brighter underlying recording with greater shadow detail and reduced noise, though with reduced highlight headroom.
The inverse applies with a higher EI setting. A brighter monitoring image prompts you to stop down or add ND, placing less light on the sensor, resulting in a darker recording. This preserves more highlight range but reduces shadow latitude and increases noise. For the majority of situations, Alister recommends simply matching the EI to the base ISO, resulting in no offset and a correctly exposed recording. The choice to deviate from that default should be driven by scene content: lower EI for shadow-heavy scenes where preserving gradation in dark areas matters, higher EI for scenes with demanding highlights.
 Credit: SonySpecial considerations for the FX3 and FX6 at high base ISO
The FX3 and FX6 both operate at a high base ISO of 12,800 for low-light shooting. At this setting, Alister notes the cameras are somewhat noisier than they are at 800 ISO base. To compensate, he recommends using an EI value between 3200 and 6400 when shooting at the high base ISO. Setting EI to 6400, for example, places an extra stop of light on the sensor, producing a brighter recording that can then be brought down slightly in post-production, effectively reducing the perceived noise. This is a subtle but meaningful advantage in demanding low-light work.
For operators who prefer a more automated approach, both cameras offer a Cine EI Quick mode, which automatically switches between the low and high base ISO as the EI value is adjusted. The transition point has been optimised by Sony for the best possible noise performance, making it the most straightforward entry point into the Cine EI workflow for those less familiar with manual base ISO management. As we reported when Sony added Cine EI Quick to the FX6 via firmware, the feature had previously been available on the FX3 and FX30 before being rolled out to the broader Cinema Line.
 Recording image flow: Credit: Alister ChapmanUsing zebras and a white card for exposure verification
Beyond eyeballing the viewfinder image, Alister demonstrates a practical, objective exposure verification method using a white card and zebras. When using Sony’s default 709 LUT, a white card or standard white paper should register at 77%. Setting zebras to 77% and adjusting exposure until the zebras cover the white card confirms correct exposure without any guesswork. On the FX6 specifically, a yellow reference line will appear across the built-in waveform display when zebras are set to 77%, providing a second, waveform-based confirmation. One important caveat: the FX6’s waveform measures the signal on the HDMI or SDI output, so the LUT must be enabled on whichever output is being measured for the reading to be accurate.
If you are new to the Cine EI workflow and want a broader look at how it fits into the Sony FX30’s S-Log3 shooting philosophy, our earlier explainer covers the fundamentals in detail. Alister’s new video, produced directly for Sony, is a concise and well-structured resource for anyone shooting on F-series cameras who wants to get a firmer grip on how and why Cine EI delivers the best possible image to take into the grade.
Do you regularly use Cine EI on your Sony Cinema Line camera, or do you prefer Flexible ISO or Custom mode for your workflow? Don’t hesitate to let us know in the comments below!