
Getting skin tones right in post-processing is one of those things that separates a good portrait from a great one. The difference usually comes down to a handful of specific adjustments most people skip.
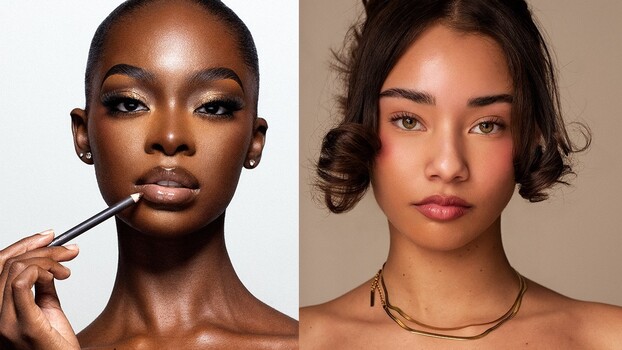
Coming to you from Prince Meyson, this practical video walks through a software-agnostic workflow for achieving rich, warm skin tones whether you’re shooting lighter or darker skin. Meyson works in Capture One but deliberately avoids tools exclusive to that software, like the skin tone color editor, so the technique translates directly to Lightroom, Photoshop, DxO PhotoLab, or anything else that handles raw files. Before even opening an editing app, he makes the case for calibrating your monitor, since most screens ship with oversaturated color profiles that will throw off every decision you make in post. Shooting with the correct white balance and in Raw are the other two things he flags before any editing begins.
The core of his approach comes down to warmth and magenta. Meyson’s position is clear: skin tones are meant to be warm, and a lot of edited images leave them looking cool and pale because nobody pushed the temperature in the right direction. He also adds contrast not by dragging a contrast slider, but by pulling in the whites and blacks separately using levels, which gives the image more life without flattening the midtones. From there, he selects the subject, isolates the skin, and adds a small amount of magenta, a move that addresses the greenish cast many skin tones carry and brings out natural-looking color and blush.
What makes this approach work beyond just skin selection is the separation step. Meyson shifts the background slightly toward green while keeping magenta in the skin, which pushes the subject forward visually without any dramatic editing. It’s a complementary color relationship: magenta in the foreground, green in the background. He also reduces background saturation slightly to keep the focus on the subject. The second image in the video, shot on a white backdrop, gets the same treatment, and the before-and-after comparison makes the difference obvious even though each individual adjustment is subtle.
One thing he mentions toward the end is worth paying attention to: if the saturation from these adjustments feels too heavy, he doesn’t roll it back in Capture One. Instead, he takes the file into Photoshop and adds a tint or two there as a final step. That’s a workflow detail that doesn’t come up much in tutorials like this, and it points to how he thinks about the relationship between raw editing and final output. There’s more in the video on how he handles masking across two different images and how he balances warmth between the face and body when they’re reading differently on screen. Check out the video above for the full rundown from Meyson.