
Have you heard about back-to-front motherboards? They move all of the fiddly cable connectors to the rear side of the board, eliminating the hardest part of PC building and giving you a clean look besides. The concept took off a few years ago, and it’s now possible to find relatively affordable motherboards from MSI (“Project Zero”), Asus (“BTF”) and Gigabyte (“Stealth”). I was aware of the concept, but it wasn’t until I built in one recently that I realised what a game-changer it is – especially for first-time PC builders.
I got the idea to try this when I received the H3 Flow Micro ATX case from NZXT; it’s one of an increasing number of cases that comes with the necessary cutouts. I picked up a used MSI Project Zero B850M motherboard on Ebay for £160 (one of my favourite ways to build PCs on a budget), then plugged in a selection of parts from the white gaming PC I built for Eurogamer in 2025 with an NZXT Kraken 240 Plus AiO.
It’s common to hear that building a computer is just like adult Lego, and with a back-to-front motherboard, that actually feels kind of true. After you’ve installed the CPU into the motherboard, which remains a bit nervy, there’s no real potential to mess anything up – it’s just a case of popping in your RAM and SSD, mounting the motherboard, then adding the cooler, GPU and power supply. If you can use a screwdriver and push a thing into another thing, you’re pretty much there.
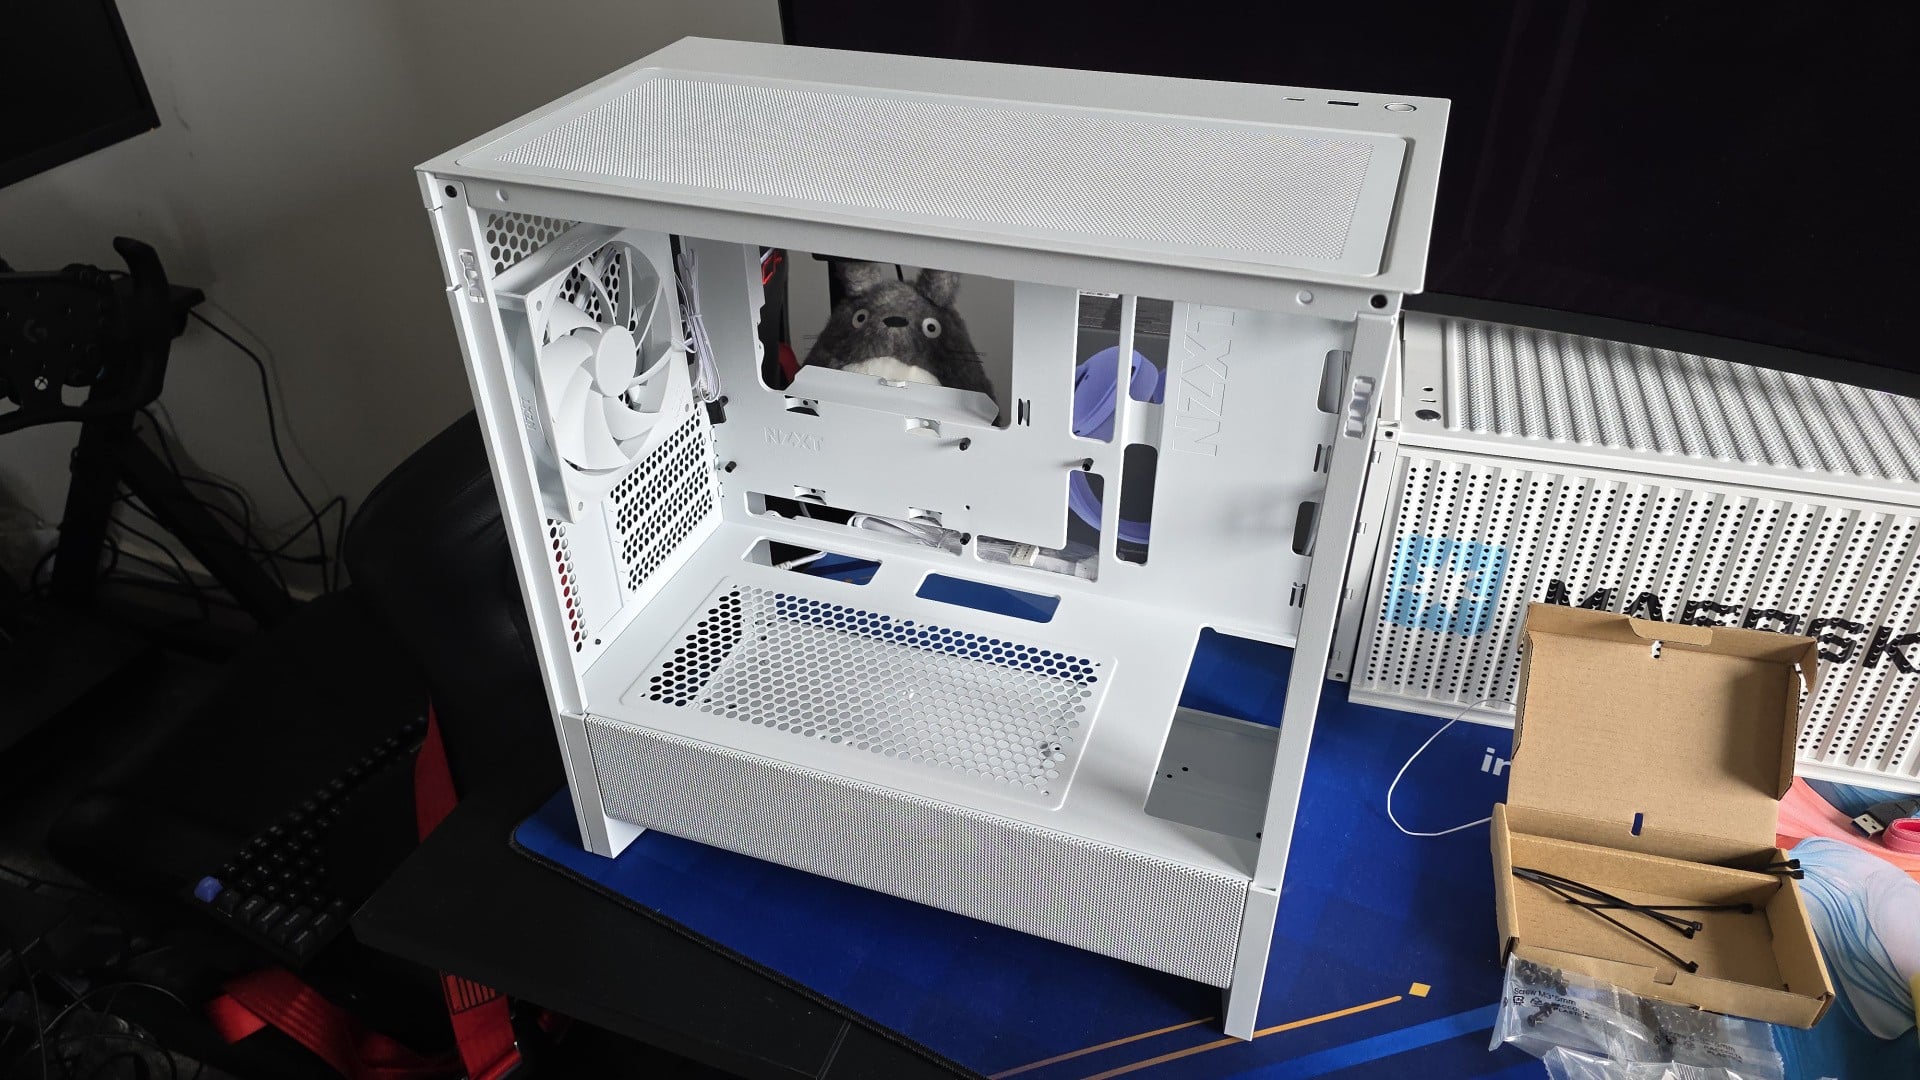 Here’s the case we’re starting with, the NZXT H3 Flow. You can see the extra cutouts that allow our backwards-facing ports to be accessible from the back side of the case. Please excuse Totoro, he’s just very excited to be involved.
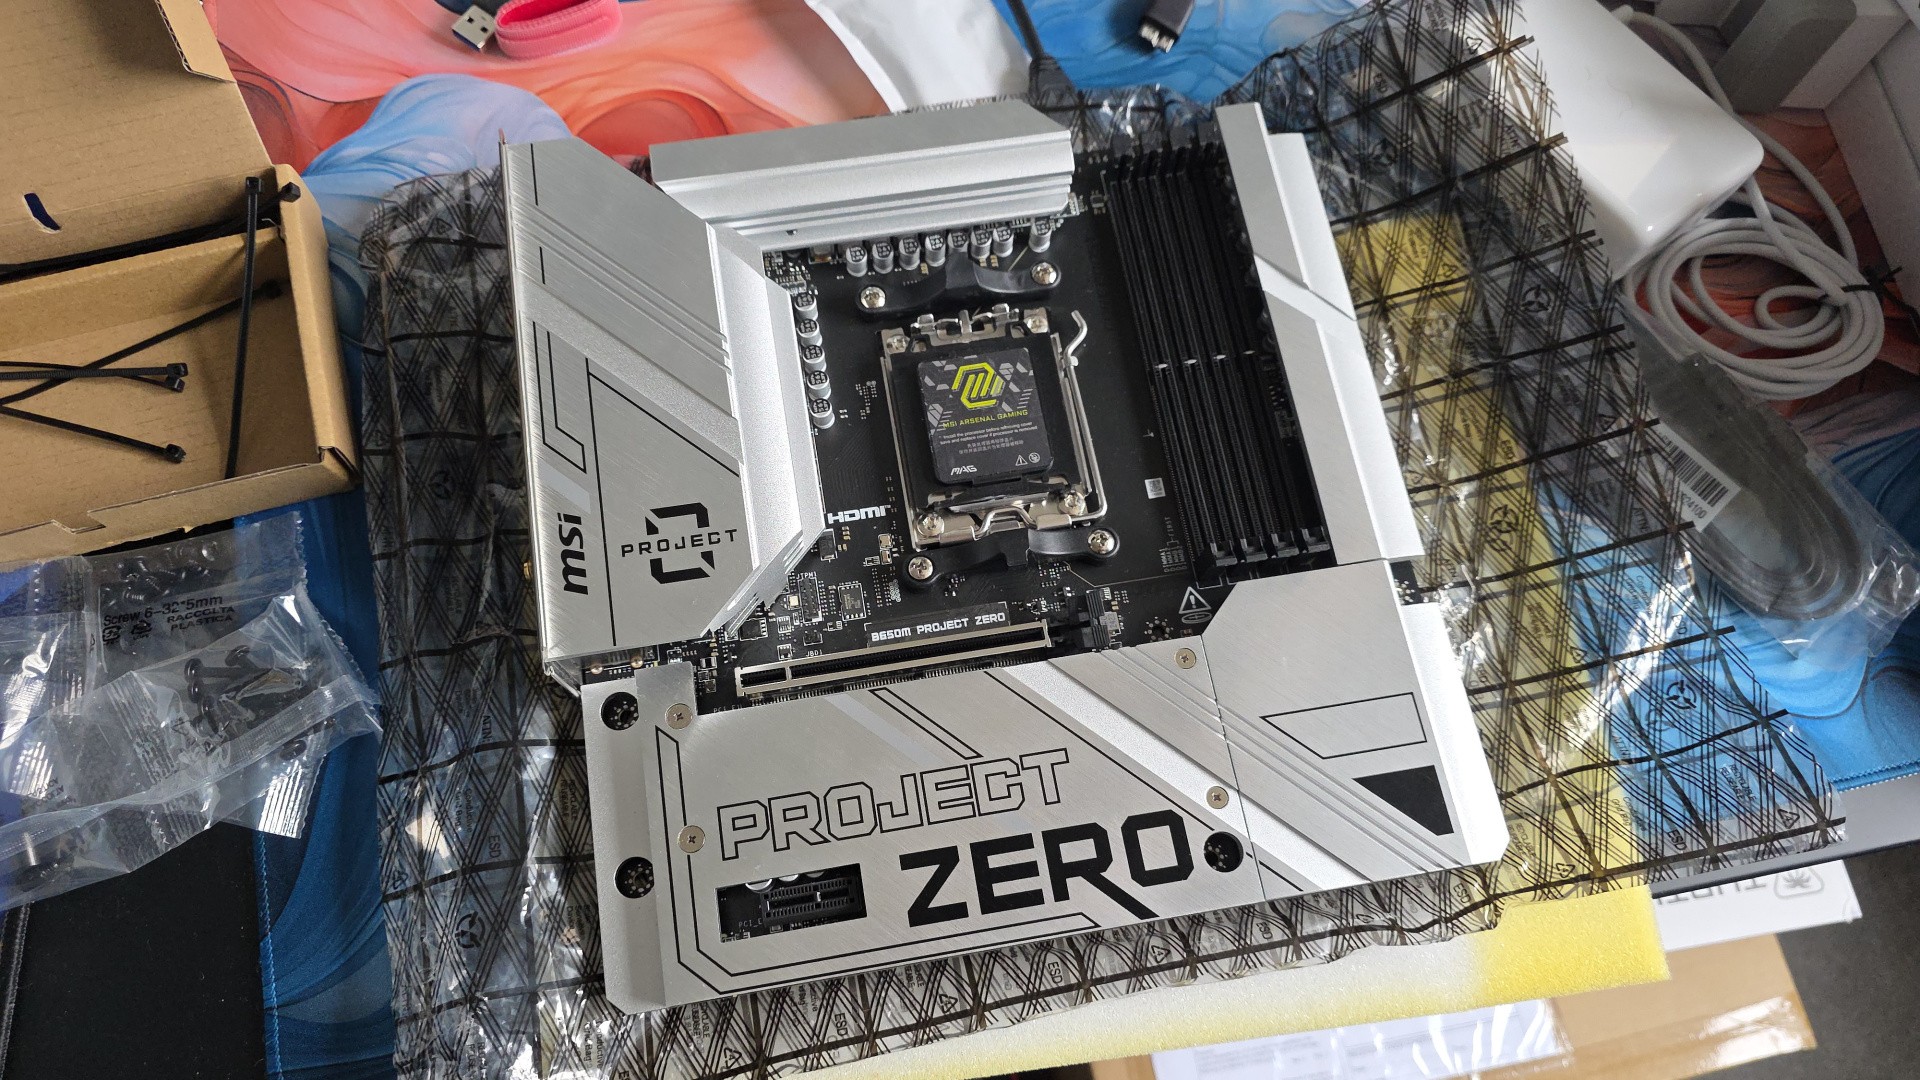 And here’s the motherboard, the MSI B850M Project Zero. It’s a mid-range choice, and purchased used it feels reasonably priced at £160.
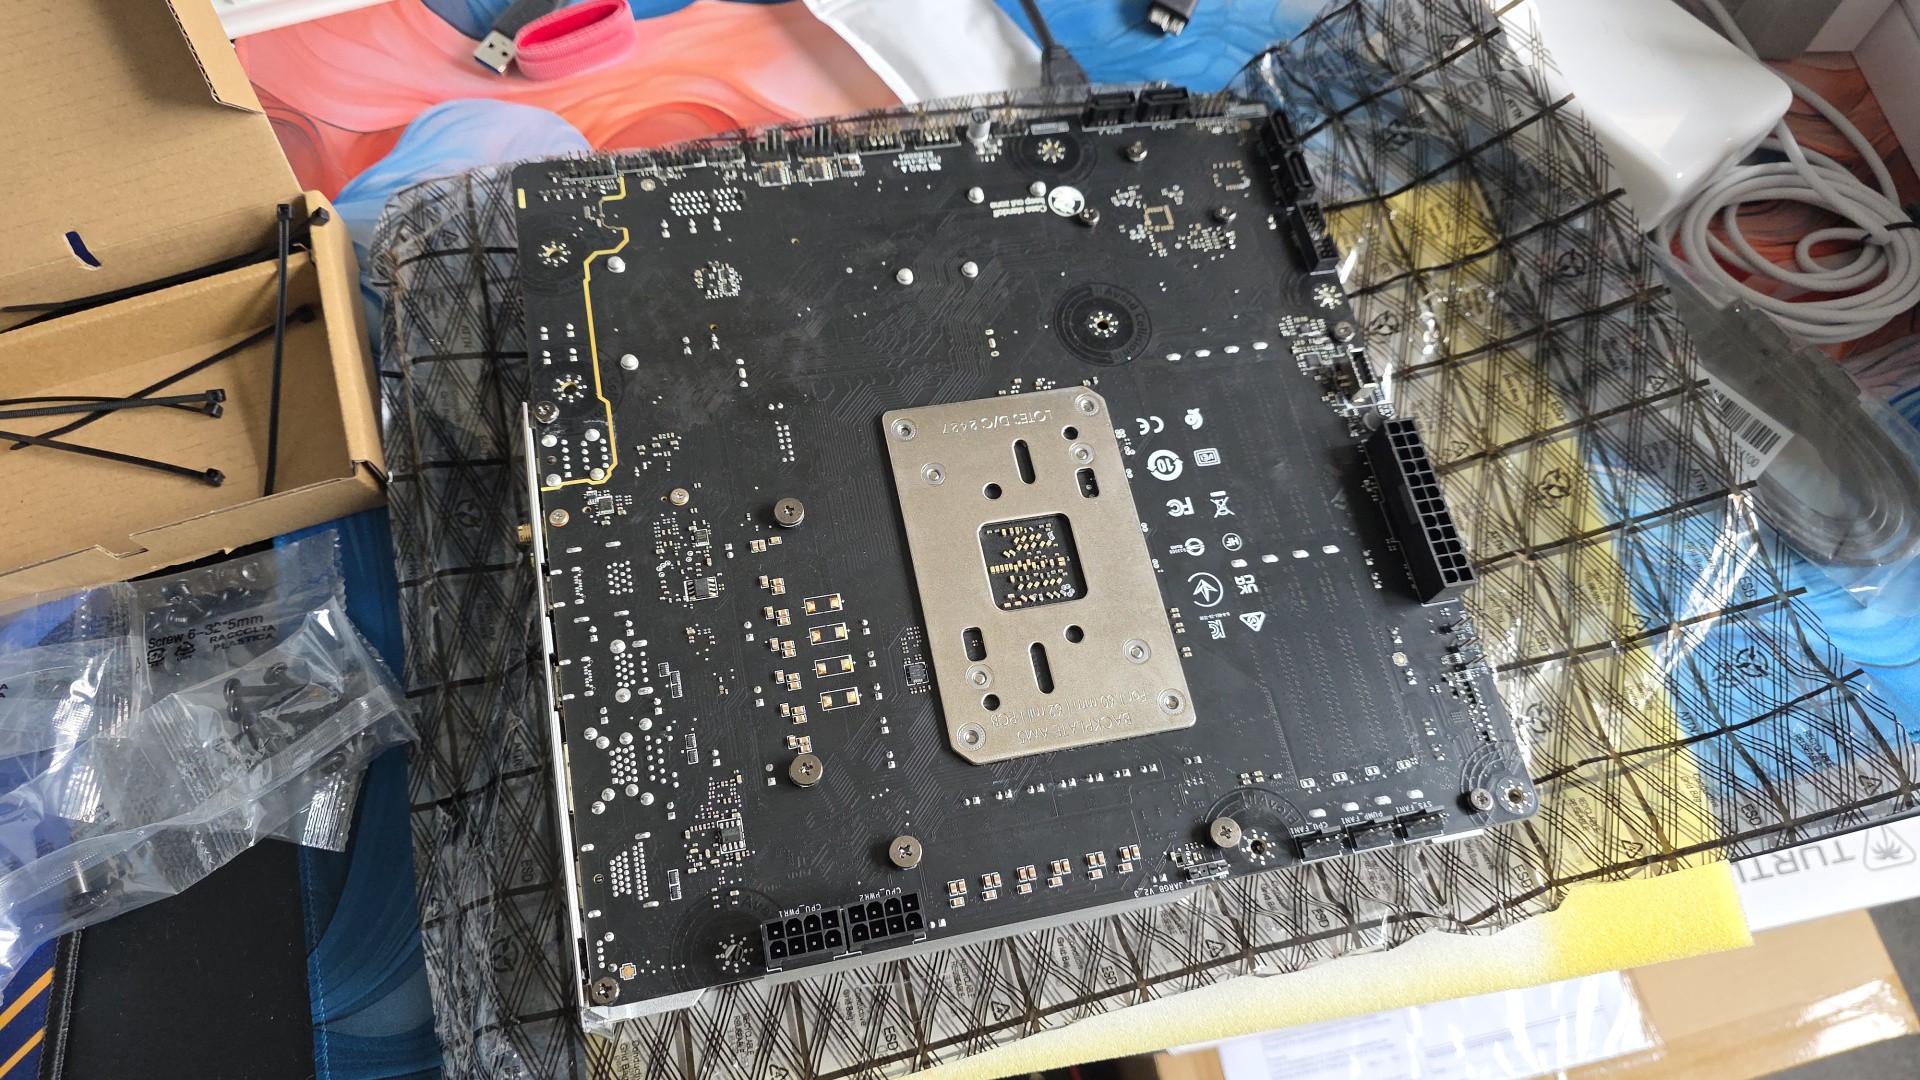 The back of the motherboard is where the magic happens – all of the power, front panel, fan and other connectors have been moved to this side.
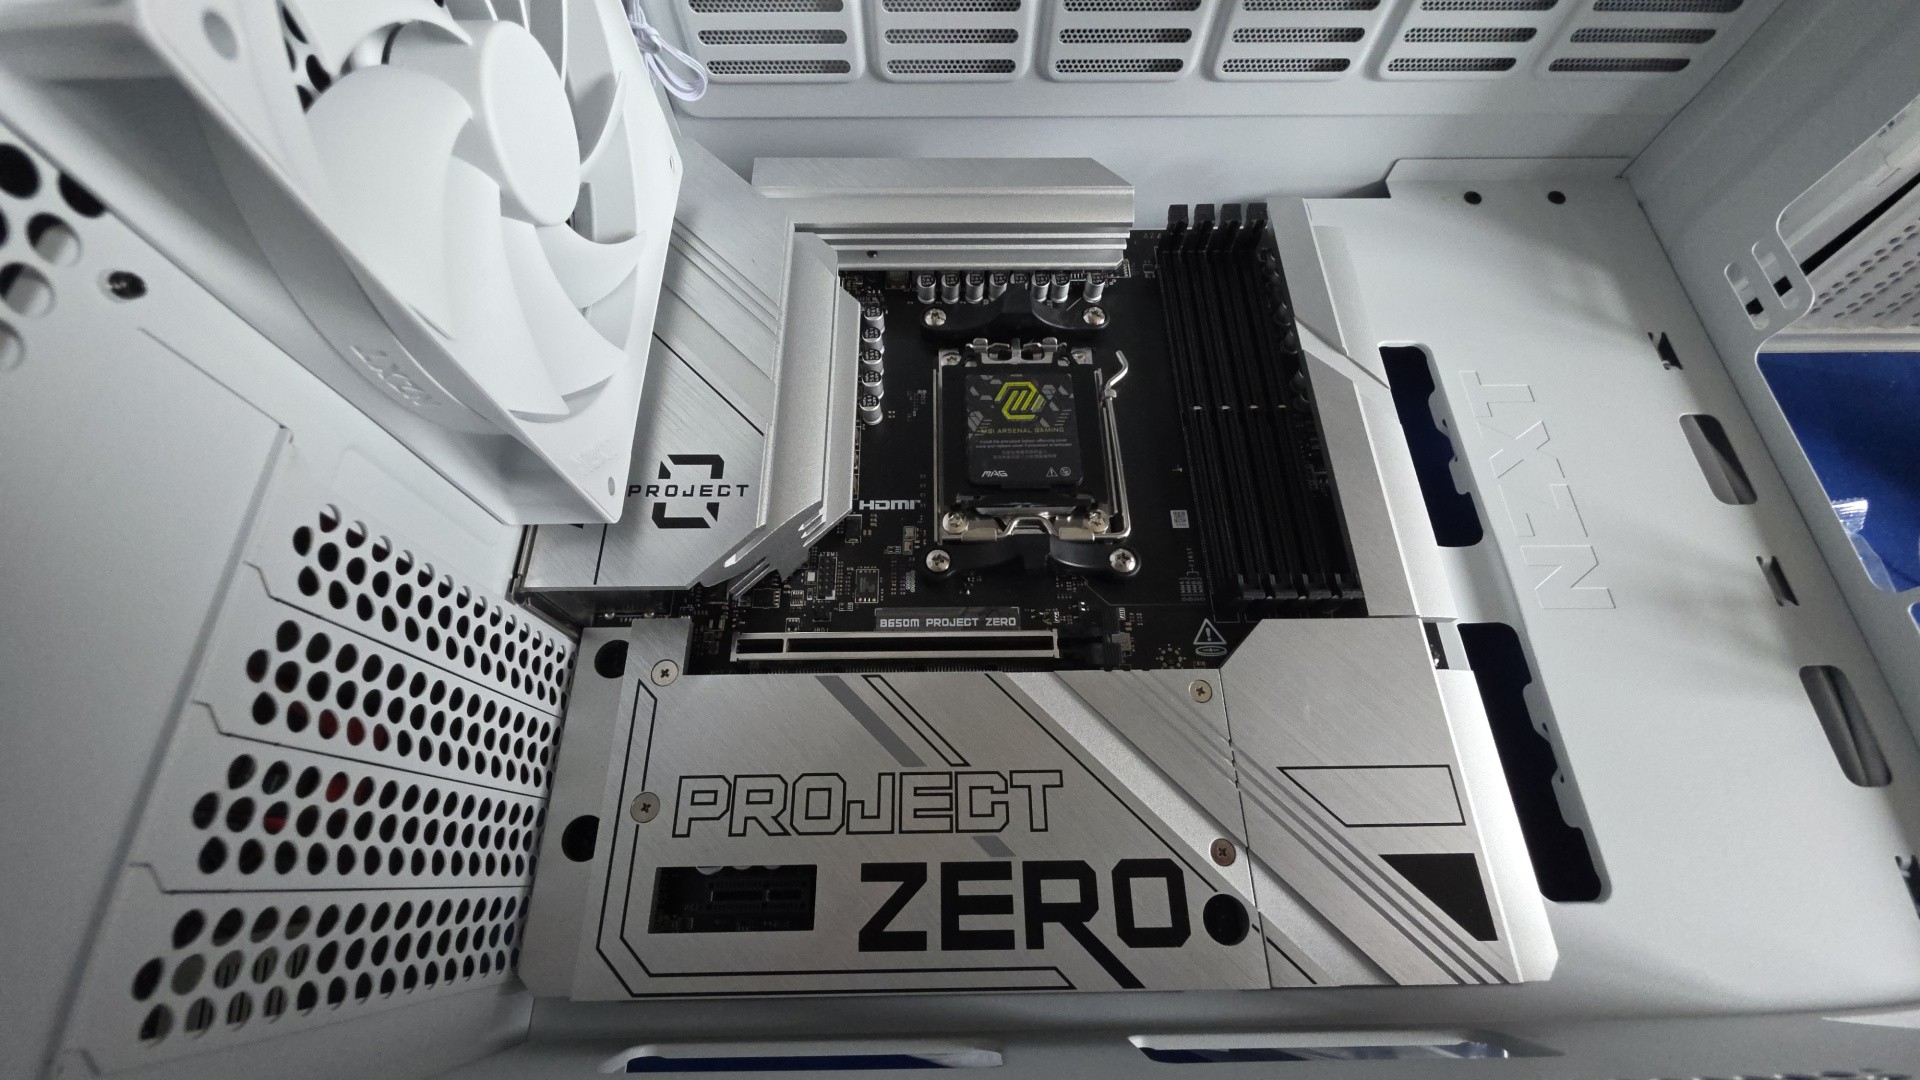 Installing the Project Zero motherboard is no different to any other Micro ATX alternative – just put the board in position and use the screws provided with the case to secure it.
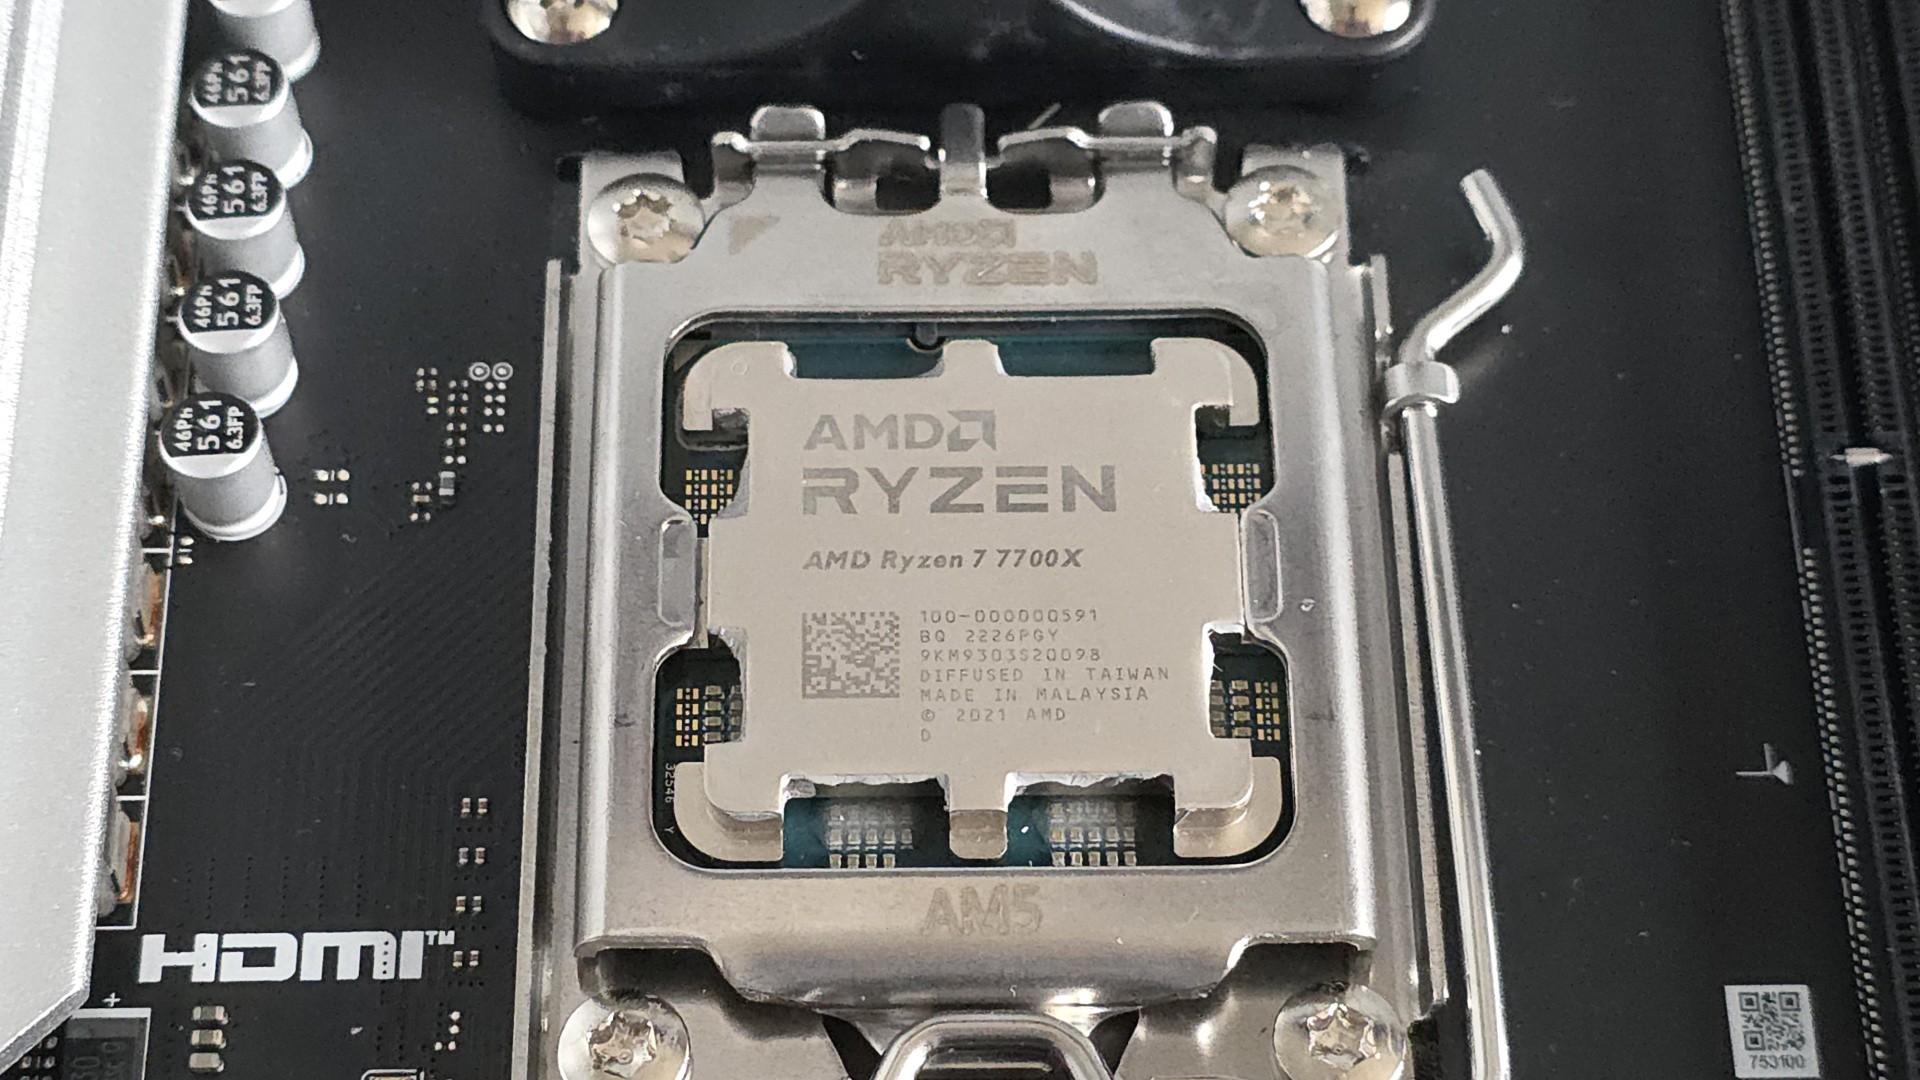 Installing the CPU is the only tricky part, so you could do it before installing the motherboard in the case if that’s easier. Just make sure the triangle markings on the CPU and the motherboard line up, place it in gently, then secure.
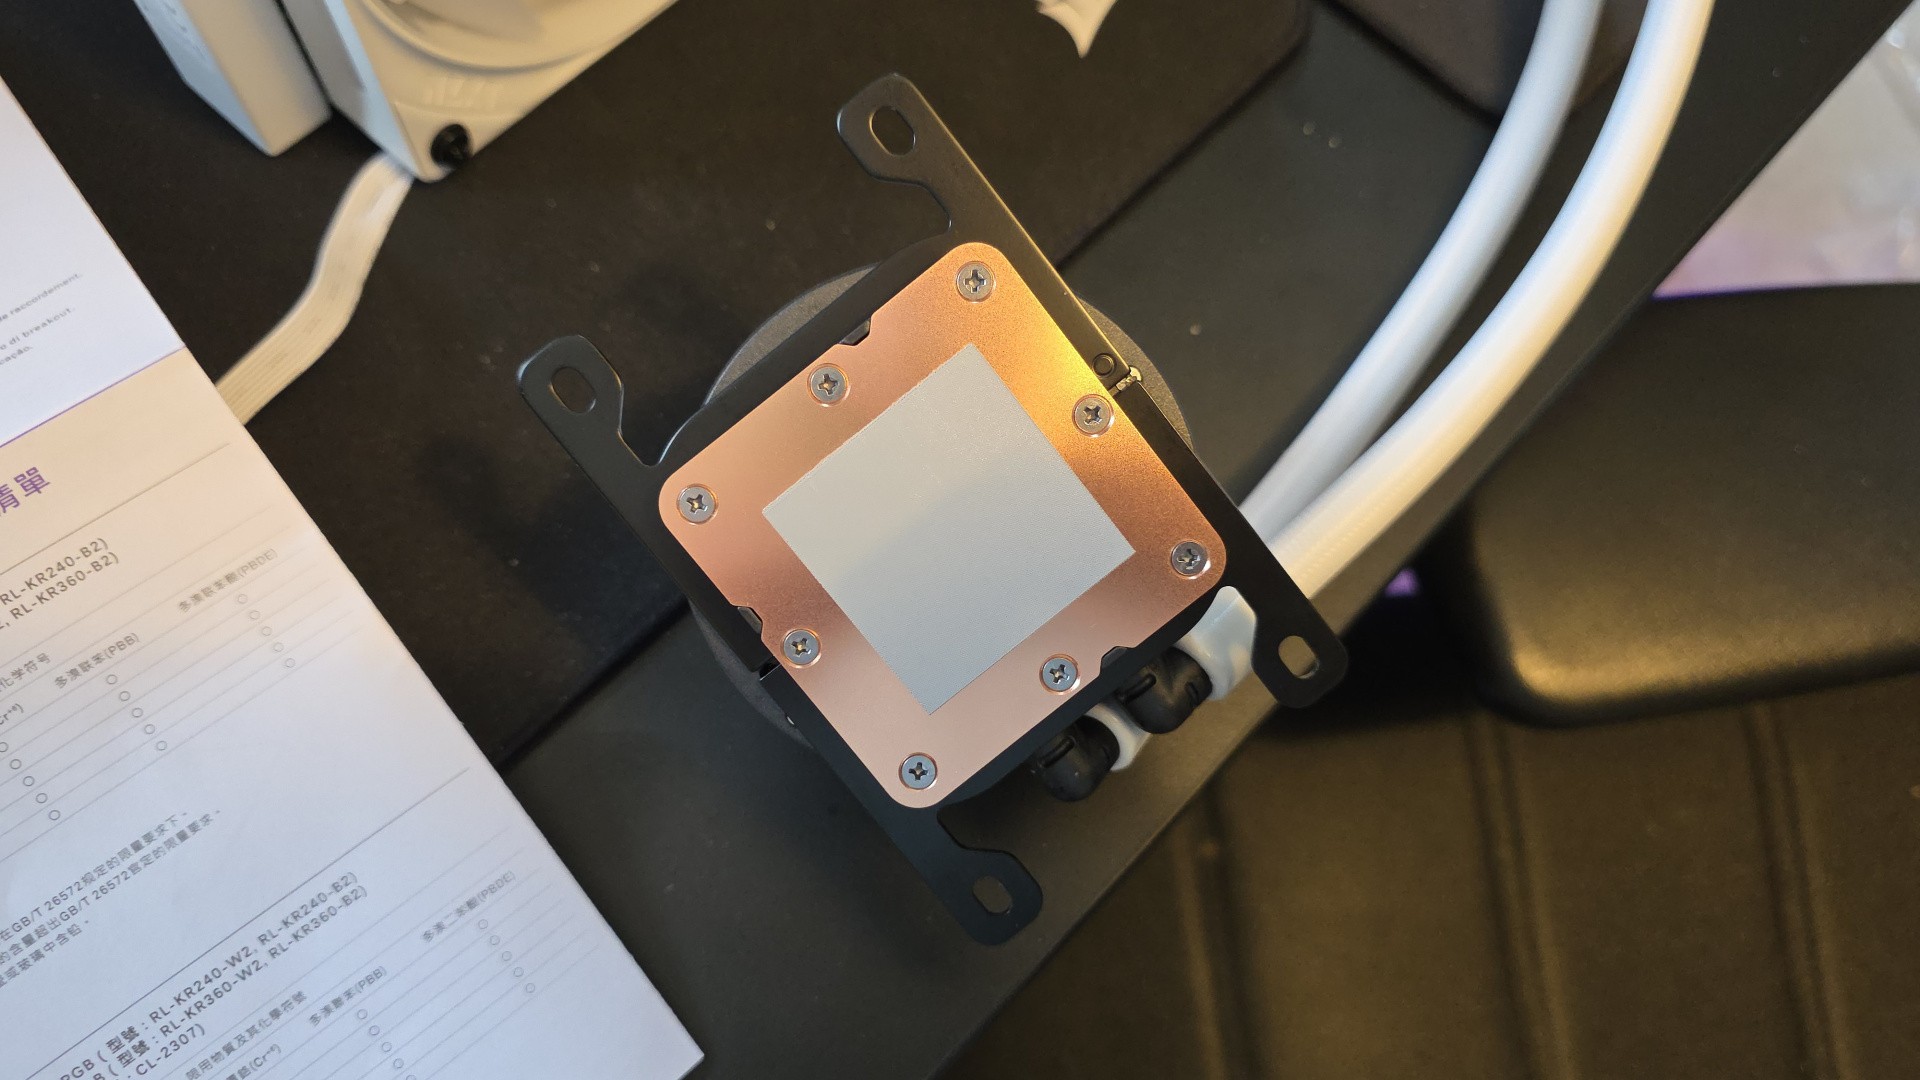 Our NZXT Kraken 240 Plus CPU cooler comes with thermal paste pre-applied, so that’s another thing we don’t have to worry about doing ourselves.
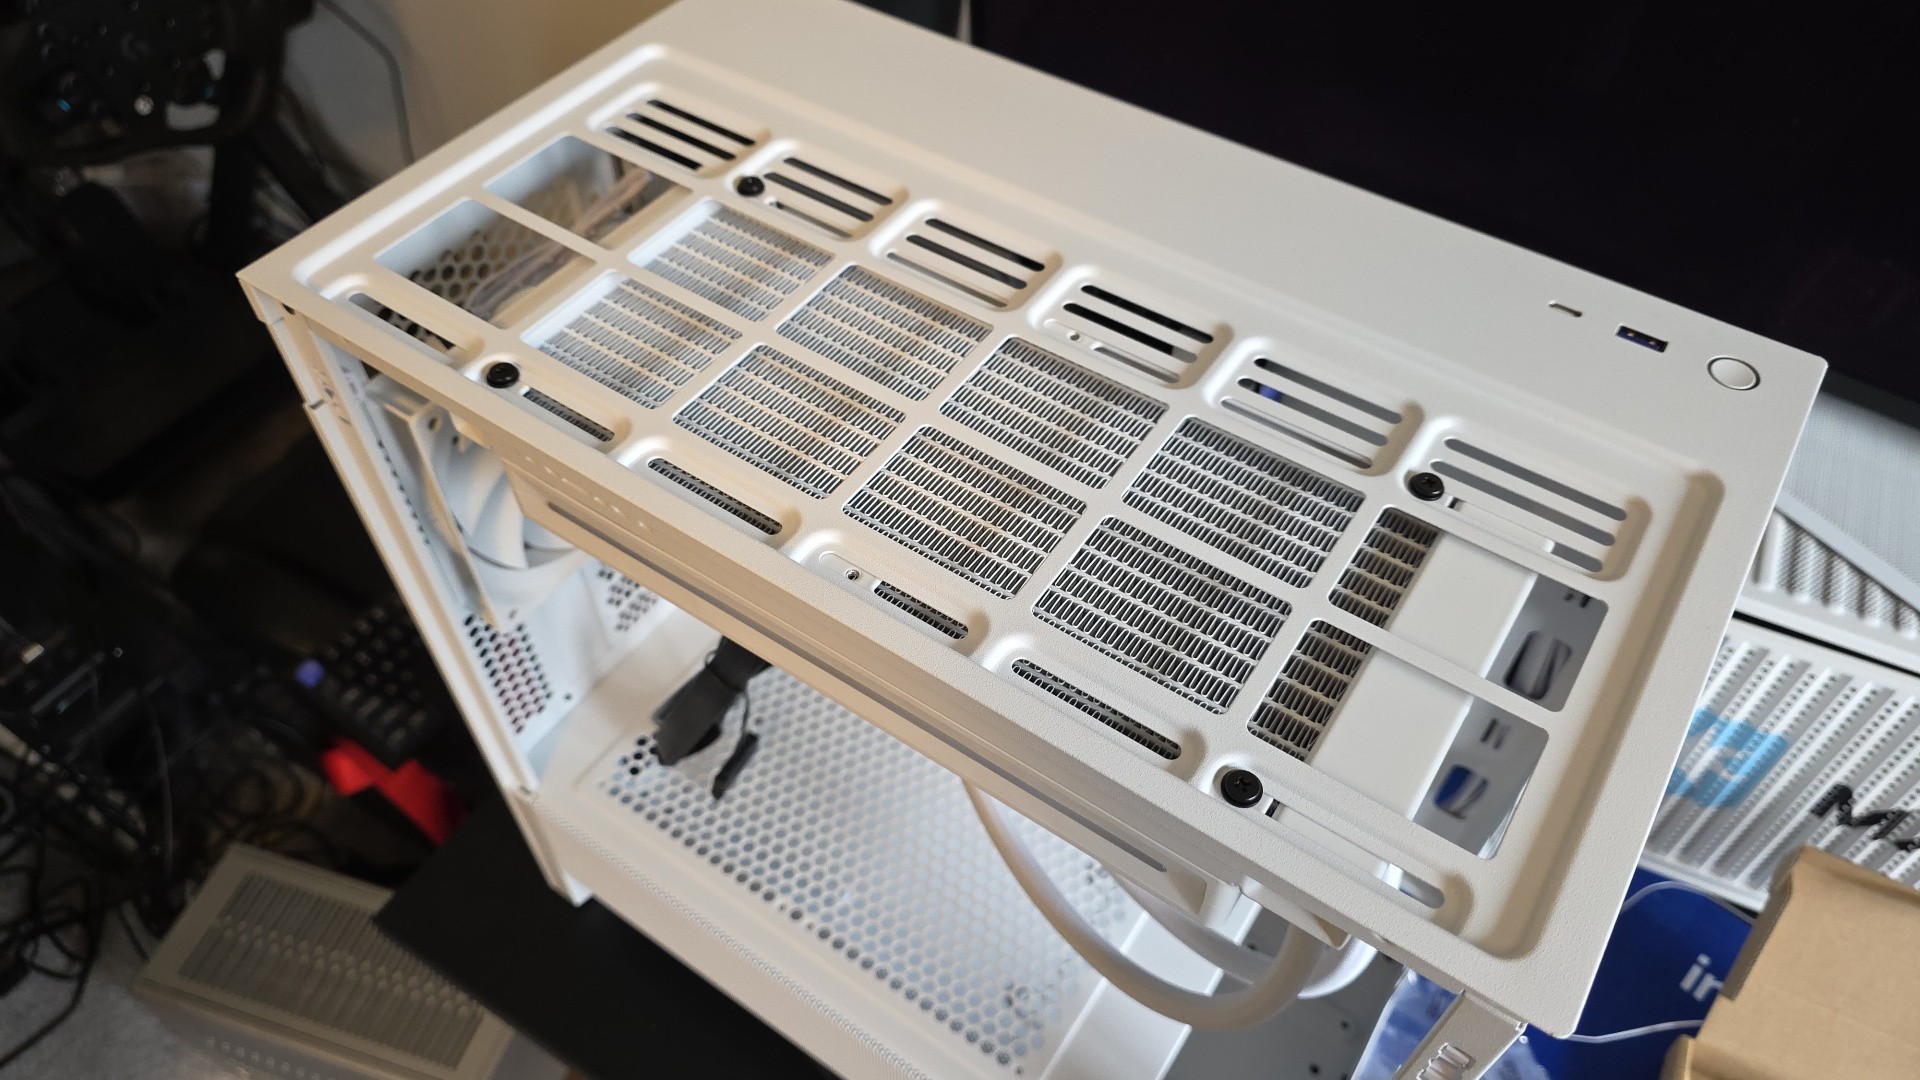 Our AiO is going on the top of the case, so the fans are screwed into the radiator with four long screws, then the radiator is screwed into the top of the case with short screws. A dust filter will hide the screws from view.
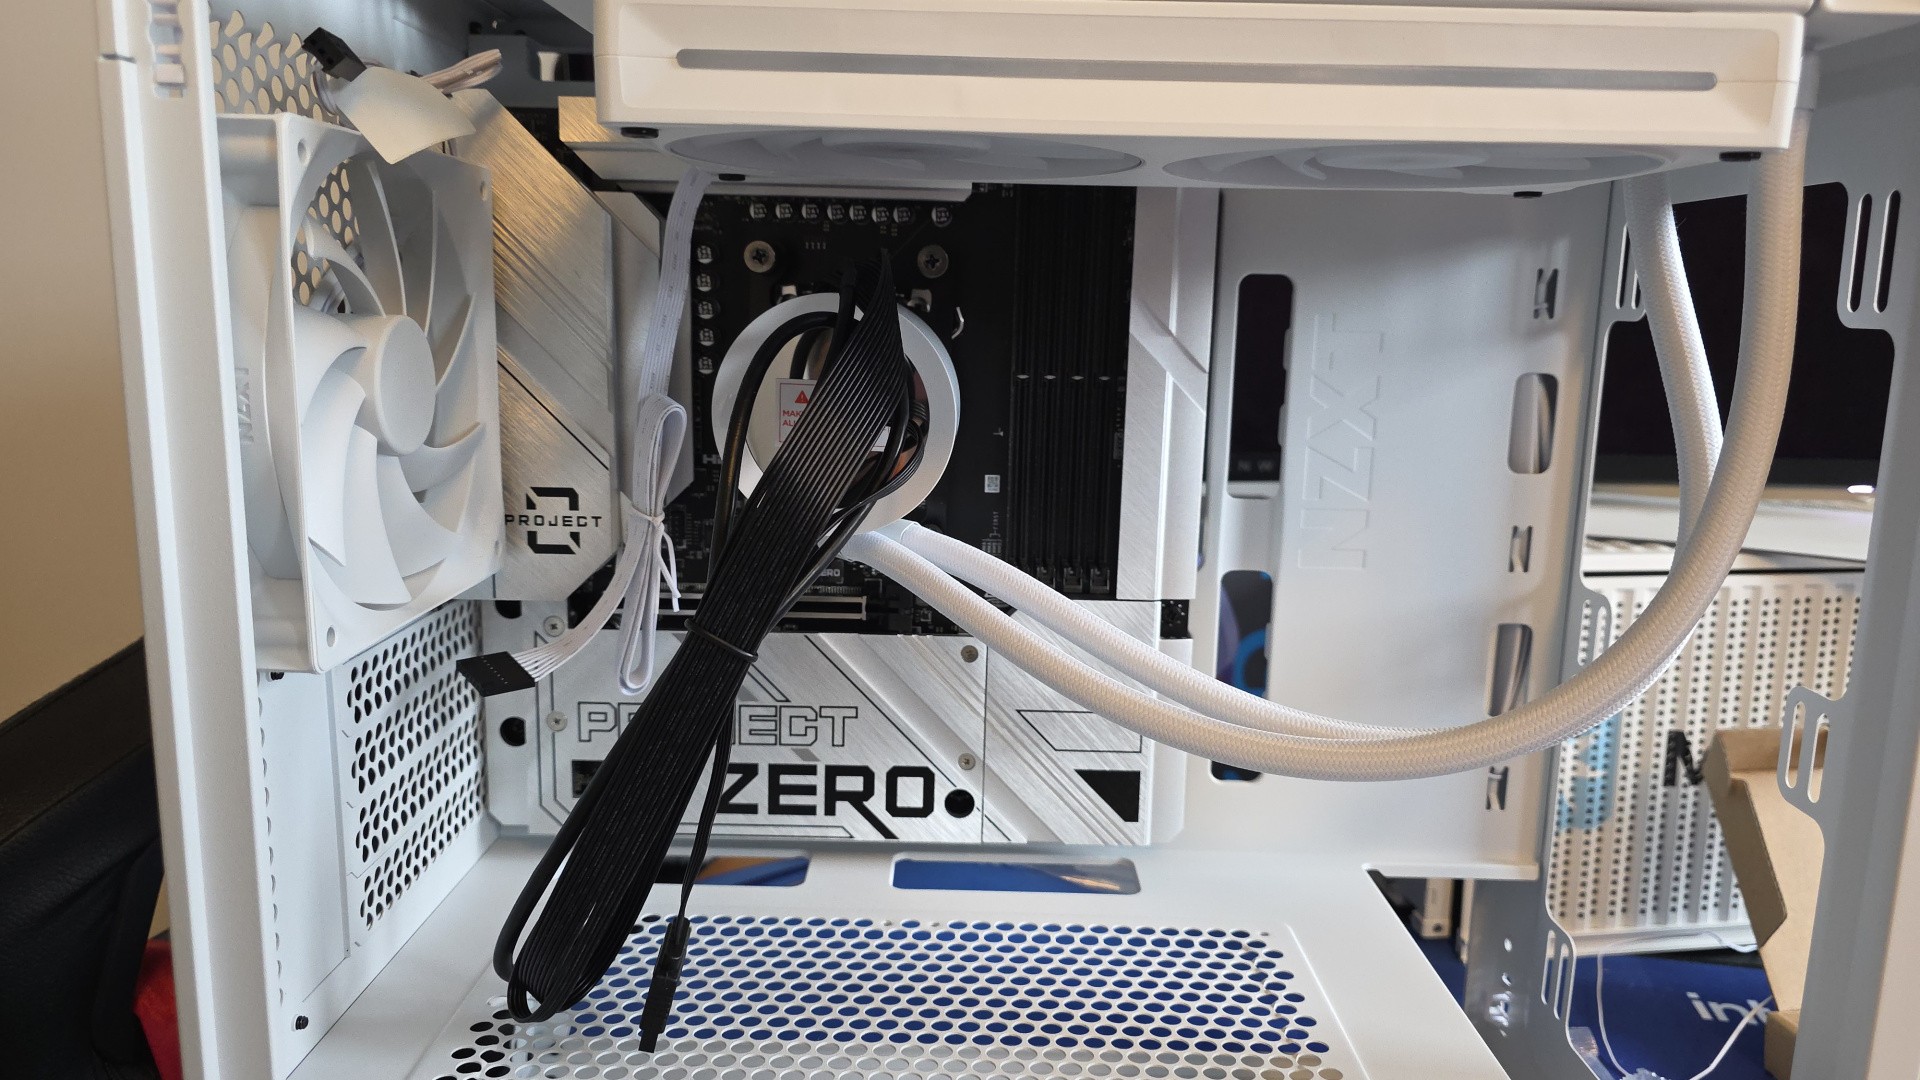 Installing the CPU block is also easy – just unscrew the default AMD mounting solution, then add the NZXT standoffs by hand. Push the CPU block onto the standoffs, then secure it with thumbscrews. No tools required.
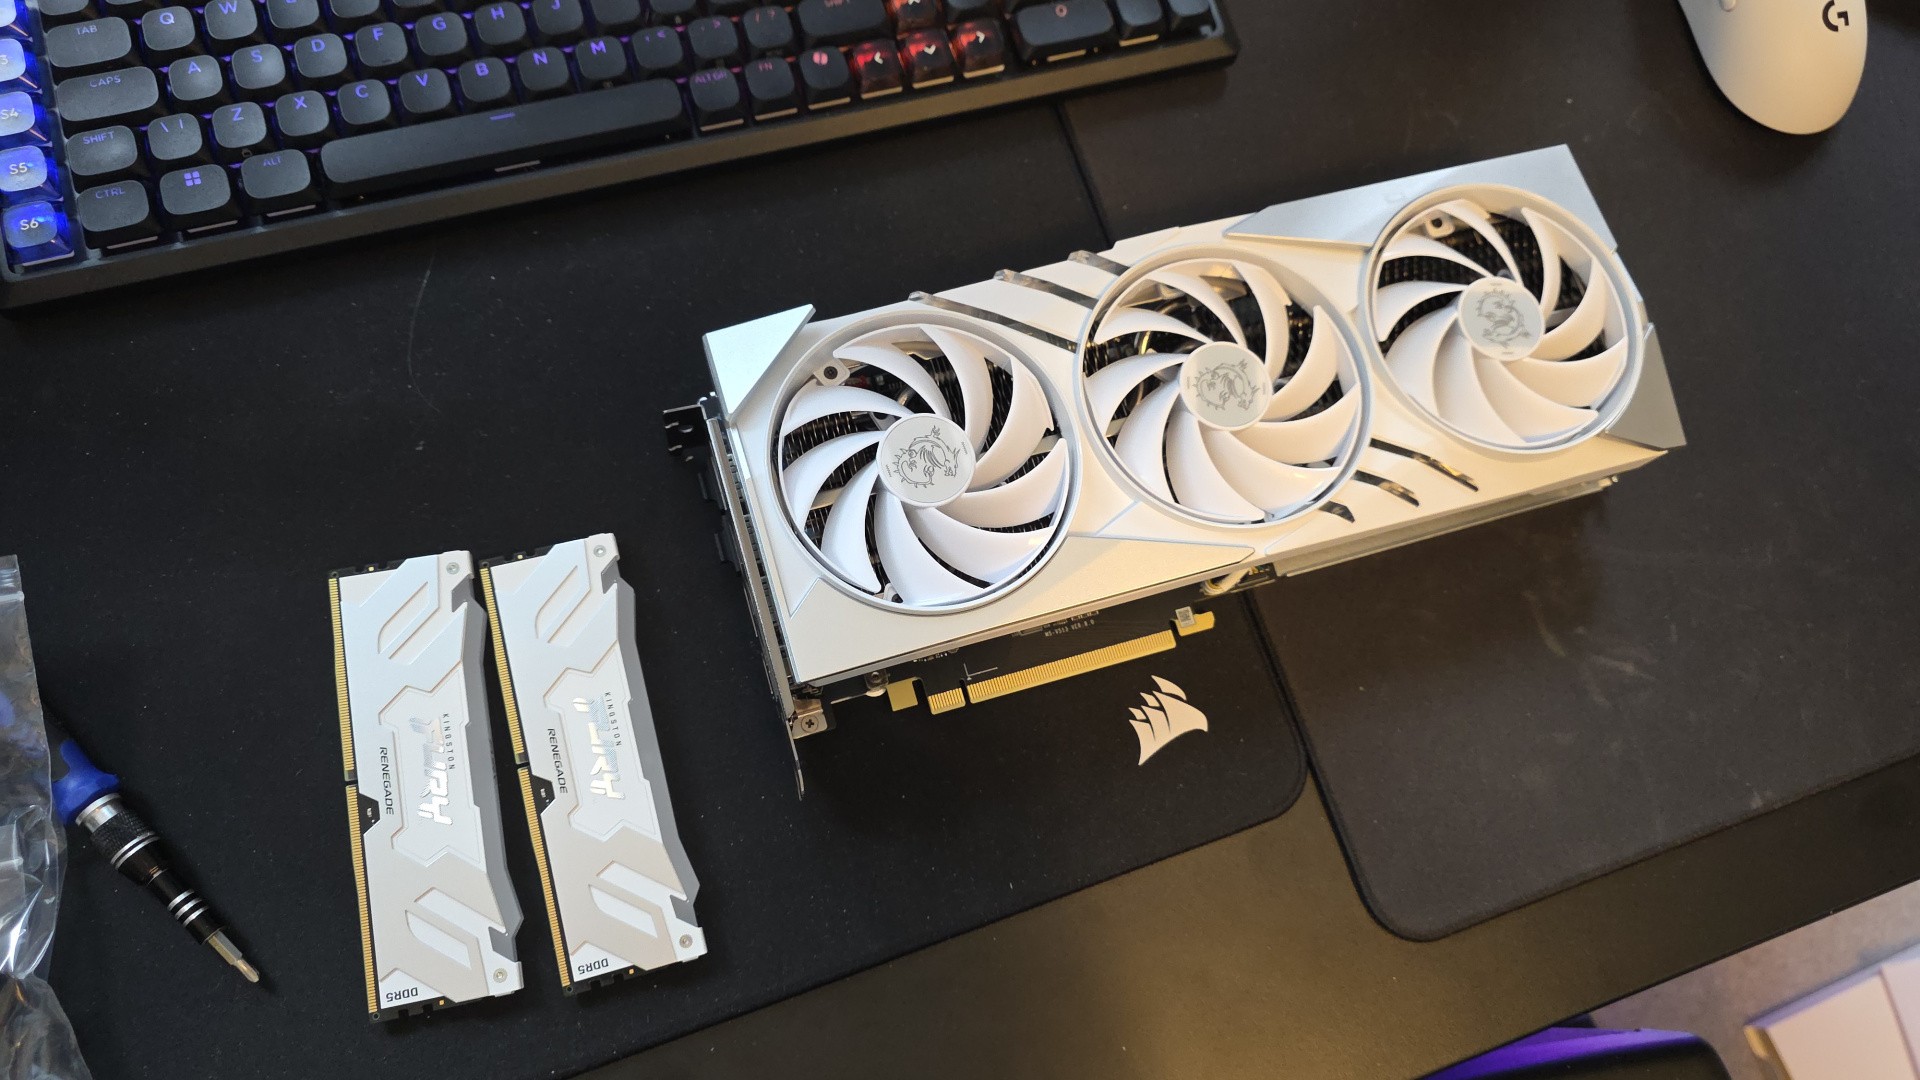 Our GPU and RAM both come from a white gaming PC build I did a few years ago, when prices were more sane. If you’re interested, it’s an RTX 4070 Ti Super and 32GB of DDR5-6400 CL32.
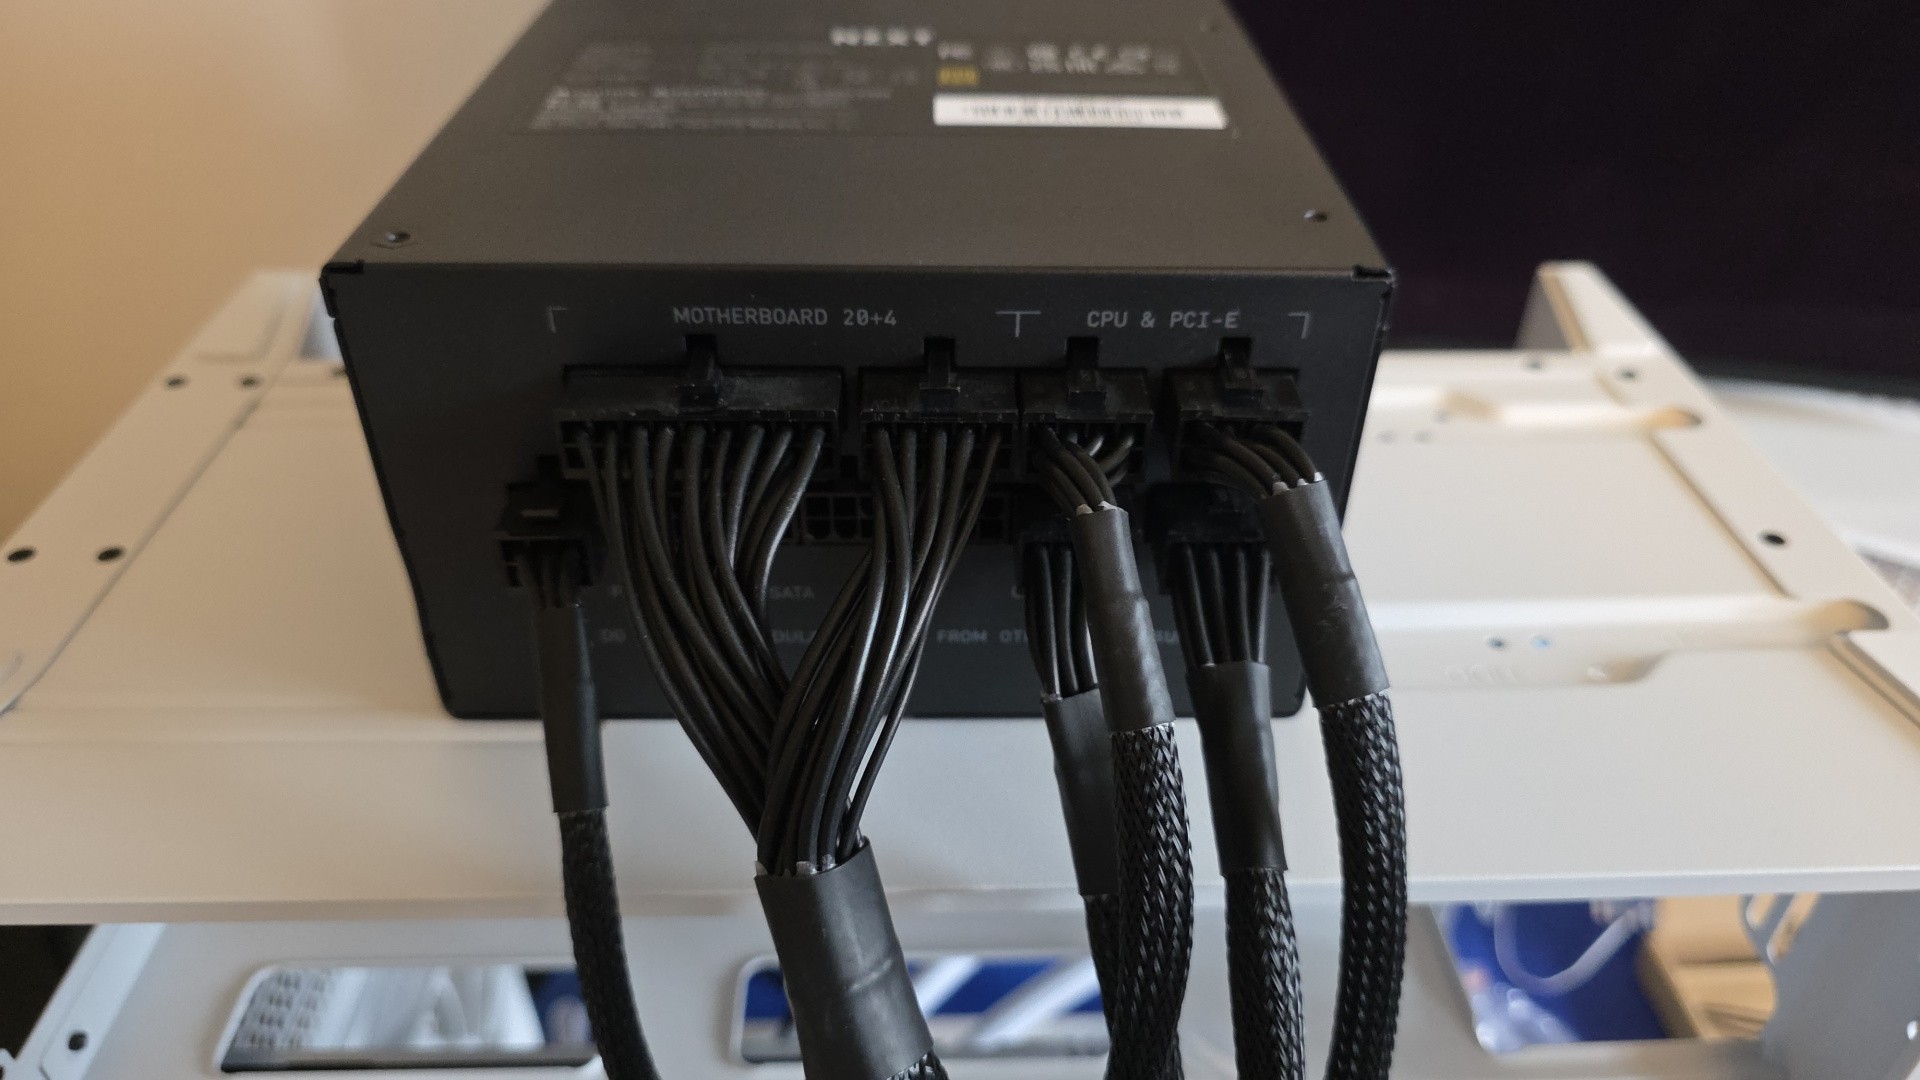 I find it easier to plug in the power cables we’ll need while the PSU is outside of the case – in this case, the main motherboard connector, two CPU cables, two GPU cables and one SATA cable for the AiO and any SATA drives we add in the future.
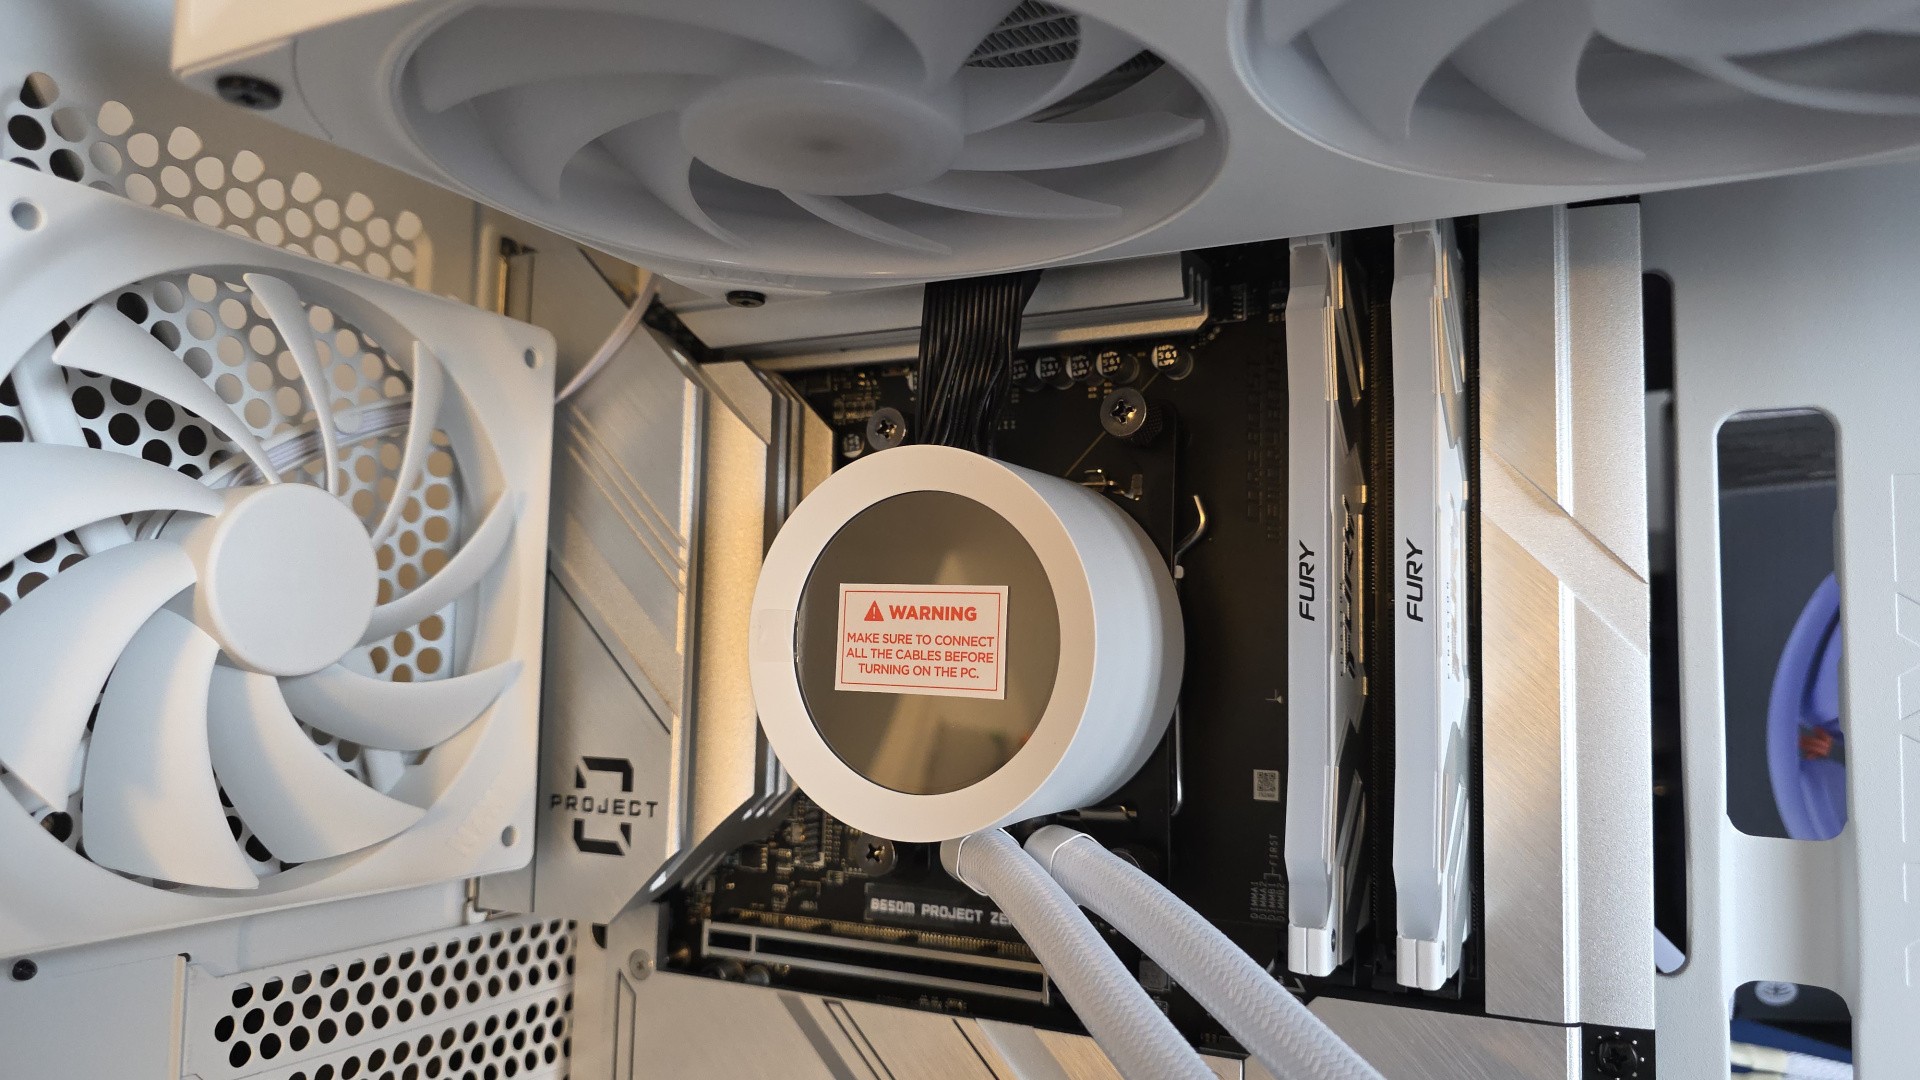 Installing the RAM could have been done earlier, but it’s still fine to add it now.
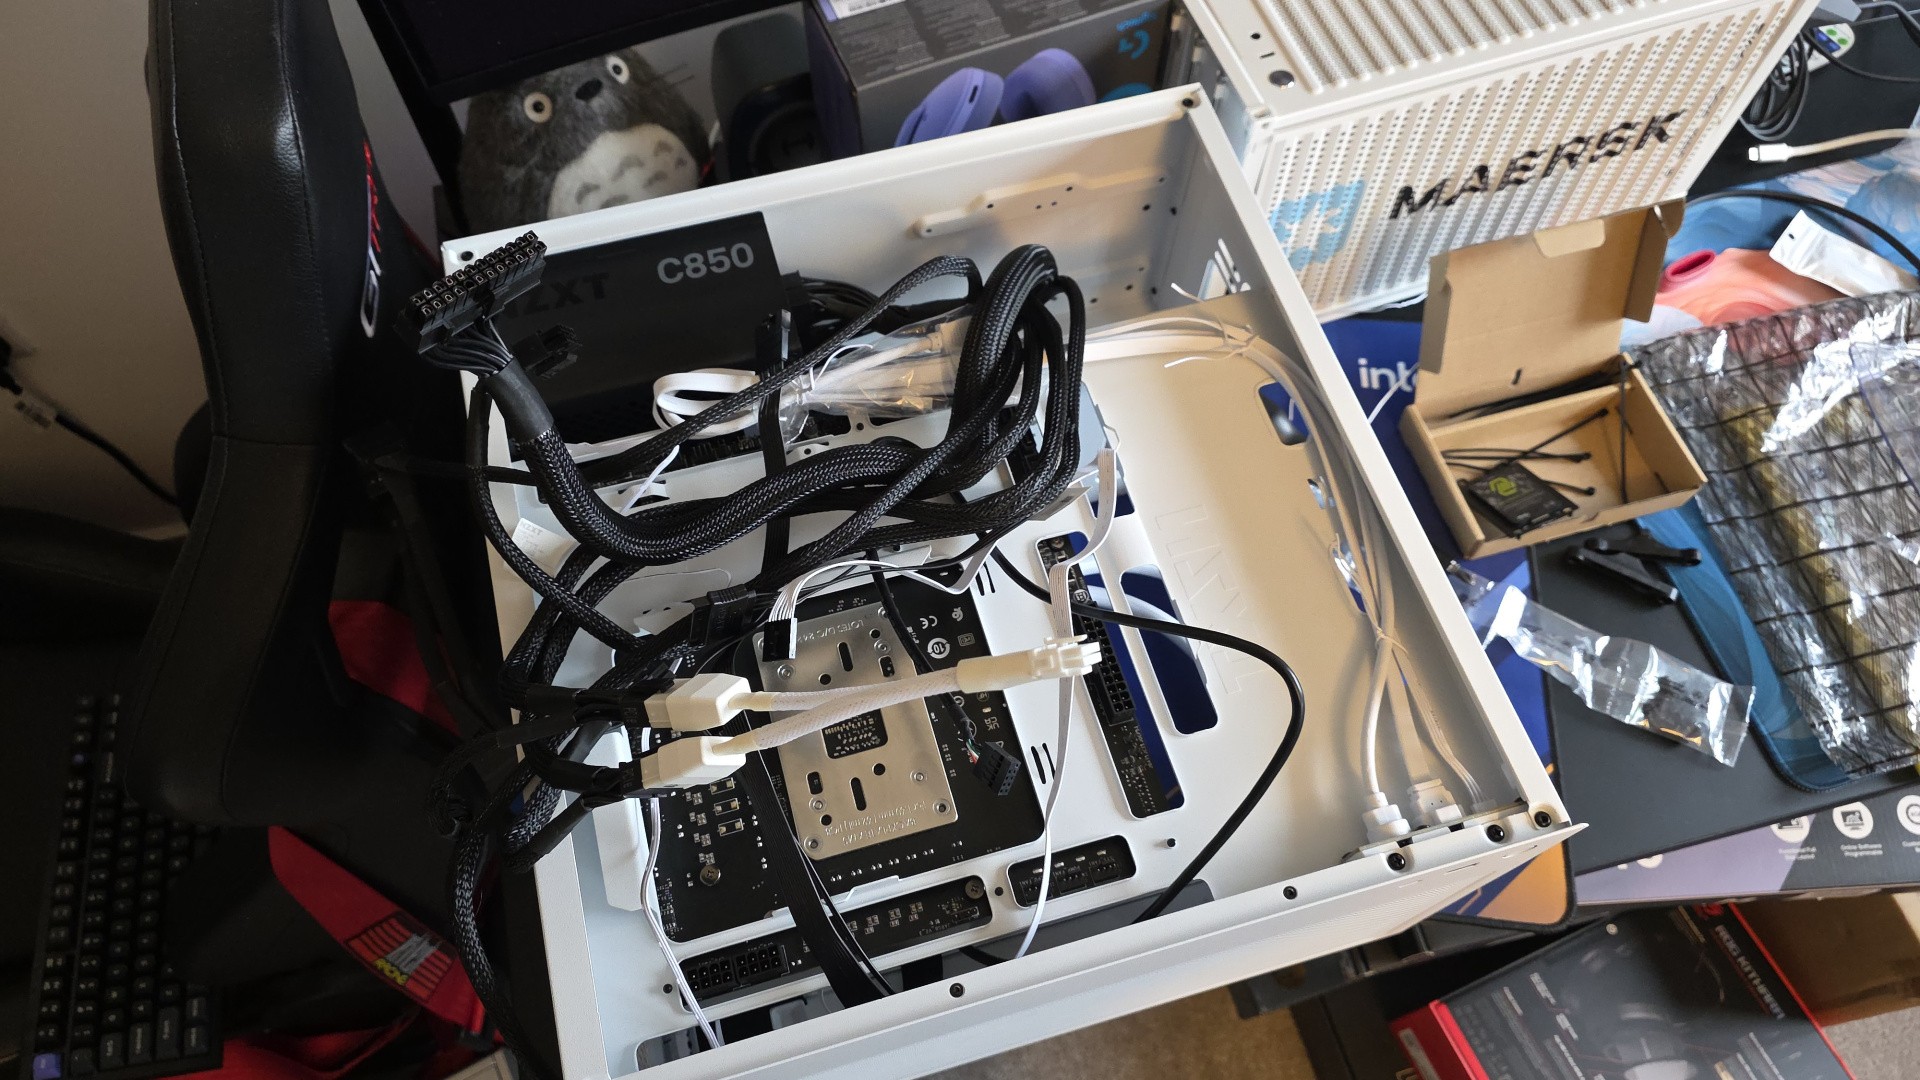 Here’s the back side of the computer, with all of the necessary cables just hanging out.
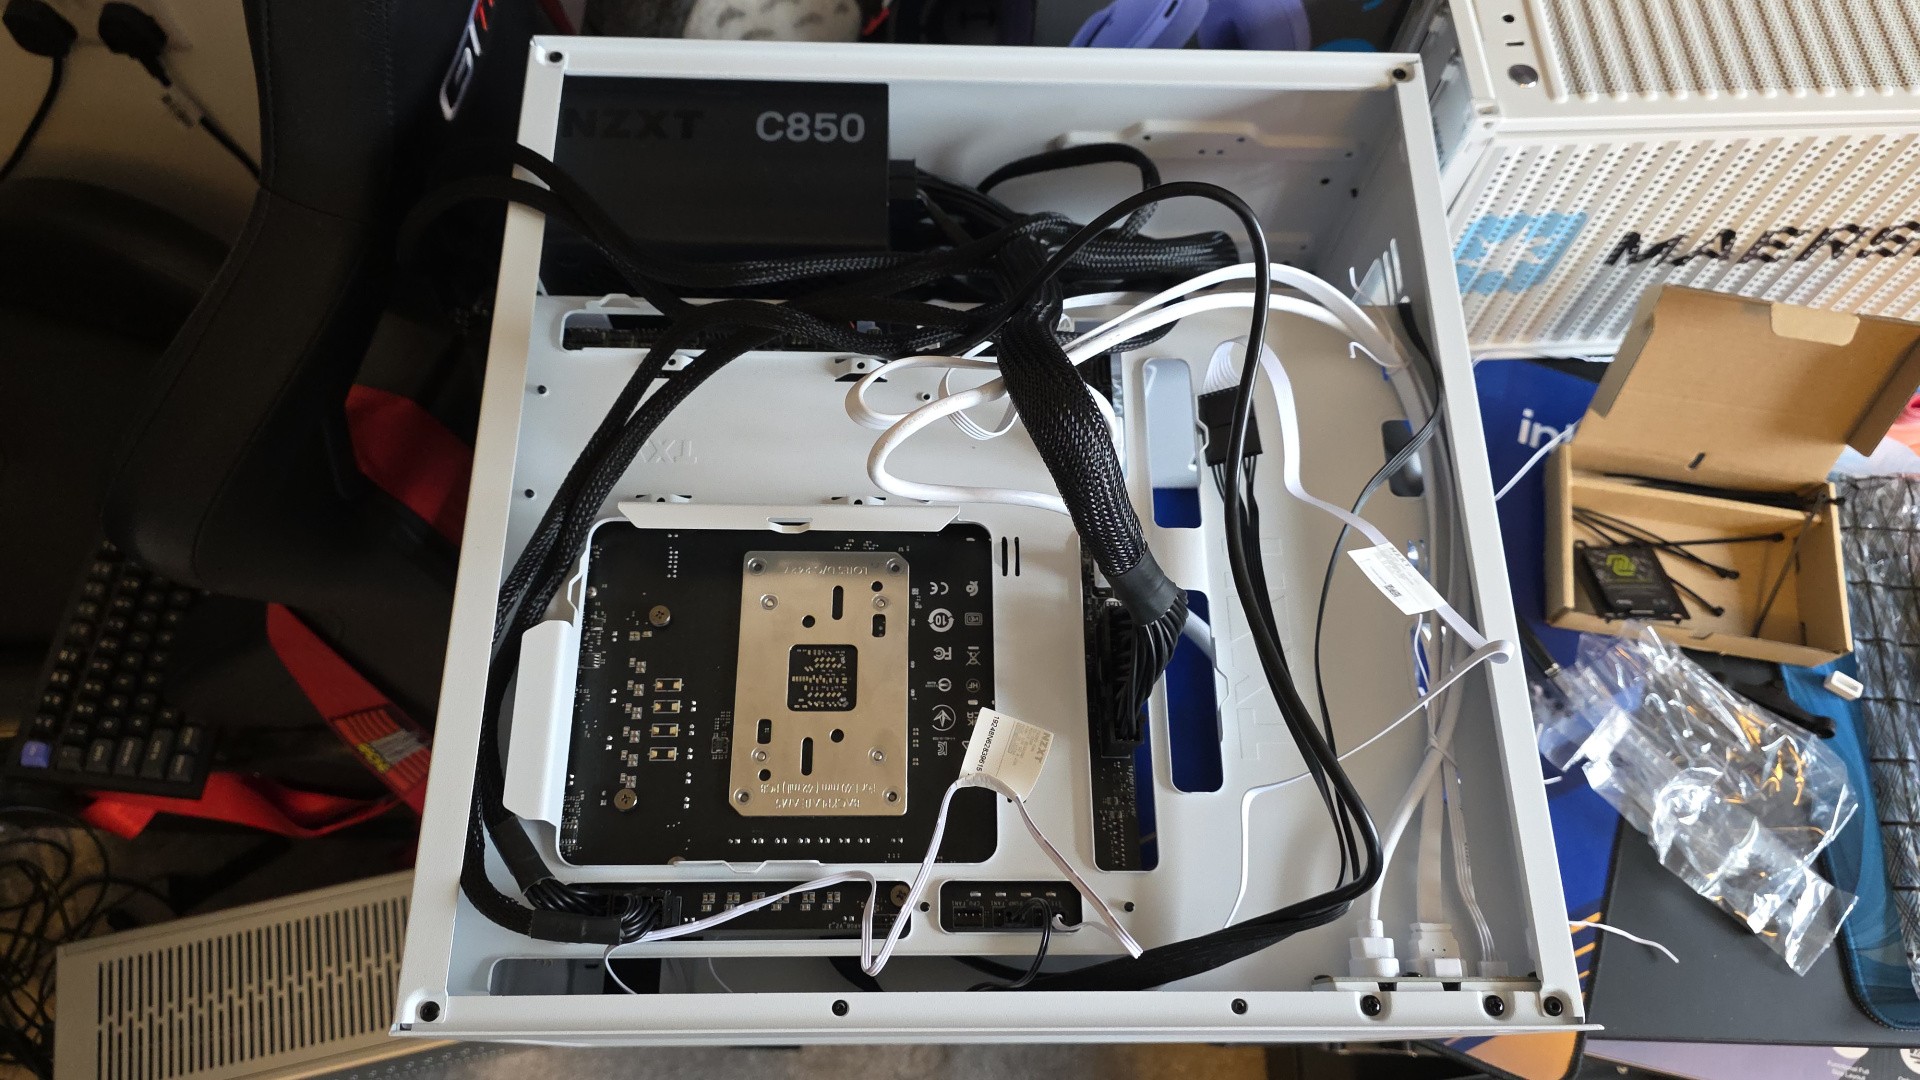 And here’s a few minutes later, with all of the cables plugged in but not yet tidied. If we didn’t care about aesthetics, we could just put the back cover on at this point.
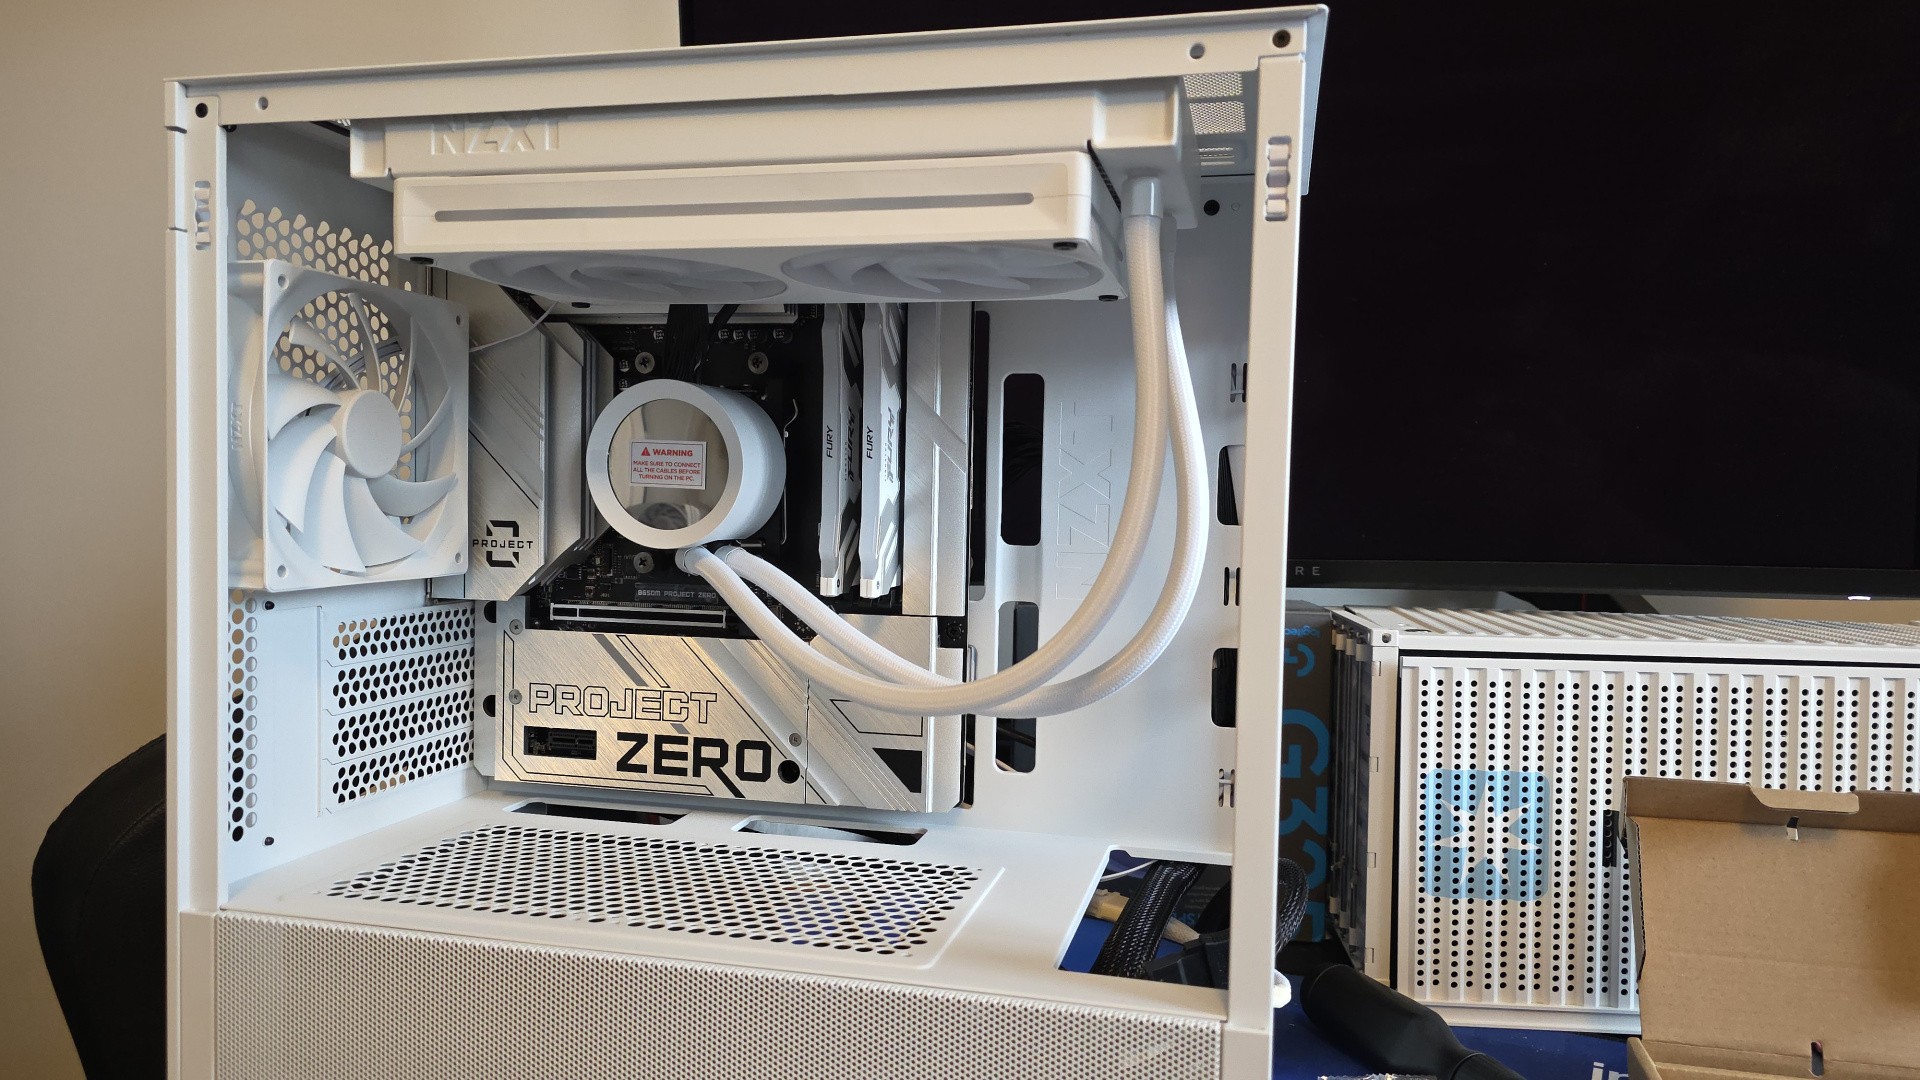 Here’s how the computer looks from the front. I think we’re add the SSD and graphics card.
 Removing a few screws from the Project Zero branded heatsink reveals two SSD slots, one of which we’ll fill now with a 2TB Kioxia Exceria Plus G4 drive.
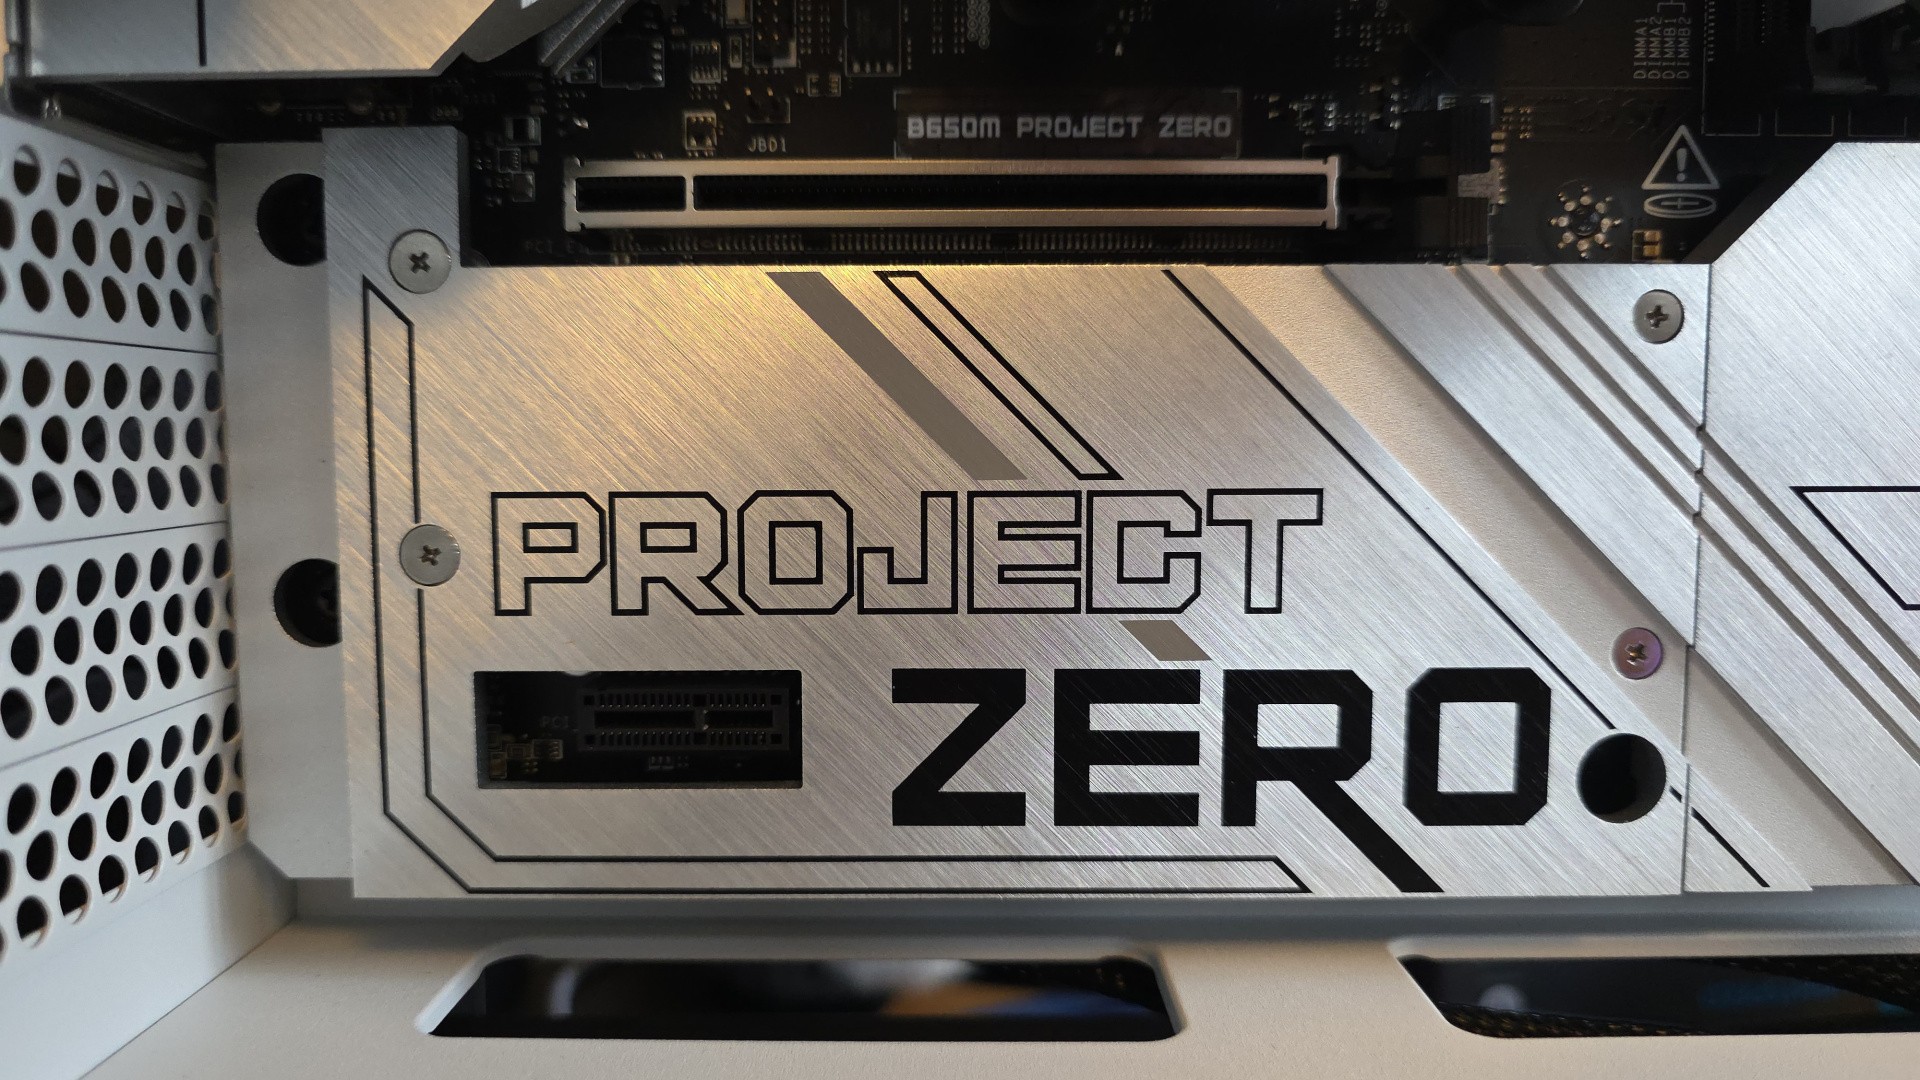 And now the SSD heatsink is back in position for that all-important clean look.
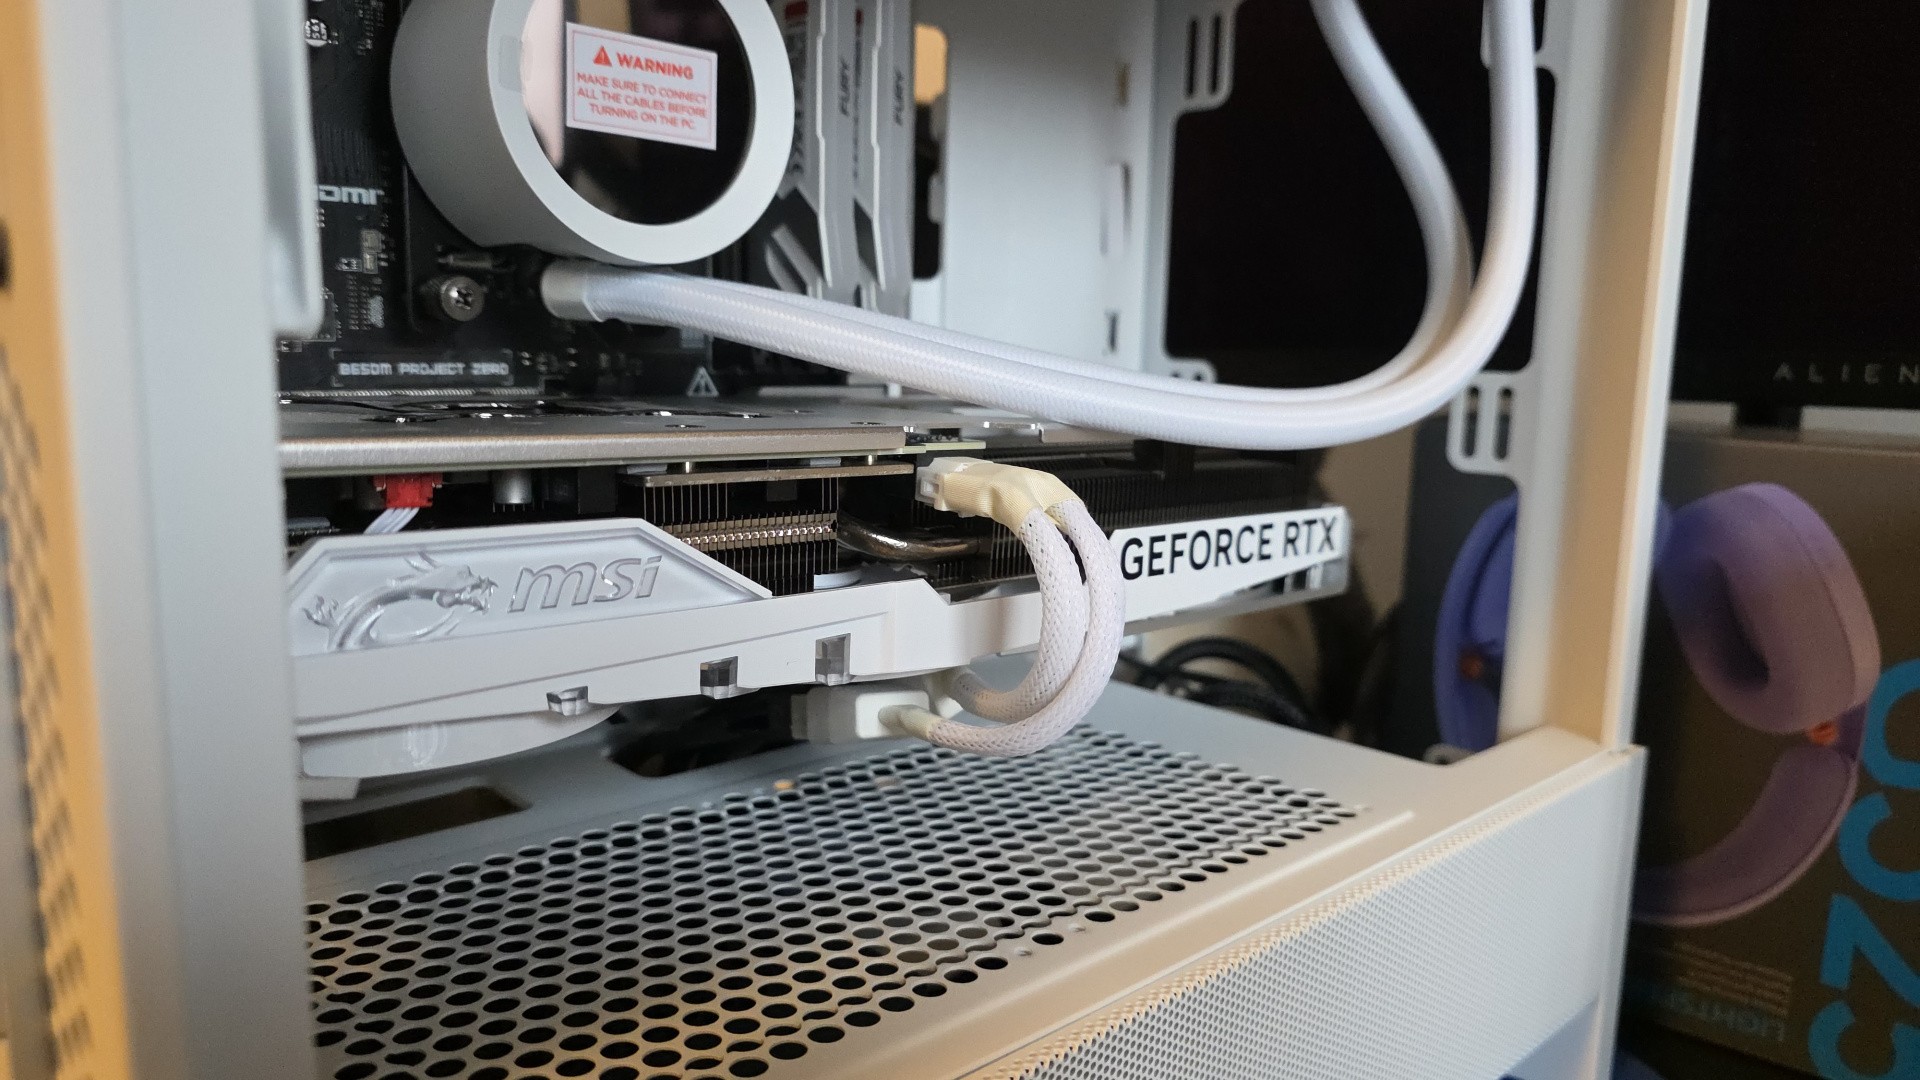 Installing the GPU is easy – just take out the matching PCIe covers on the left, then carefully angle the card into the top PCIe slot. Plug in the 12VHPWR cable, pushing until you hear a click. Secure the card with the screws you removed.
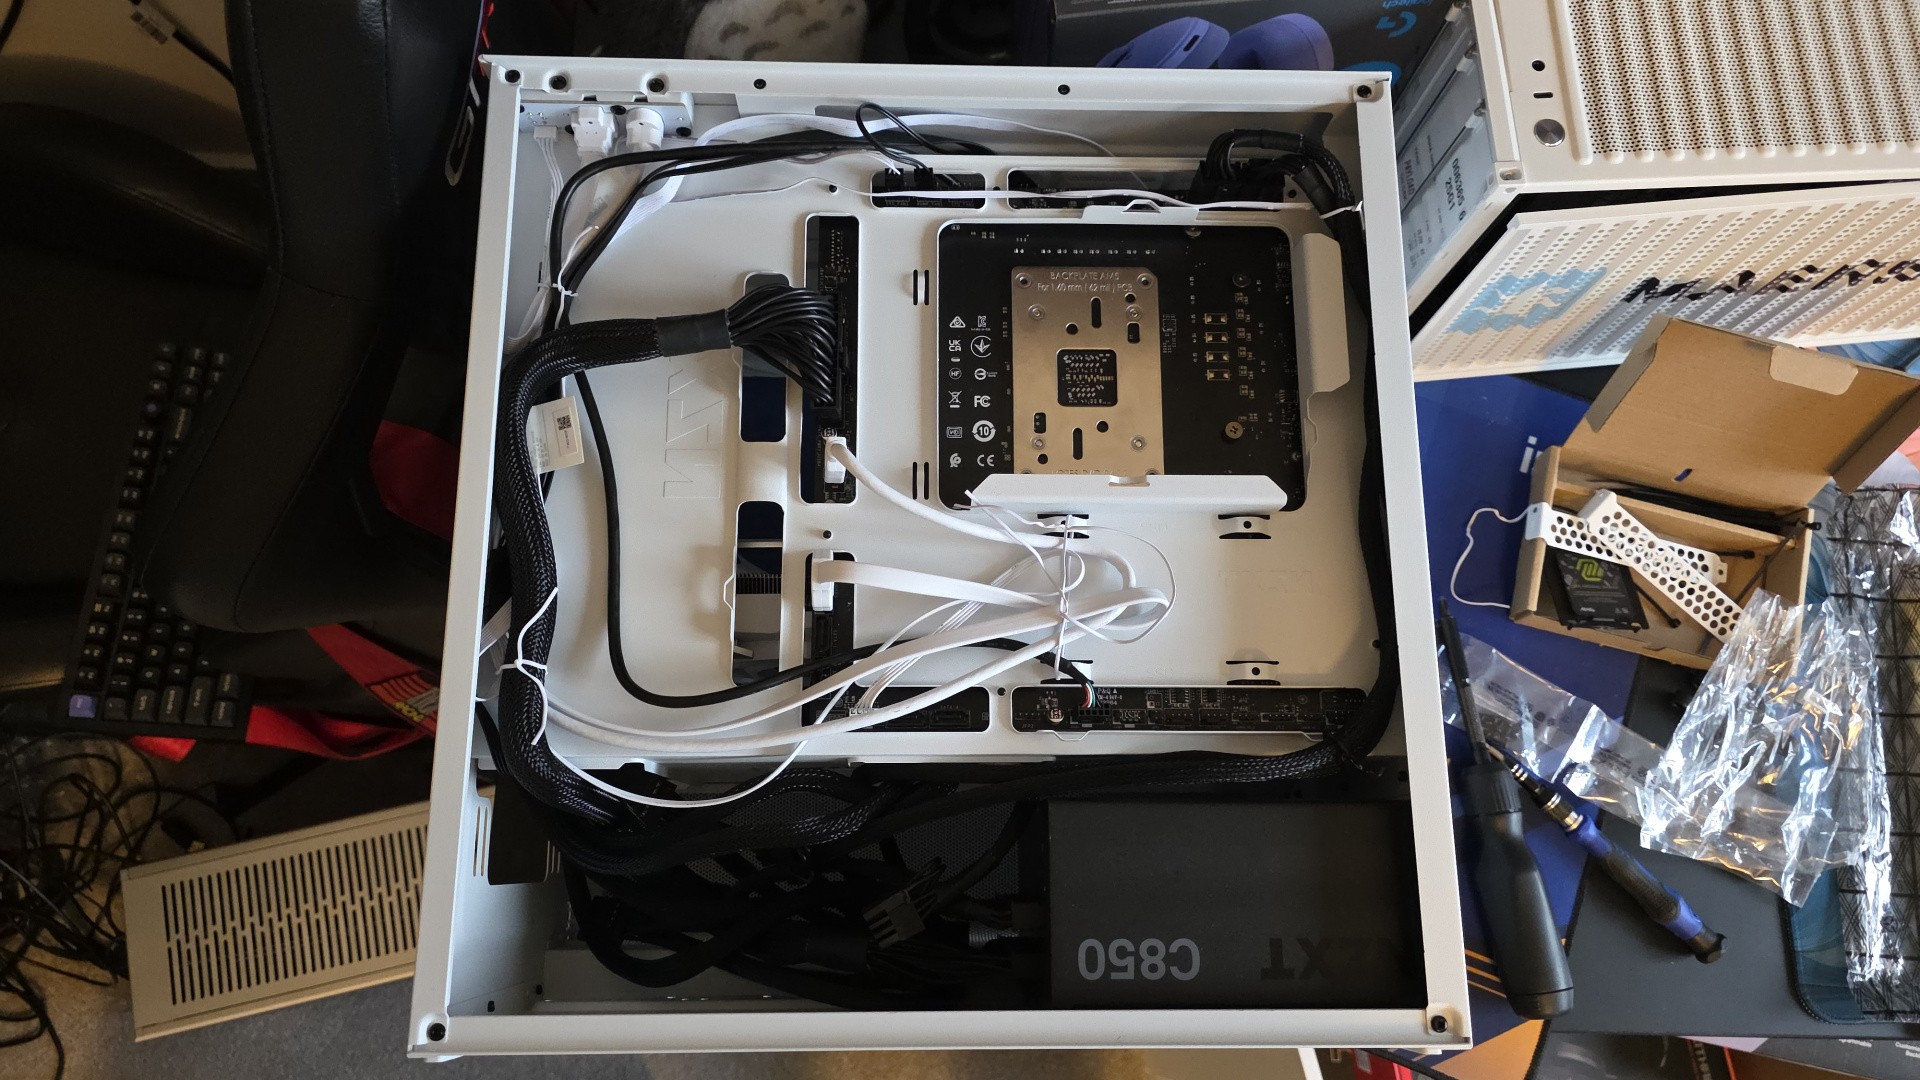 Now that every component is in the case, let’s tidy the cables up.
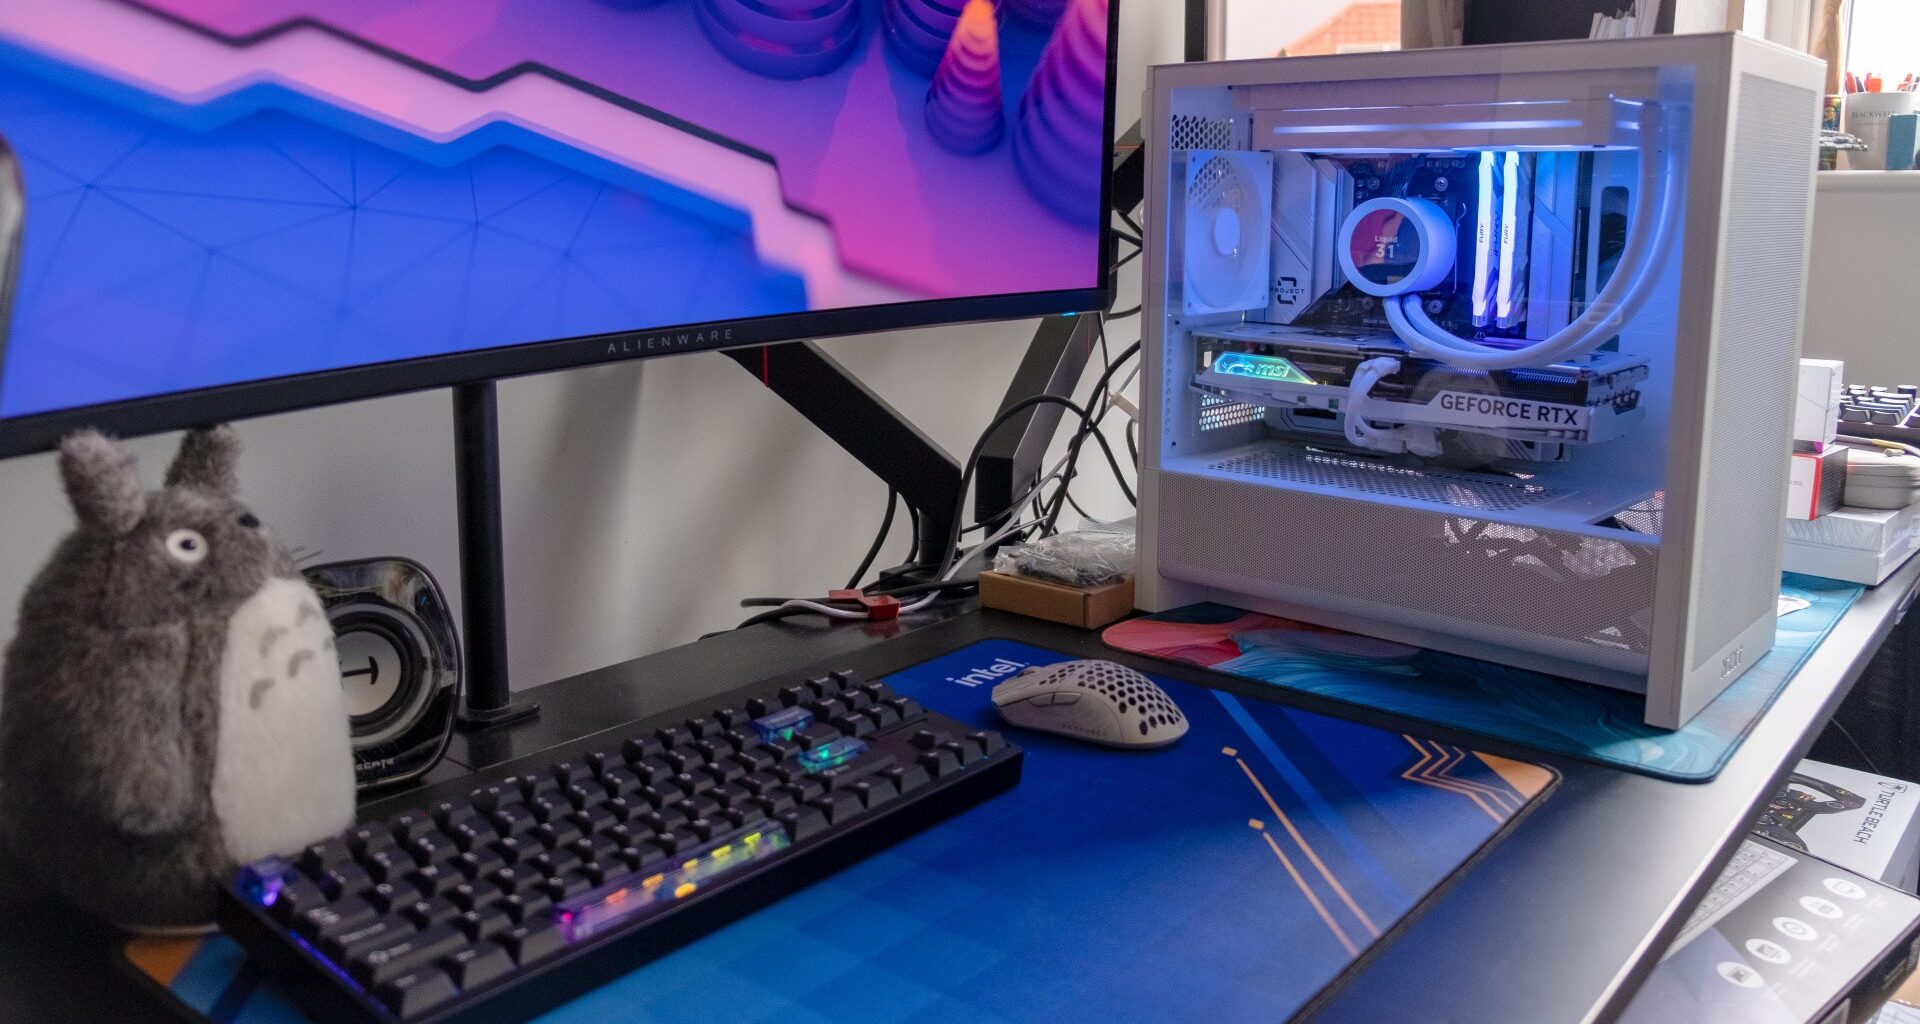
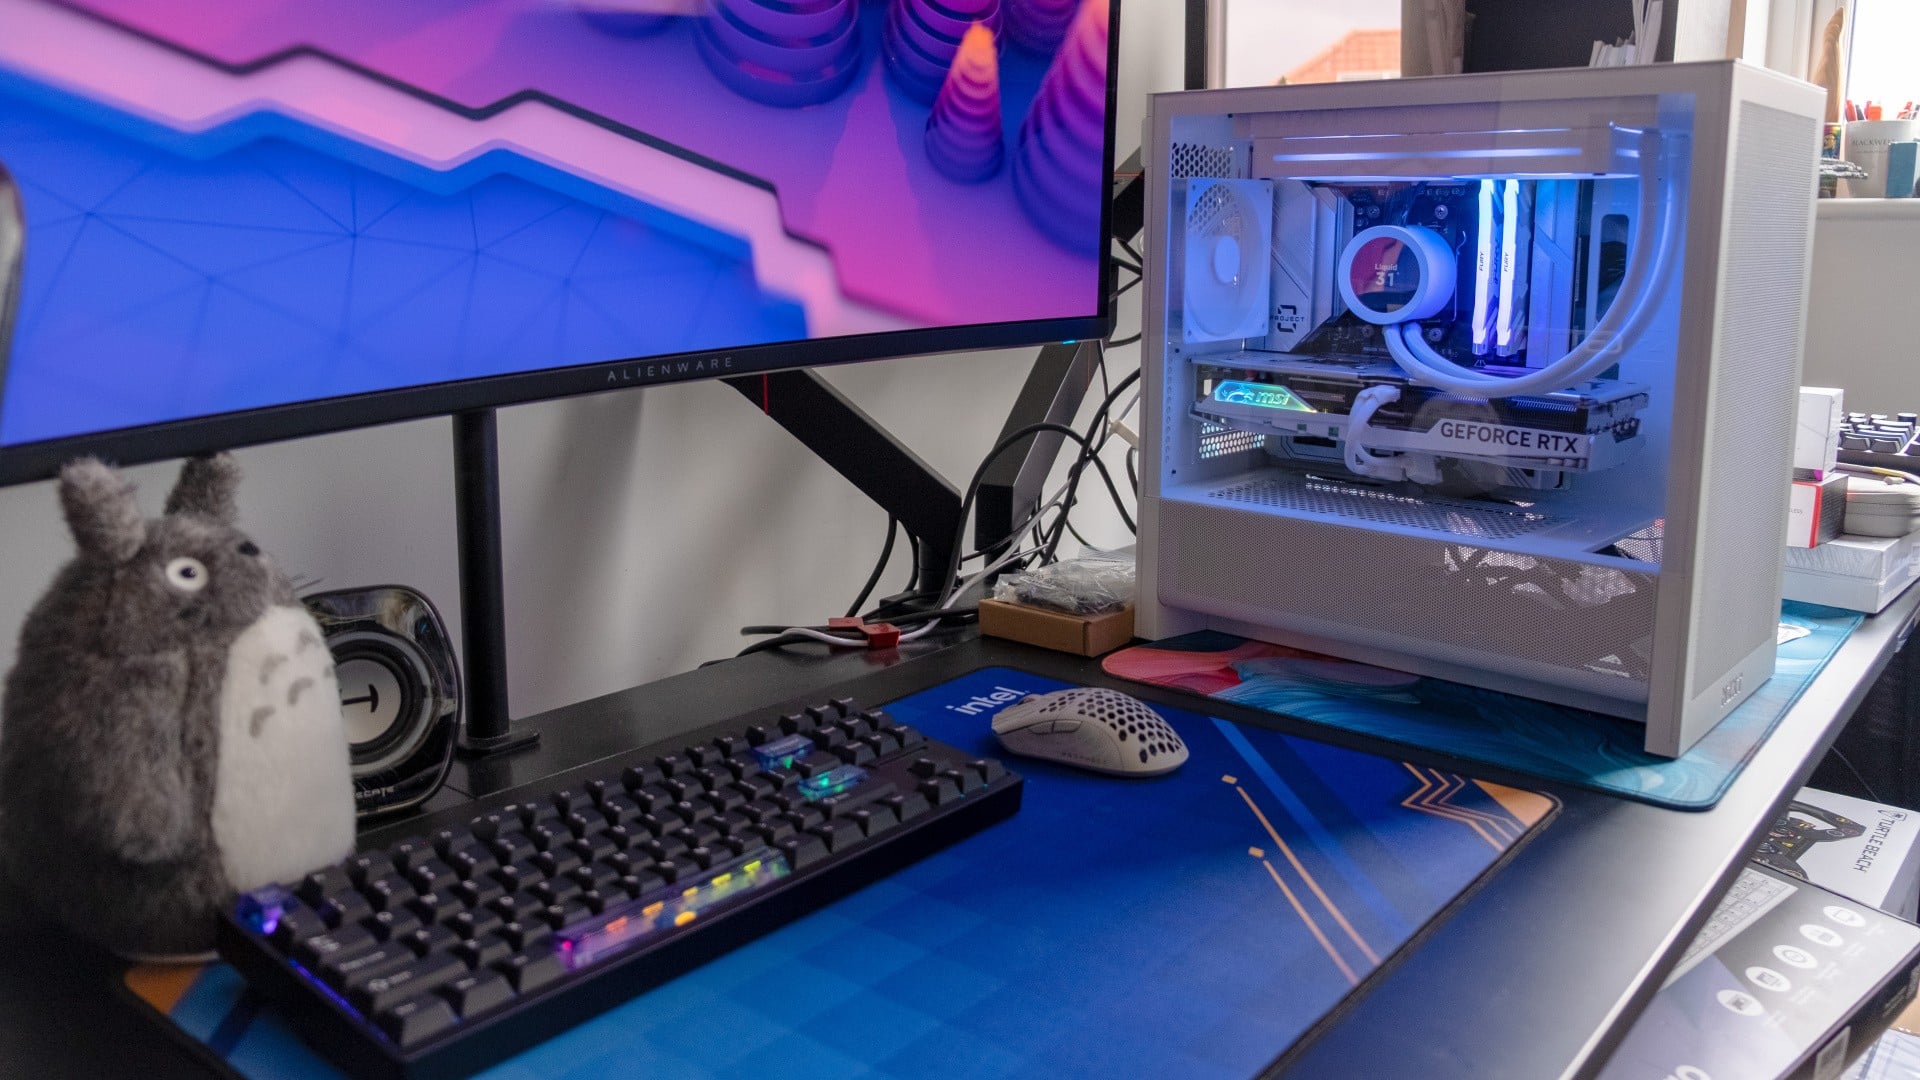
 Looking back at the front, here’s how it looks – ready for first turn-on.
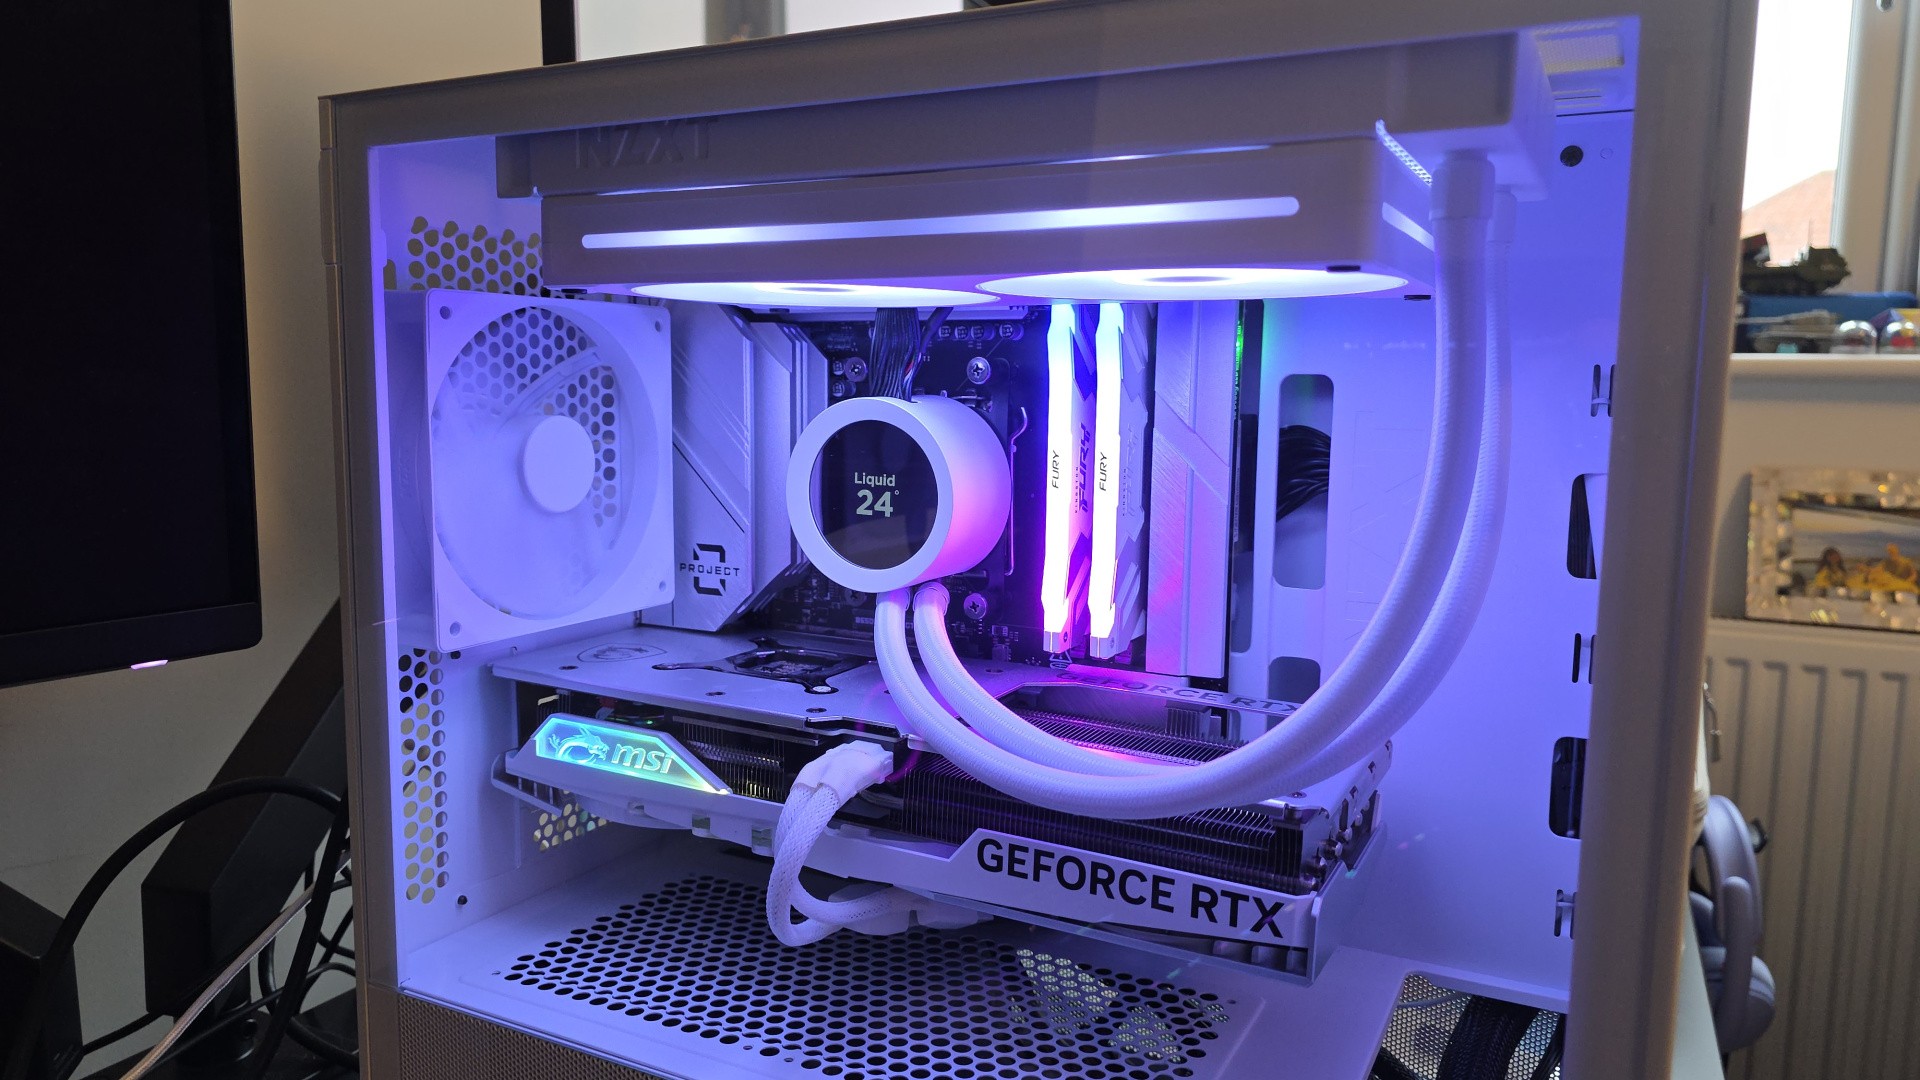 Lights, camera, we have a working computer.
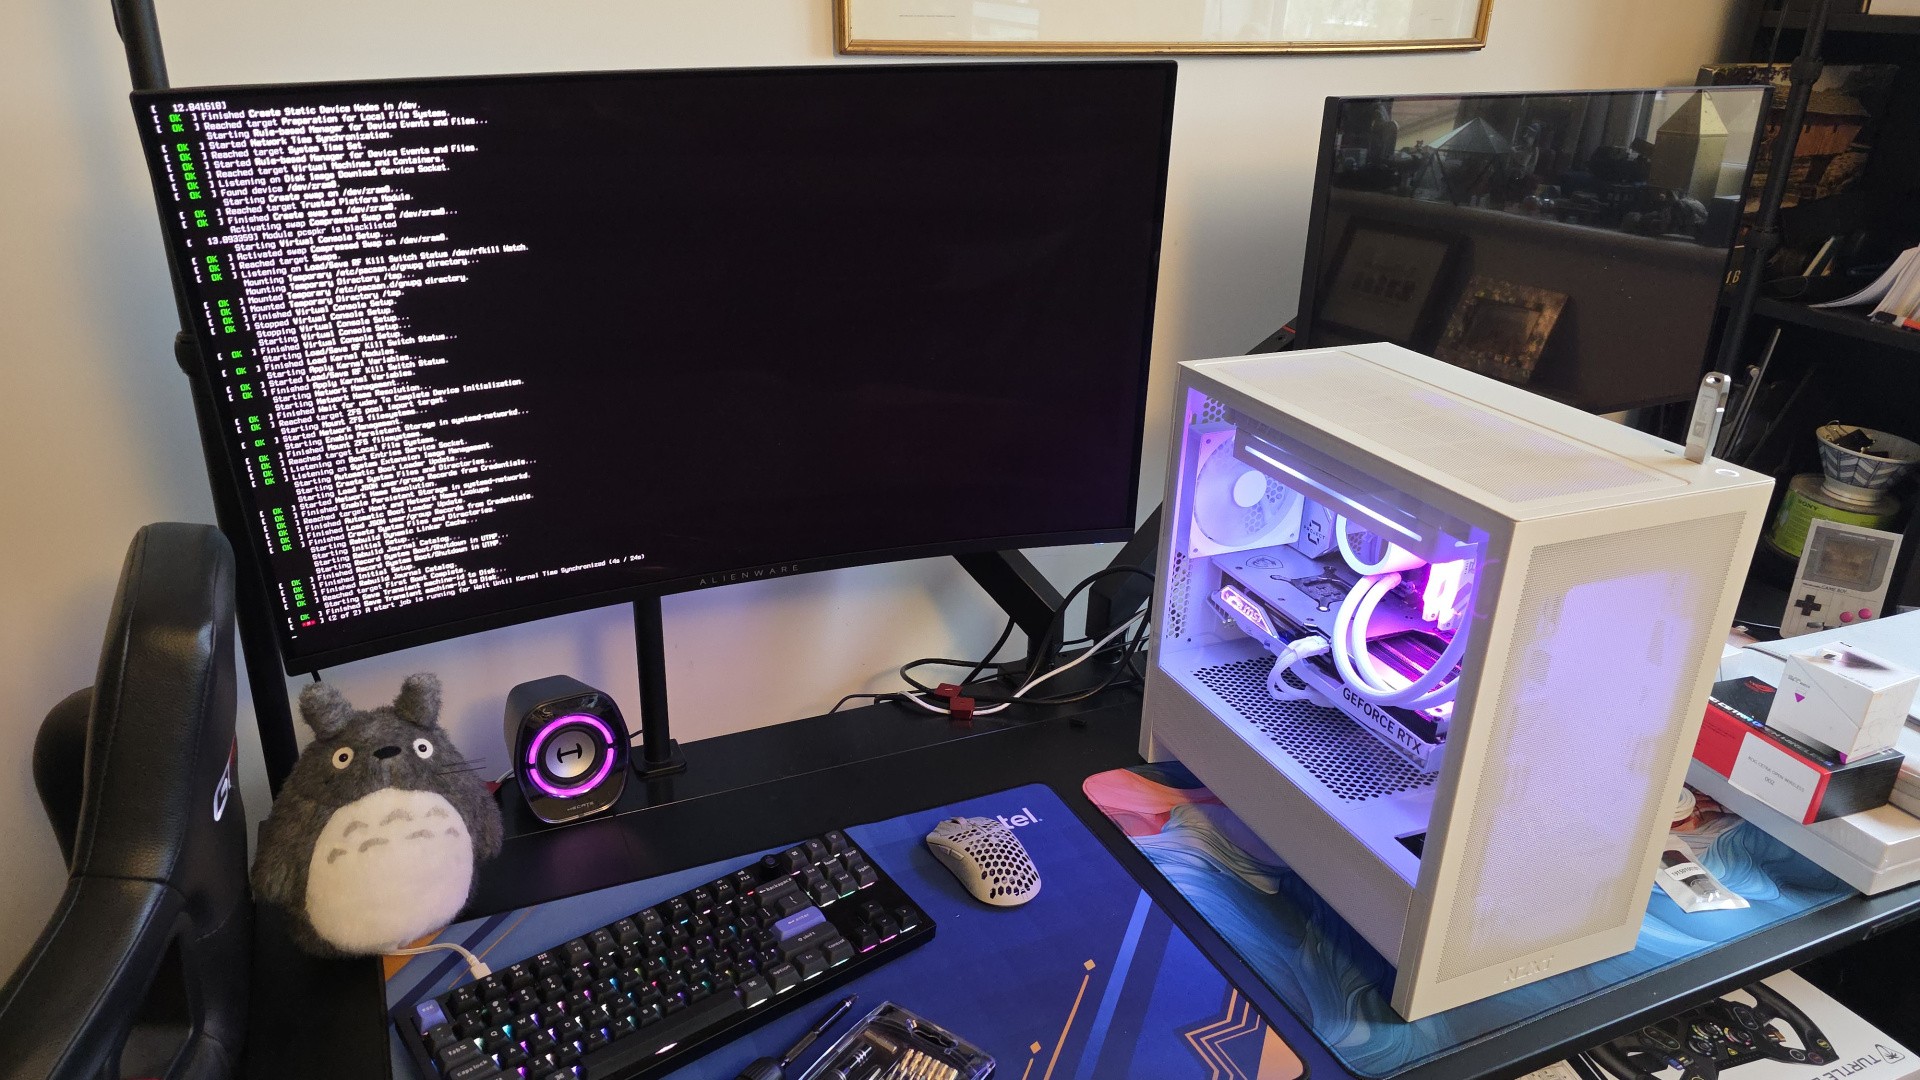 I inserted an OS install USB drive, enabled XMP in the BIOS to ensure our RAM runs at full speed and set the USB drive to boot first. Now, we’re entering Linux.
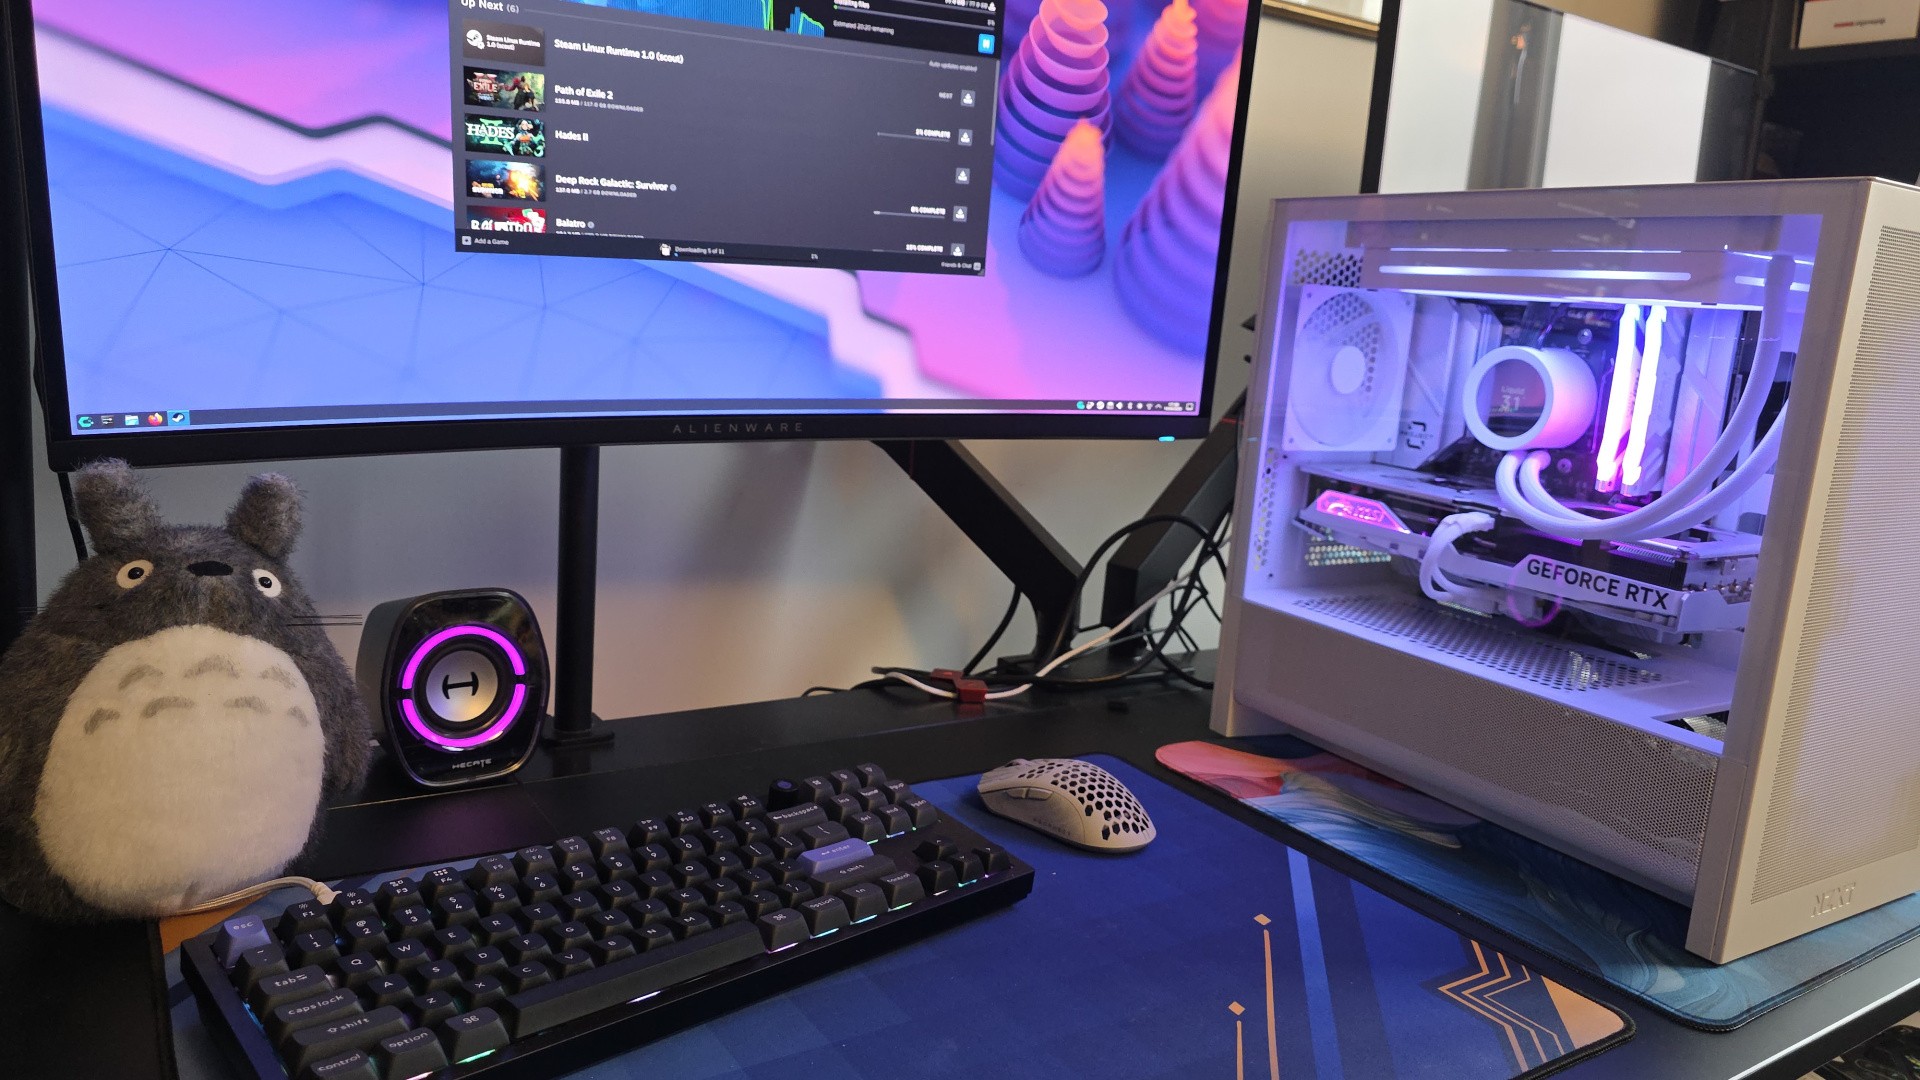 And a few minutes later, we’ve installed CachyOS, reached the desktop (far faster than Windows 11) and started to install some games on Steam. That’s it!
For me, a normal part of the build process is running cables as you go, and inevitably finding that what you’ve done isn’t quite right – so things need to be disconnected, reconfigured and plugged back in again. Here, thanks to all of the motherboard cable connectors being accessible on the rear side, you can leave the plugging in cables bit until the very last step. If you have any components in the front part of the case that have their own cables, like case fans, AiOs or graphics cards, then you just poke the wires through to the back side via the nearest available aperture – simple.
And that final connecting step for me was genuinely joyful. There are so many times where I’ve sweat and swore while willing my fingers to become smaller and more graceful so that I can finally plug in the obnoxiously-placed connector that has me flummoxed. One of my clearest memories from circa 2005 is having my hands jammed into a tiny HP office PC I was converting to play games, struggling to plug in the tiny individual front-panel connectors over 30 hellish minutes, my hand emerging bruised and bloodied. Here it was the exact opposite experience – quick, easy, never in doubt.
Would you pay a (small) premium for a back-to-front motherboard? (77 votes)
Yes, I already have1%Yes, I’d definitely want this for my next build40%Maybe, I’d consider this for my next build43%No, I’m not too interested16%
Running even bulky motherboard power cables is dead easy, as you’re going from the back side of the board to power supply tray on the same side, while fan headers are all easily visible and even the dainty front-panel connectors can be one-shot. This was the first time I’ve ever not had to refer to a motherboard manual to see where an internal connector was, because you can actually see the labels for the darn things without having to carefully angle torchlight around a CPU cooler or a graphics card, like you’re Lara Croft trying to solve a light puzzle in a Mayan tomb.
All told, it took literally five minutes (according to photo timestamps) to plug in every cable needed, route them cleanly and cable tie them into position – what a revelation. The entire build took only an hour too, and that’s with frequent breaks to document the process and sip coffee. That made for by far the easiest and most relaxed PC build I’ve ever done, and the final result looks super clean too.
After having experienced it for myself, I’m now convinced that these back-connect motherboards ought to be the standard going forward. There are only a handful of options from MSI, Asus and Gigabyte on the market right now, but I would expect many more for the next generation of AMD and Intel processors, especially for mid-range and higher boards that are looking to one-up their rivals in terms of features.
What do you think of this emerging technology? Have you built with one of these boards before, and would you consider it in the future? Let me know in the poll above or the comments below.