
You just bought a camera. Maybe it is a Canon EOS R50, maybe a Nikon Z50 II, maybe a Sony a6400 you found on sale, maybe a Fujifilm X-T50 that took three months on a waitlist. Whatever it is, you unboxed it, charged the battery, took a couple of test shots of your cat, and now it is sitting on the counter while you wonder what to do next.
Most people stall right here. The excitement of ownership crashes into the reality of 47 menu pages, a 300-page manual written by engineers, and the sinking feeling that a $1,200 camera is producing photos that look suspiciously similar to what their phone was already doing. The usual advice is “go shoot,” but that is about as helpful as telling someone who just bought a piano to “go play.” Without structure, you end up pressing the same buttons in the same situations and wondering why nothing improves.
This is a different kind of 30-day plan. It is not a list of themed prompts like “Day 7: photograph something blue.” It is a progressive curriculum where each day builds a specific skill on top of what you learned the day before. By the end, you will not just own a camera. You will know how to use it.
You do not need to follow this on 30 consecutive calendar days. Life happens. Skip a day, double up on a weekend, take a week off. The order matters more than the pace.
Week 1: Learn Your Camera (Days 1 Through 7)
Before you worry about making great images, you need to know where things are. This week is about muscle memory, not art.
Day 1: Read the quick-start guide and charge everything. Not the full manual. Just the quick-start pamphlet that came in the box (or the first 15 pages of the PDF). Charge your battery fully. Insert your memory card. Set the date and time. Format the card in-camera. This is not glamorous, but a dead battery or a full card on day three will kill your momentum.
Day 2: Explore every physical control without taking a single photo. Turn every dial. Press every button. Flip every switch. Do not worry about what they do yet. Just locate them with your fingers while looking through the viewfinder so your hands start learning the geography. Find the shutter button, the mode dial, the command dials, the playback button, the menu button, the exposure compensation control, and the focus point selector. If your camera has a touchscreen, figure out what it responds to and what it ignores.
Day 3: Shoot 50 photos in full Auto. Take the camera outside or around your house and take 50 photos of anything that catches your eye. Do not think about settings. Do not try to make anything good. The purpose is to get comfortable holding the camera, finding subjects through the viewfinder, and pressing the shutter without hesitation. When you are done, review them on your computer (not the back of the camera). Notice which ones you like and which ones you do not. You do not need to know why yet.
Don’t worry about your first photos. Just get out there and get comfortable.
Day 4: Learn to change one setting: ISO. Find where your camera’s ISO control lives. Switch out of Auto for this: set the mode dial to P (Program). Now manually change the ISO to 100, take a photo of the same subject, change it to 800, shoot again, change it to 3,200, shoot again, change it to 6,400, shoot again. Look at the results on your computer at full size. Notice the noise difference. You have just learned what ISO does with your hands, not just your head.
Day 5: Learn to change another setting: white balance. Stay in Program mode. Find the white balance setting in your menu or function button. Shoot the same scene on Auto white balance, then Daylight, then Cloudy, then Tungsten, then Fluorescent. Notice how the color shifts. If you are shooting raw files (and you should be; check your image quality setting and switch to raw if it is set to JPEG), you can fix white balance later. But knowing what it looks like in-camera builds your eye for color.
Day 6: Learn playback and image review. Take 20 photos, then spend the rest of your session in playback mode. Learn how to zoom in on an image to check sharpness. Learn how to toggle the histogram display. Learn how to see the shooting data (aperture, shutter speed, ISO) overlaid on each image. Learn how to delete a single image and how to protect one from accidental deletion. These playback skills save enormous time later.
Day 7: Set up your camera for the rest of the challenge. Today is a menu day. Set image quality to raw (or raw + JPEG if you want quick previews). Turn on the grid overlay in your viewfinder or LCD. Set Auto ISO with a minimum shutter speed of 1/125. Set the review time to 2 seconds (long enough to glance, short enough that it does not slow you down). If your camera has customizable buttons, assign one to ISO and one to white balance. You are building the cockpit for the next three weeks.
Week 2: The Exposure Triangle in Practice (Days 8 Through 14)
You read about the exposure triangle in our previous article. This week you feel it.
Day 8: Aperture Priority, wide open. Set the mode dial to A (or Av on Canon). Set your aperture to the lowest number your lens allows (probably f/3.5 to f/5.6 on a kit lens, or f/1.8 if you have a 50mm prime). Photograph objects at different distances. Notice how the background goes soft. This is shallow depth of field, and it is the reason Aperture Priority is the most popular mode among working photographers.
Day 9: Aperture Priority, stopped down. Same mode, but now set the aperture to f/8 or f/11. Photograph the same objects from the same positions. Compare the results side by side with yesterday’s images. The background will be sharper, the depth of field deeper. Two days, one dial, and you can now see the creative trade-off of aperture.
Day 10: Shutter Priority, freezing motion. Switch to S (or Tv on Canon). Set 1/500. Find something that moves: a dog, a kid, a ceiling fan, water from a faucet. Freeze it. Then try 1/1,000. Notice how the camera opens the aperture wider to compensate. If the light is low, notice how it bumps ISO. The triangle is balancing itself in real time. You are just choosing which side to push.
Time to start thinking more about how technique connects to creativity.
Day 11: Shutter Priority, blurring motion. Stay in Shutter Priority. Set 1/15. Photograph the same moving subjects. Watch them blur. Now try panning: track a moving subject with your camera while pressing the shutter at 1/30. The subject stays relatively sharp while the background streaks. This is one of the most satisfying techniques in photography, and you just learned it on day 11.
Day 12: Manual mode, stationary subject. Find a well-lit, stationary subject. Switch to M. Set ISO 200. Set f/5.6. Now adjust shutter speed until the exposure meter in your viewfinder sits at zero (the center mark). Take the photo. Now deliberately make it one stop brighter by slowing the shutter. Then one stop darker by speeding it up. Look at all three. You now understand what the meter is telling you and how to override it.
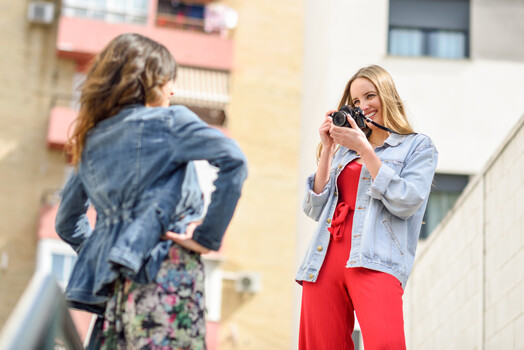
Day 13: Manual mode, changing light. Take the camera for a walk. Stay in Manual. As you move from shade to sun to indoors, adjust your settings to keep the exposure correct. This will feel slow. That is the point. You are training yourself to read light and respond. After 20 minutes, switch to Aperture Priority and notice how much faster the camera adapts. Now you understand why Aperture Priority exists and when Manual earns its place.
Day 14: Review day. Import everything from the week onto your computer. Compare your Day 8 wide-open shots to your Day 9 stopped-down shots. Compare your Day 10 frozen motion to your Day 11 blurred motion. Compare your Day 12 correct exposure to your deliberate over- and underexposures. This review is where the learning solidifies. Delete nothing. The bad shots teach more than the good ones.
Week 3: Composition and Light (Days 15 Through 21)
You can control your camera now. This week is about controlling what is in the frame and how light shapes it.
Day 15: The rule of thirds. Turn on your viewfinder grid if you have not already. For every photo today, place your main subject on one of the four intersection points, never dead center. Shoot 30 images this way. By the end of the day, off-center placement will start to feel natural instead of forced.
Day 16: Leading lines. Look for lines that pull the viewer’s eye into the frame: roads, fences, railroad tracks, hallways, shadows, tree branches. Photograph 10 scenes where a line leads from the edge of the frame toward your subject. This is composition at its most mechanical, and it works almost every time.
Day 17: Foreground interest. Find a landscape or wide scene. Now crouch down and include something in the foreground: a rock, a flower, a puddle, a crack in the pavement. Take one shot without the foreground element and one with it. The version with foreground interest will almost always feel more three-dimensional.
Start experimenting.
Day 18: Golden hour. Shoot during the first or last hour of sunlight. Not midday, not overcast, not indoors. Golden hour specifically. Notice how the warm, low-angle light wraps around subjects, creates long shadows, and makes even mundane scenes look cinematic. Photograph anything you want, but do it in this light. If you want to see what professionals do with golden-hour landscapes from some of the most photogenic locations on the planet, Fstoppers’ Photographing the World: Landscape Photography and Post-Processing is worth a look.
Day 19: Harsh midday light. Now do the opposite. Shoot at noon on a sunny day. Notice the hard shadows under people’s eyes, the blown-out highlights, the flat, contrasty look. Find ways to make it work: seek open shade, shoot into shadows, use the harsh light creatively by photographing strong shadow patterns on the ground. Knowing how to handle bad light is more useful than knowing how to exploit good light, because bad light is what you will face most of the time.
Day 20: Framing and negative space. Find natural frames: doorways, windows, arches, gaps between branches. Place your subject inside them. Then try the opposite: place a small subject against a large expanse of empty space (a person against a blank wall, a bird against open sky). Both techniques direct the viewer’s attention, just in different ways.
Day 21: Shoot one subject 20 different ways. Pick a single object. Your coffee mug, your car, a fire hydrant, anything that is not going anywhere. Now photograph it 20 times, each from a different angle, distance, height, aperture, or lighting direction. Crouch low, climb above it, shoot through something, backlight it, silhouette it. By shot 12, you will be out of obvious ideas. Shots 13 through 20 are where creativity actually starts.
Week 4: Putting It All Together (Days 22 Through 30)
You have the technical skills. You have the compositional awareness. This week you combine them and start making photographs instead of taking them.
Day 22: Photograph a person. Ask a friend, family member, or willing stranger to stand in nice light (a window, open shade, golden hour). Set Aperture Priority, open the aperture for background blur, and focus on their eyes. Take 20 frames. Direct them minimally: “turn your shoulders slightly,” “look past me,” “now look at me.”
Day 23: Photograph a meal. Before you eat, take five minutes to photograph your food. Move the plate near a window. Shoot from above (the “flat lay”), then from a 45-degree angle, then from the side. Notice how the angle changes the story. This is product photography at the kitchen table, and it teaches you that light direction matters more than lens choice.
Day 24: Street photography. Go somewhere with foot traffic. Set Aperture Priority, f/5.6 to f/8, Auto ISO, and shoot from the hip or at eye level without overthinking. The goal is not masterpieces. The goal is getting comfortable photographing in public and reacting quickly to fleeting moments. Shoot 50 frames. Keep five.
Day 25: Landscape or cityscape. Find a view. Use a tripod if you have one. Set f/8 to f/11 for deep focus. Include foreground interest (Day 17). Shoot during golden hour (Day 18). Wait for the light to change. Take fewer frames than usual and spend more time composing each one. This is the day your technical and compositional skills converge.
Have fun!
Day 26: Macro or close-up. You do not need a dedicated macro lens for this. Set your kit lens to its longest focal length and get as close as the lens allows while still achieving focus. Photograph textures: fabric, wood grain, a leaf, a coin, the surface of fruit. Open the aperture wide and notice how razor-thin the depth of field becomes at close distances. If this hooks you, Fstoppers’ Mastering Macro Photography goes deep on technique and editing.
Day 27: Night photography. Wait for dark. Use a tripod or any stable surface. Switch to Manual mode. Set ISO 800 to 1,600, open the aperture wide, and experiment with shutter speeds between 1 and 10 seconds. Photograph street lights, traffic trails, city skylines, or just the view from your porch. Night photography forces you to work at the extremes of the exposure triangle, and the results feel almost magical compared to daylight shooting.
Day 28: Edit your five best images. Pick your five strongest photos from the entire month. Import them into whatever editing software you have (Adobe Lightroom, Capture One, the free version of DxO PhotoLab, even Apple Photos). Pull the highlights back if they are blown, open up the shadows if they are buried, nudge the white balance until the colors look honest, and add a touch of contrast if the image feels flat. Crop if needed. Do not overdo it. The goal is to see how much a modest edit can improve an already well-shot image. If you want a guided introduction to the editing process, Photography 101 covers both shooting and Photoshop post-processing end to end.
Day 29: Share your work. Post your five edited images somewhere other people will see them. Instagram, a photography forum, the Fstoppers community, a family group chat. The act of selecting, editing, and presenting your work for an audience, even a small one, changes how you evaluate your own images. It also forces you to commit to a finished product instead of endlessly second-guessing.
Day 30: Identify what you want to learn next. Look back through the entire month. Which days excited you? Which ones felt like a chore? If you loved the portrait day, go deeper into lighting and posing. If the landscape day was your favorite, start learning about filters and advanced composition. If the night session hooked you, explore astrophotography. The purpose of these 30 days was not to turn you into a finished photographer. It was to give you enough fluency with your camera that you can now choose your own direction with confidence instead of confusion.
What Comes After Day 30
You now know more about your camera than most people learn in a year of aimless shooting. You understand exposure, composition, light, and the basics of multiple genres. The temptation will be to buy a new lens or a better body. Resist it. You have not yet exhausted what your current gear can do, and the best investment at this stage is practice and education, not equipment. This was only the first step, a plan to expose you to a variety of photography and techniques, not master them all.
Pick a genre. Shoot it deliberately. Study photographers whose work in that genre you admire. And when you are ready for structured guidance beyond what a 30-day plan can offer, the Fstoppers tutorial library has deep dives on landscapes, architecture and real estate, headshots and portraits, product photography, macro, and the business of going professional. But those are destinations. This 30-day plan was the on-ramp. You are on it now. Keep driving.