

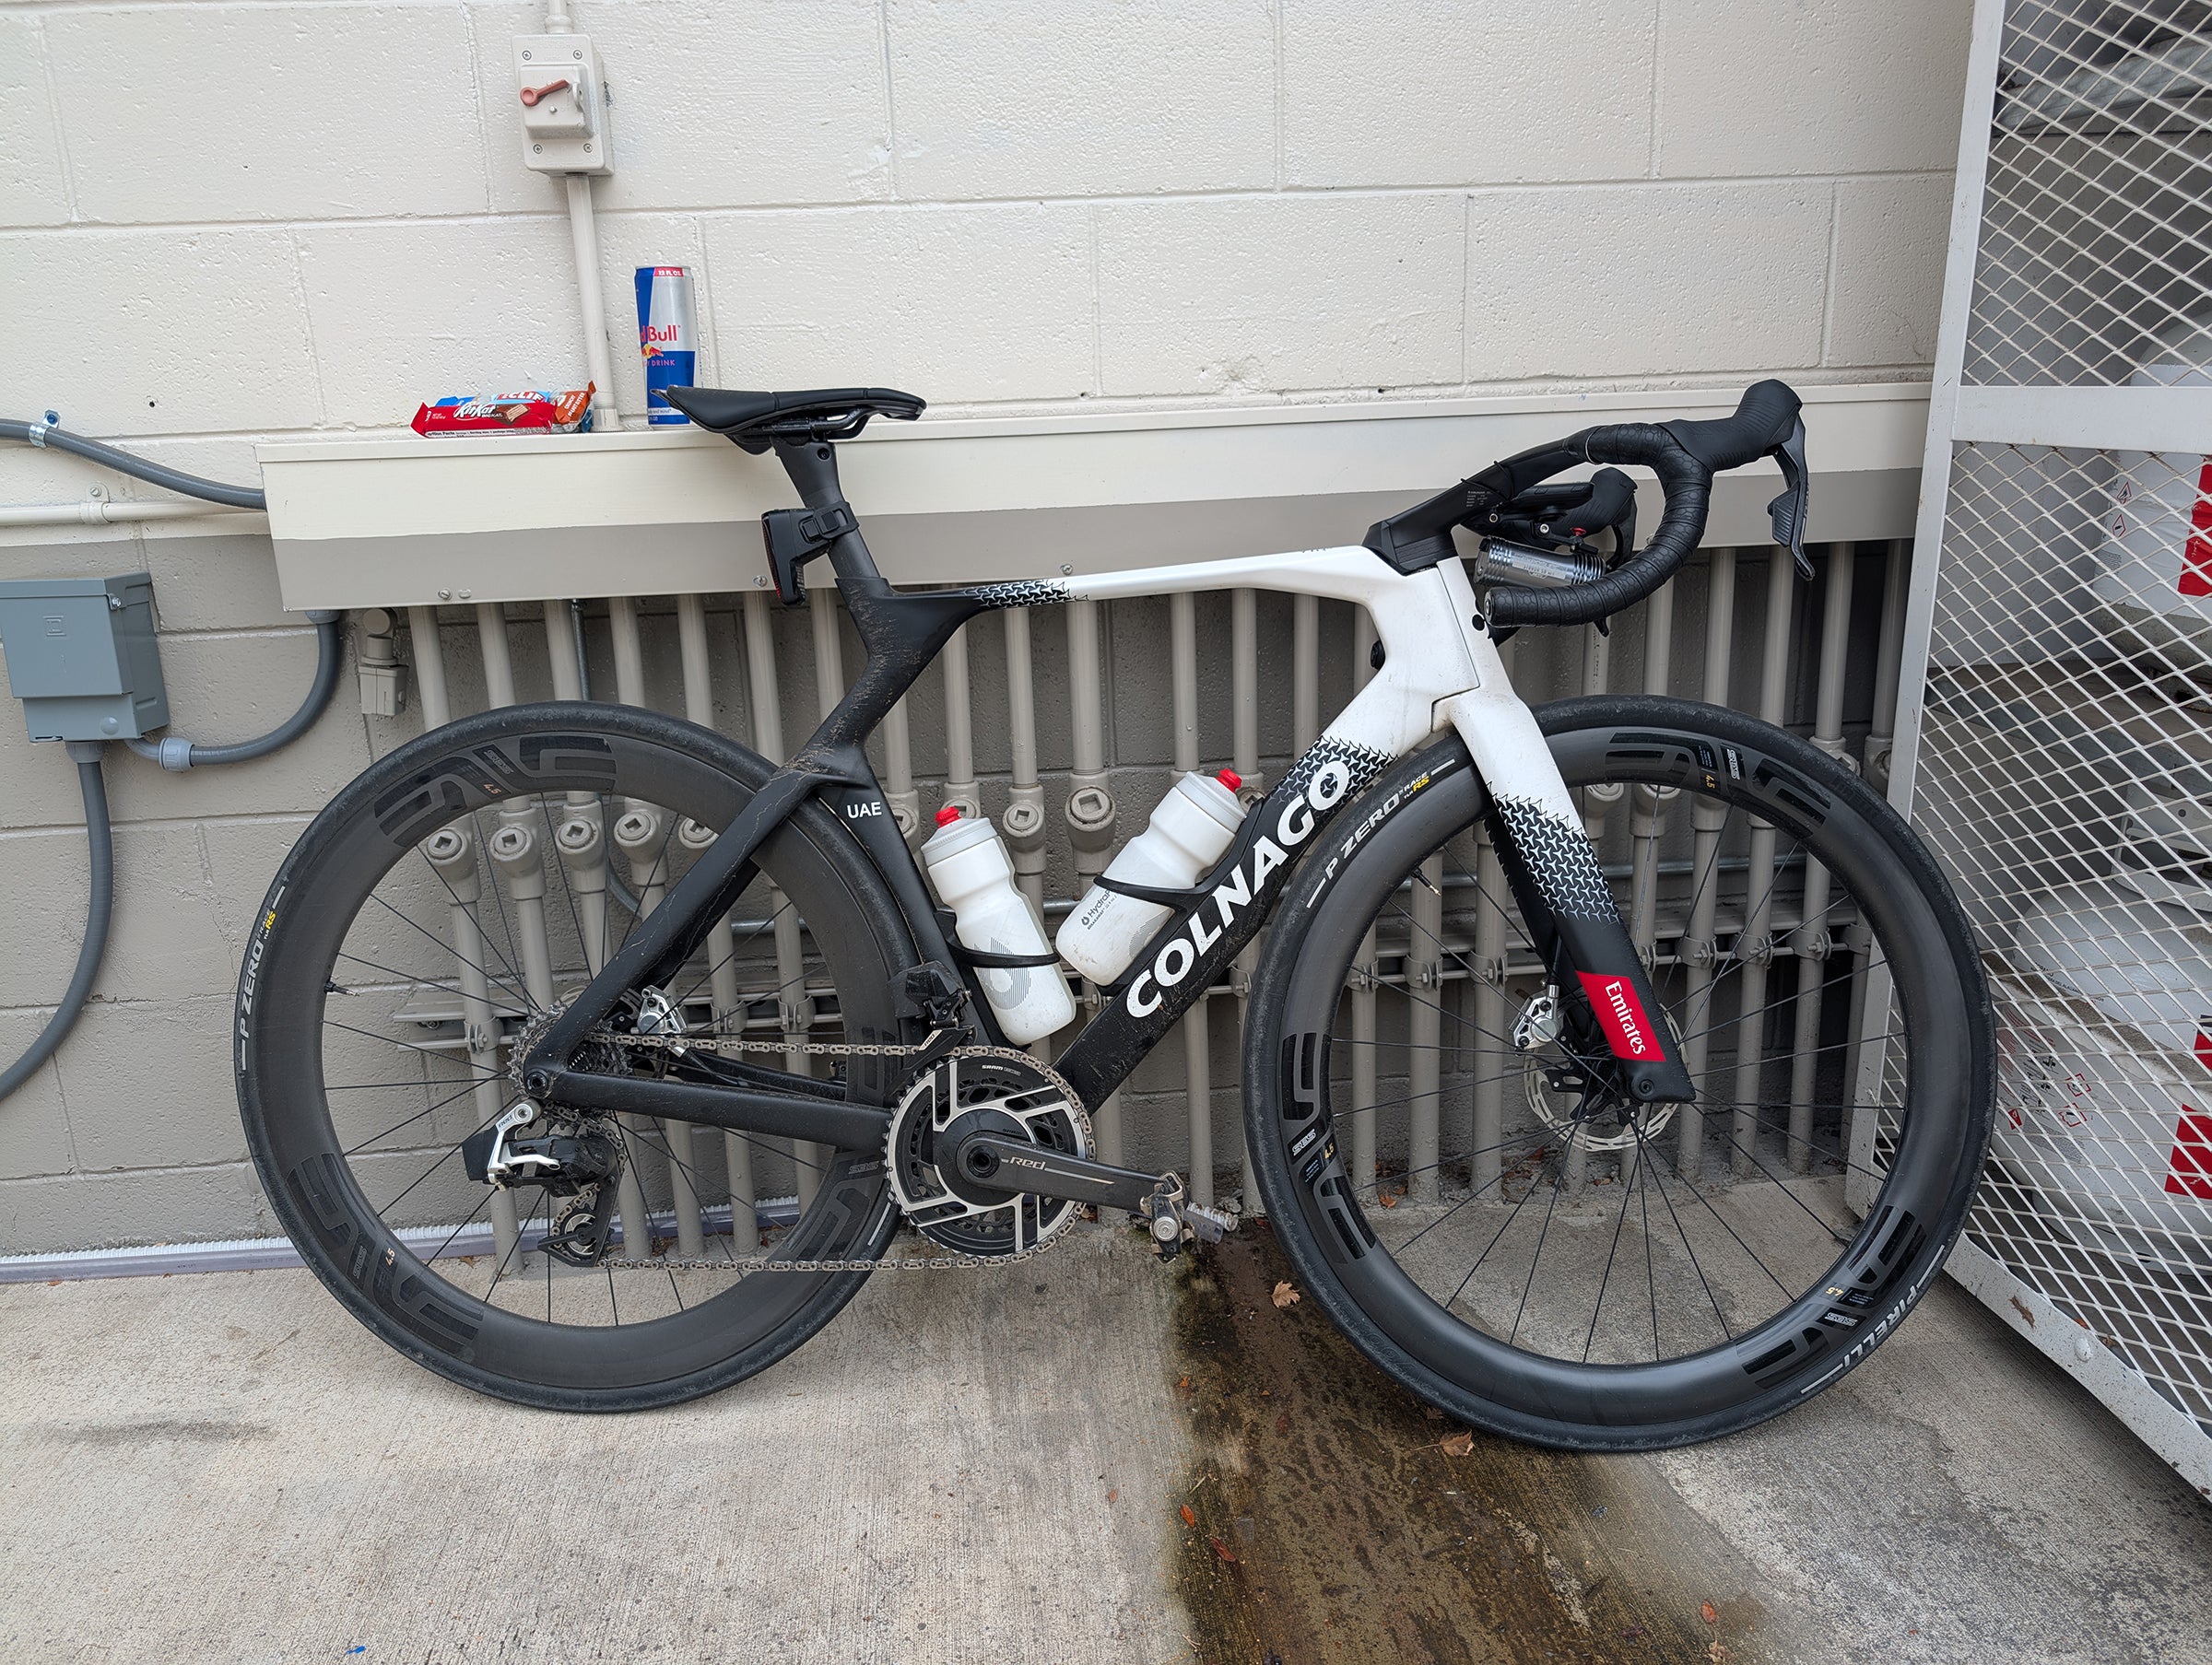
We know the Colnago Y1Rs is good enough to win the Tour de France with. Naturally we took it way out of its element.
Updated October 16, 2025 11:55AM
You aren’t supposed to take the Colnago Y1Rs on a 600km gravel adventure. That bike is one of today’s premier aero race bikes, meant for a highly specific function: speed at all costs. It wouldn’t be most people’s first choice for endurance rides, and you certainly wouldn’t ride it long distances across mixed surfaces.
I did it anyway.
Why? Most of us can’t own every kind of bike for every kind of ride — but that doesn’t mean you should let the equipment you do have limit what you can do.
This is how I set the bike up to make it work, plus all the gear I used. There’s lessons you can take with you for whatever adventure you want to do with whatever bike you have. First though, let’s address that claim about what a race bike can and can’t do.
 (Photo Josh Ross/Velo)
You can do a lot on an aero race bike
The idea that you need a special bike for everything is not only wrong but it also presents a number of problems for regular people who buy bikes. If that narrative is true it really means that you need a stable of different bikes for different purposes. It could also mean you have to have an incredibly, perhaps unrealistic, understanding of your needs when you buy a bike and you can’t change your mind later.
Personally, I reject the entire narrative. Certainly some kinds of bikes are better for certain activities but I love the feeling of riding a fast race bike. Aero bike in particular is perfect for long distance riding but whatever bike you have you can do more than you think.
You don’t have to buy a perfect bike for every situation and only use it for that situation. A bike like the Colnago Y1RS is incredibly fun to ride and realistically crazy long adventure rides are always going to be a small part of any cyclist’s riding experience. For lots of people it might even be only once every couple of years. You don’t need a special bike for that but it does require a bit of planning.
 That’s an Enve SES 4.5 that the tire is mounted to. (Photo Josh Ross/Velo)
How I made the Colnago Y1Rs into an endurance bike
The first thing I had to address was a major sticking point in my Colnago Y1Rs review, the outfront mount. The one Colnago provided was terrible for a number of reasons but the number one issue in this case was the lack of an action camera mount on the underside. This is an issue for every Colnago I’ve ever reviewed and this scenario is exactly why I comment on it.
I didn’t plan to use this bike, and you might not have planned to do that big ride, but I was convinced to do so at the last minute. Colnago doesn’t consider packaging a terrible mount an issue because you can get one from FramesandGear. The problem is that frames and gear is a tiny company and currently out of stock on that mount. You should never have to scramble for a mount at the last minute on a bike that requires a proprietary piece.
Unfortunately I had to scramble but I found a hacky solution that worked and might apply to your bike also. The Colnago Y1Rs is one of a few bikes, including the Cervelo S5, that uses an adapter to bolt to the bar then connects an arm to that adapter with a GoPro (action camera) mount.
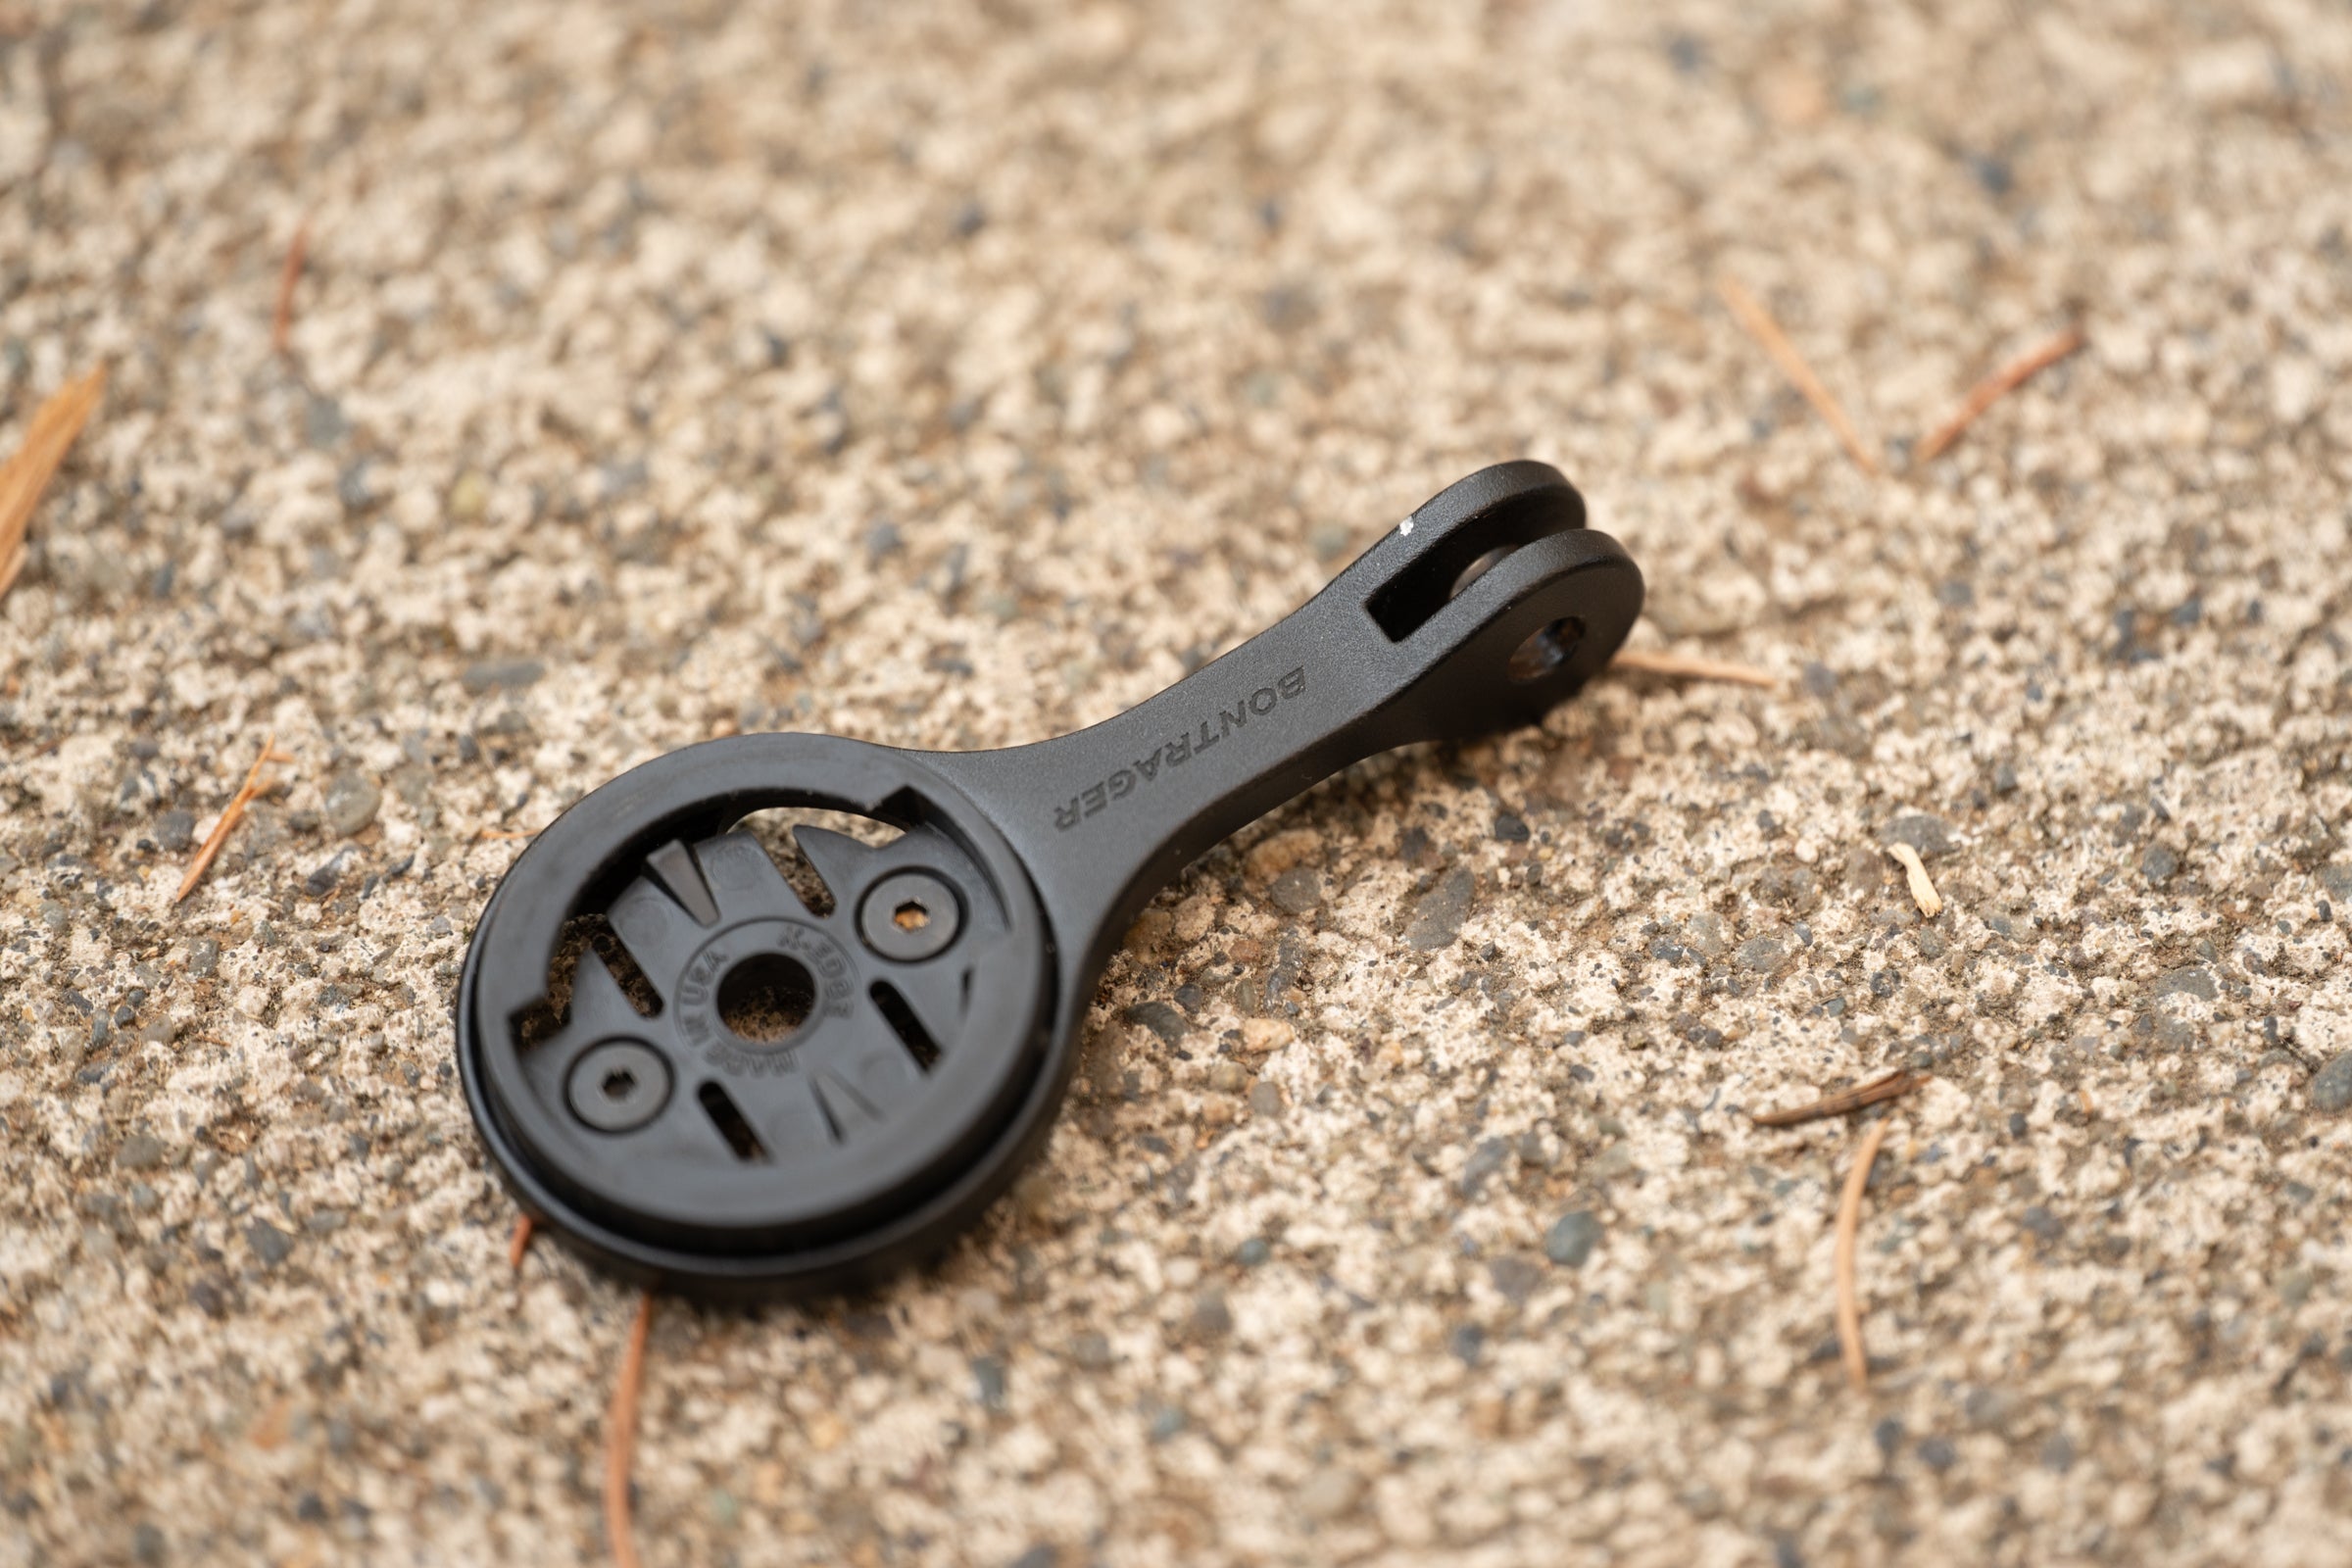 The only downside to this is that it’s a bit short but otherwise this will solve a lot of problems for a variety of bikes. (Photo Josh Ross/Velo)
Trek also uses that design. Trek expects you to use it with a Trek stem but the Trek stem just has a GoPro adapter that the arm bolts to. You can use it with any GoPro adapter and there are Trek stores everywhere plus tons of inventory and fast shipping if you need it. I was able to walk into a Trek store and purchase a Bontrager Blendr Garmin High Mount.
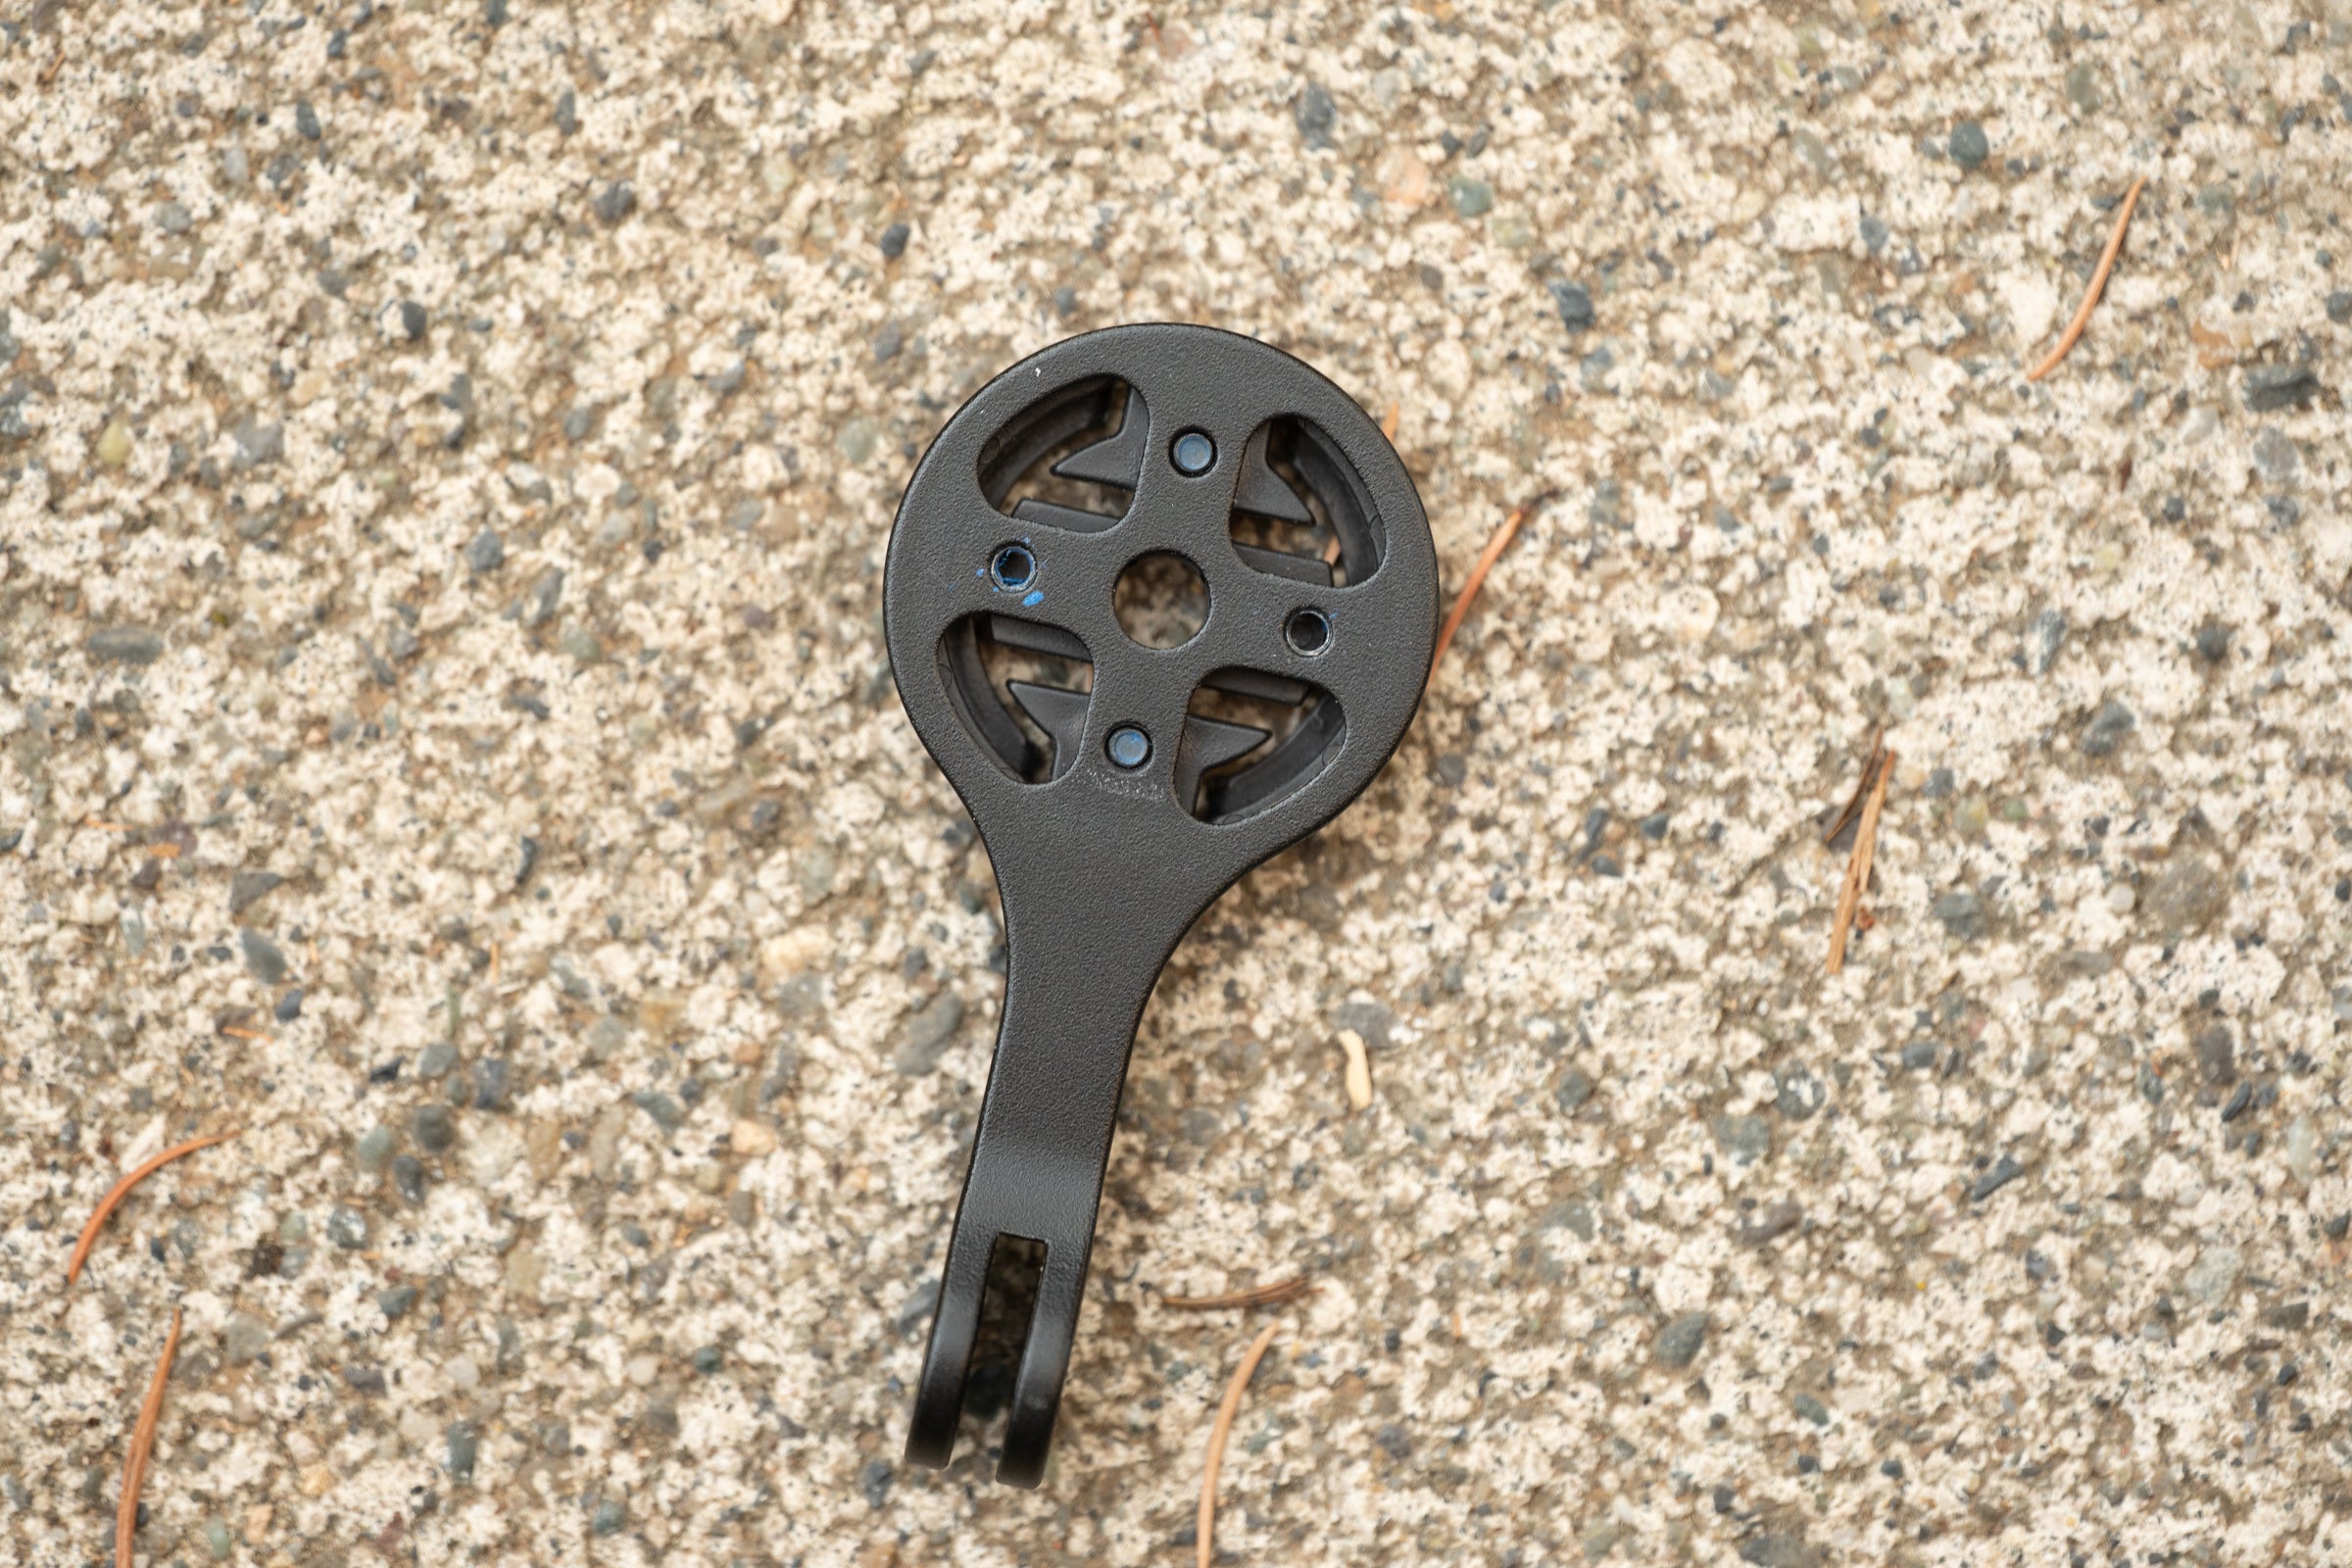 As long as you are using a Garmin, the K-Edge adapter will bolt in without issue. (Photo Josh Ross/Velo)
This works but it also opens up a whole new list of problems to solve. First off, it doesn’t have a GoPro adapter which was the original issue. I need that to use with a light on the funky bars. I solved that by adding a K-Edge Combo Mount Adapter I already had on hand. If you don’t, K-Edge is a US company with fast shipping.
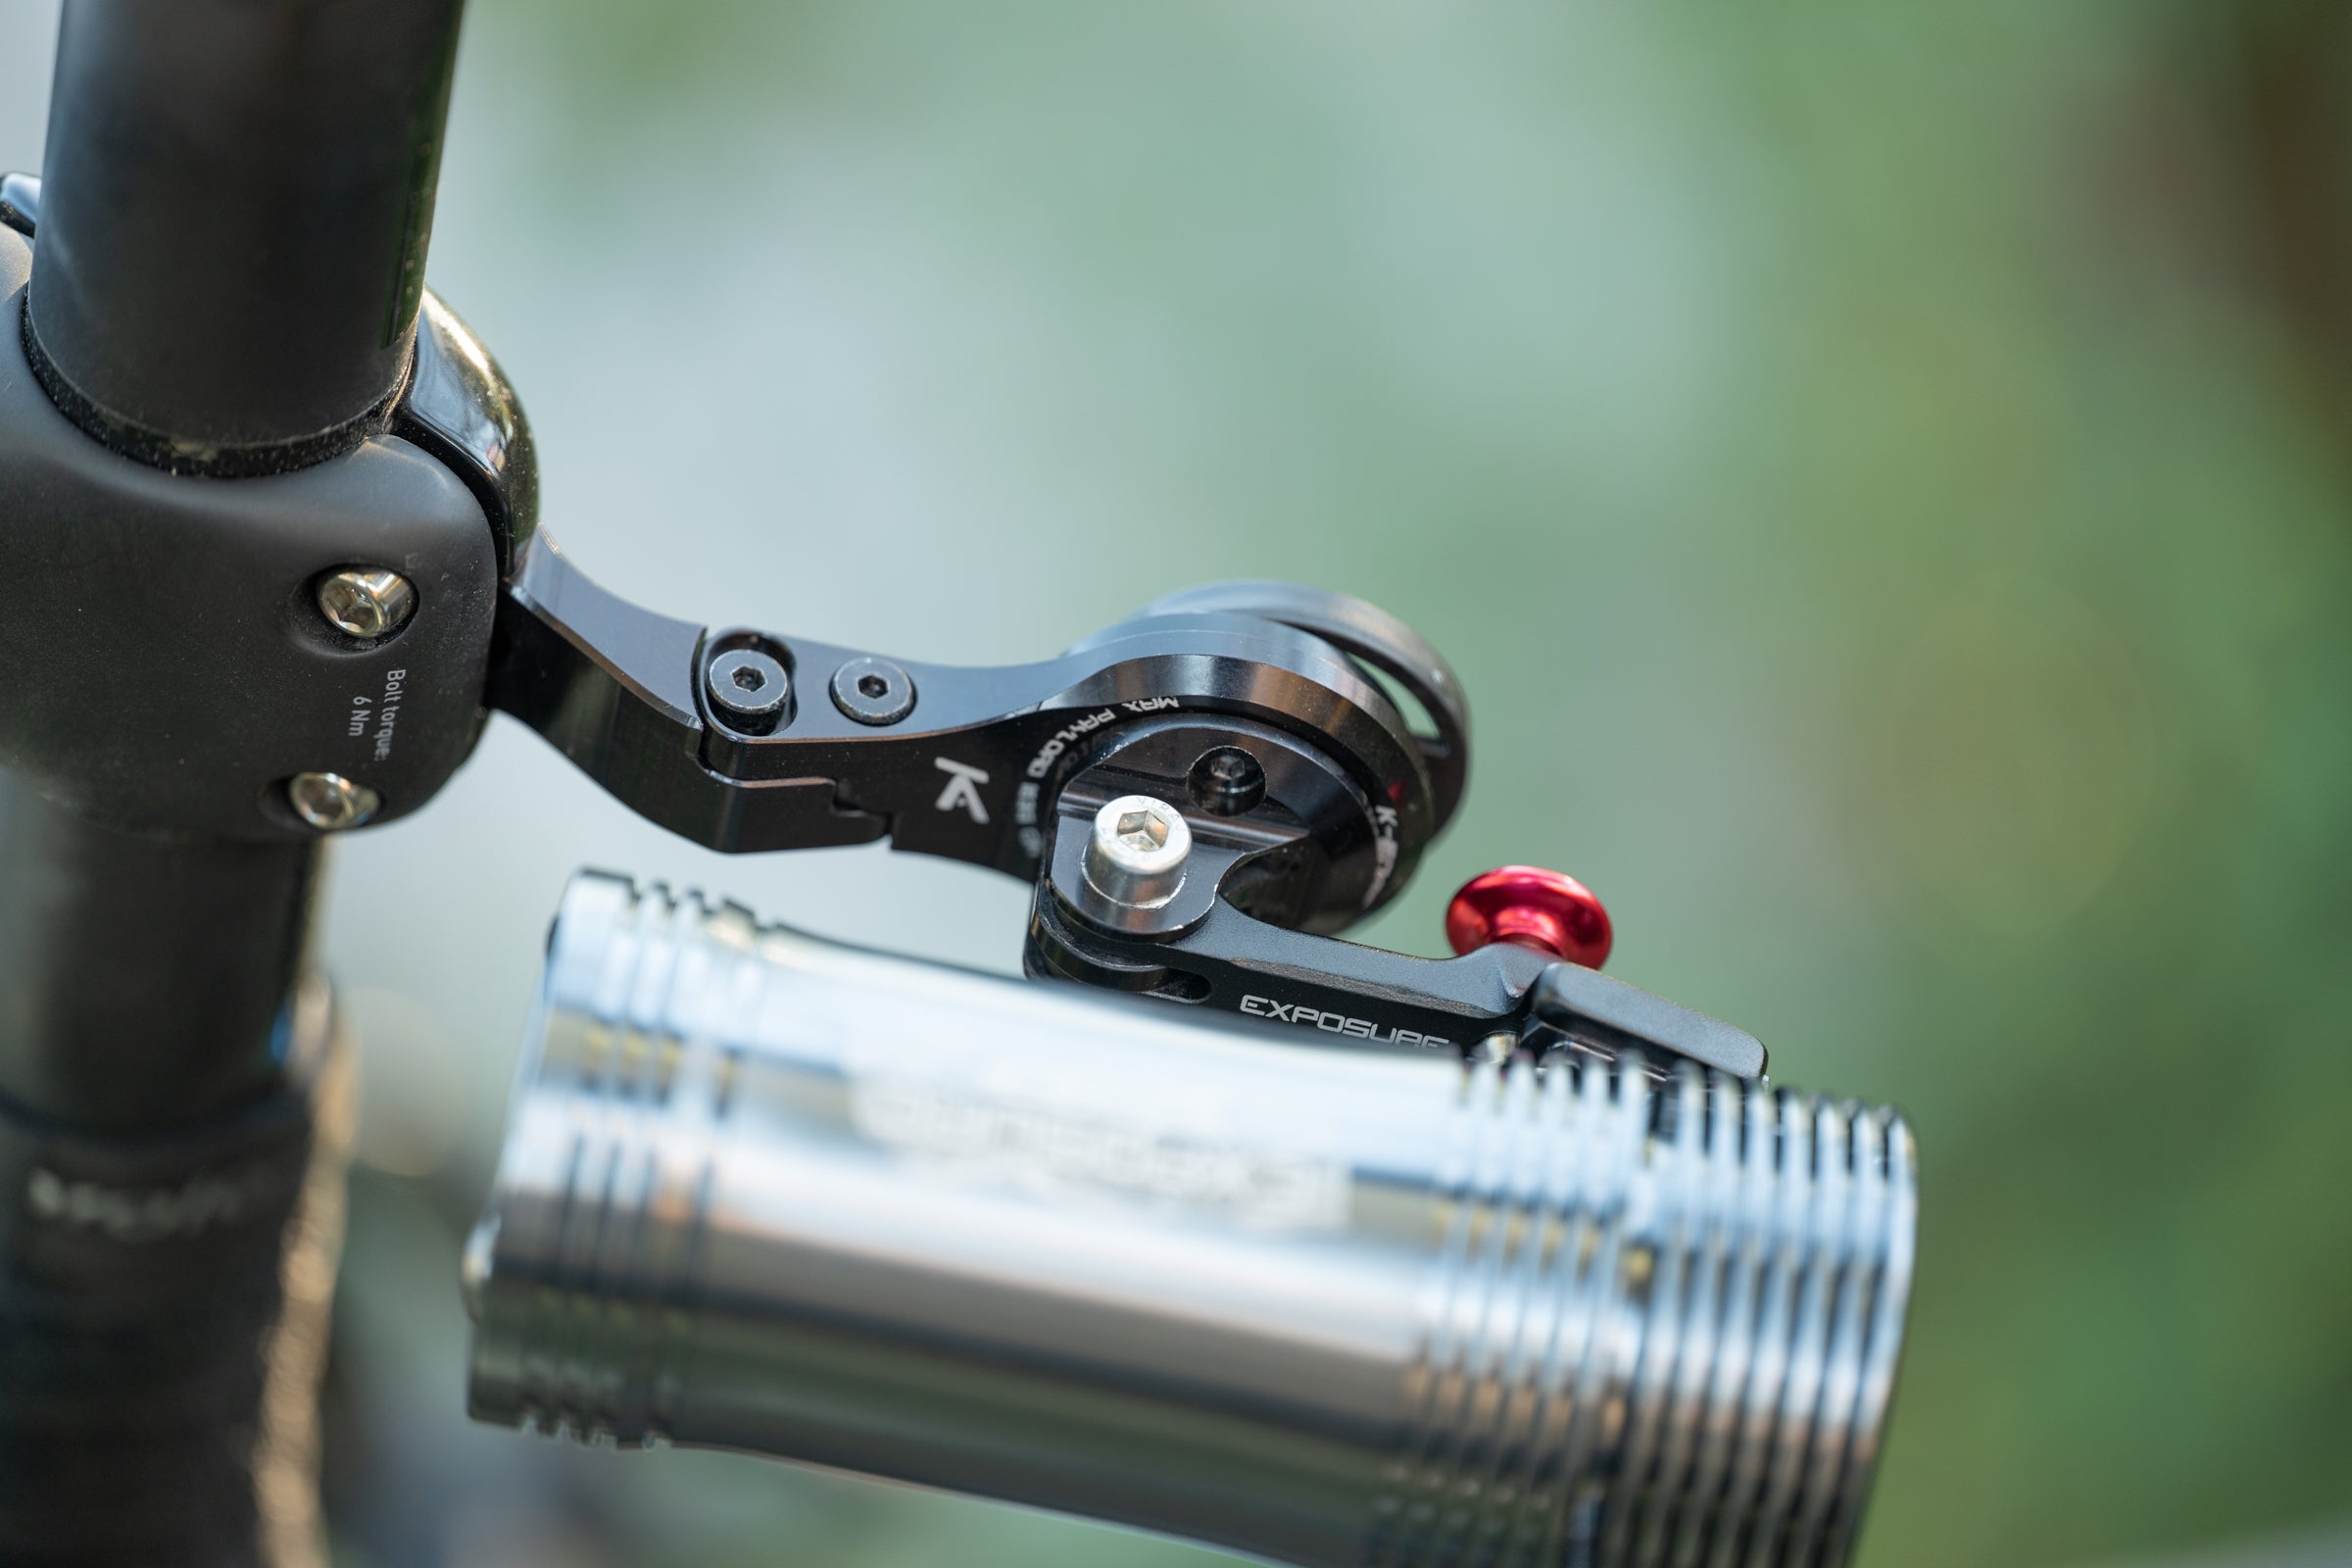 This the K-Edge adapter mounted on a K-Edge mount but it works on the Bontrager piece as well. (Photo Josh Ross/Velo)
There’s still one more issue though. Colnago uses a bolt to secure the two pieces together that will strip if you look at it wrong. Turns out this is because the adapter is plastic and is easy to break if you overtighten. I had an extra adapter on hand but you probably don’t. Go replace the bolt with something much more robust from the hardware store but tighten it with care once you’ve swapped it out.
That’s a lot of description so hopefully it helps someone besides me to cobble together a mounting solution for both a light and computer on whatever bike you need to deal with on a short timeline.
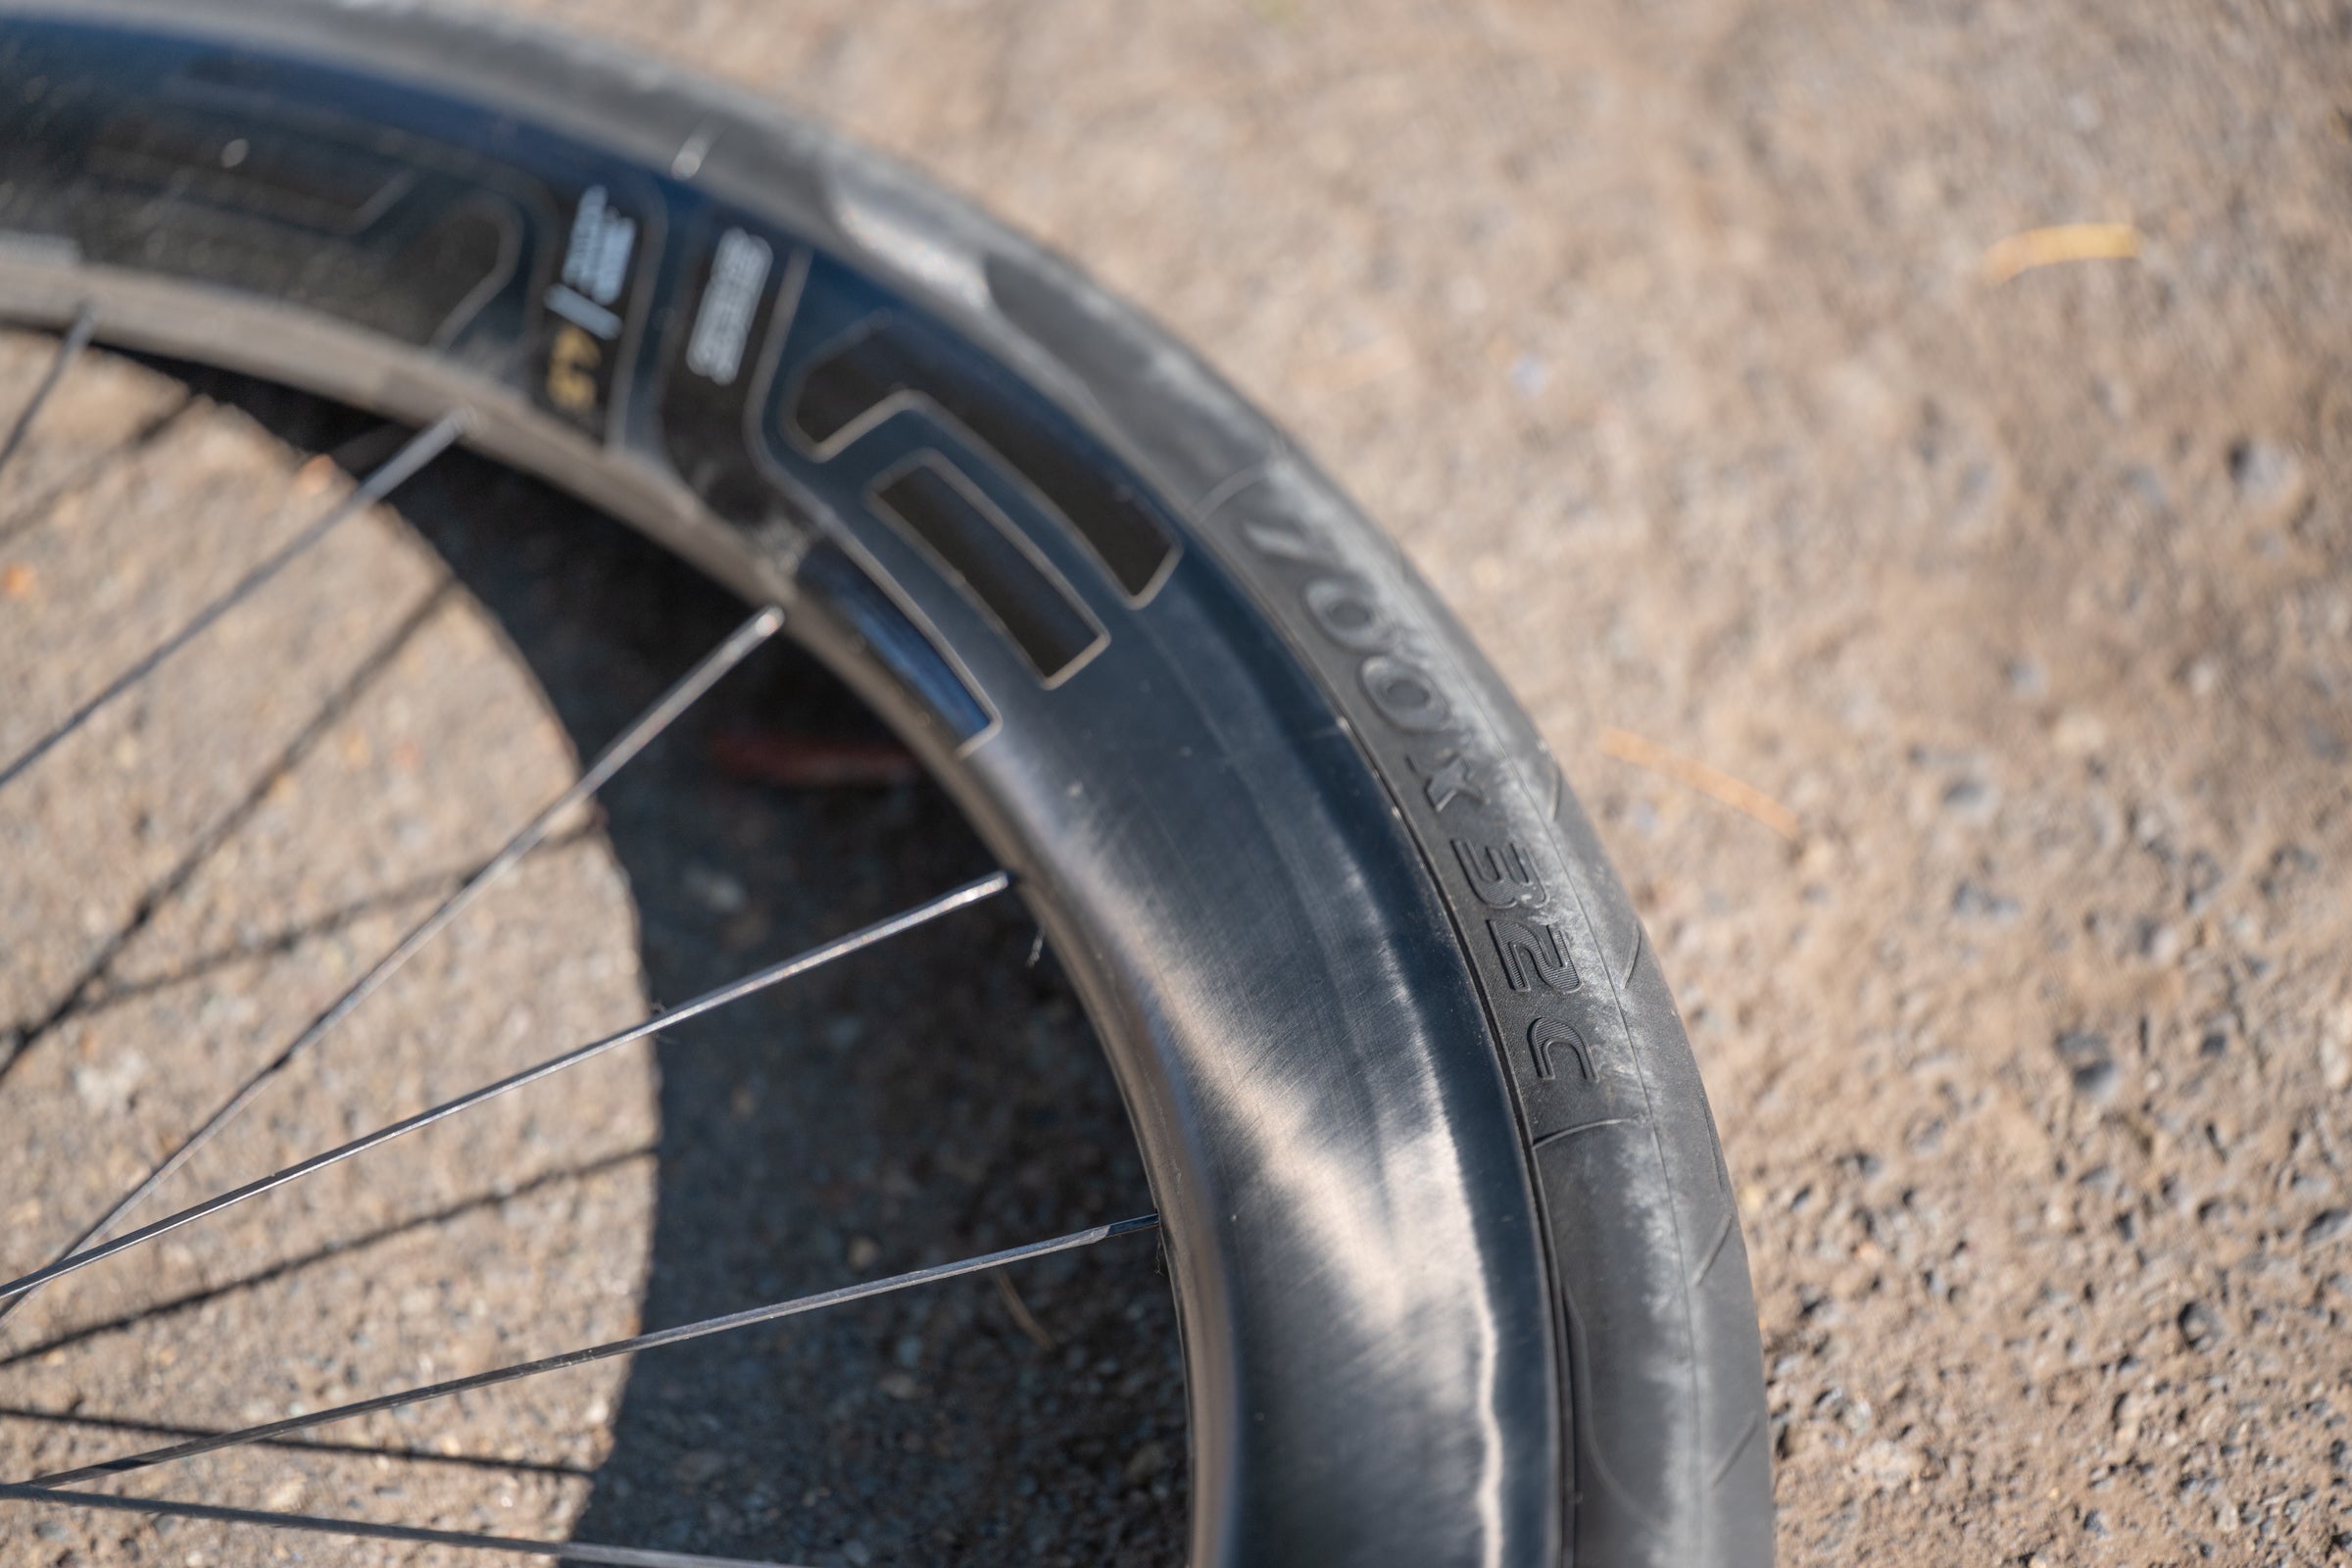
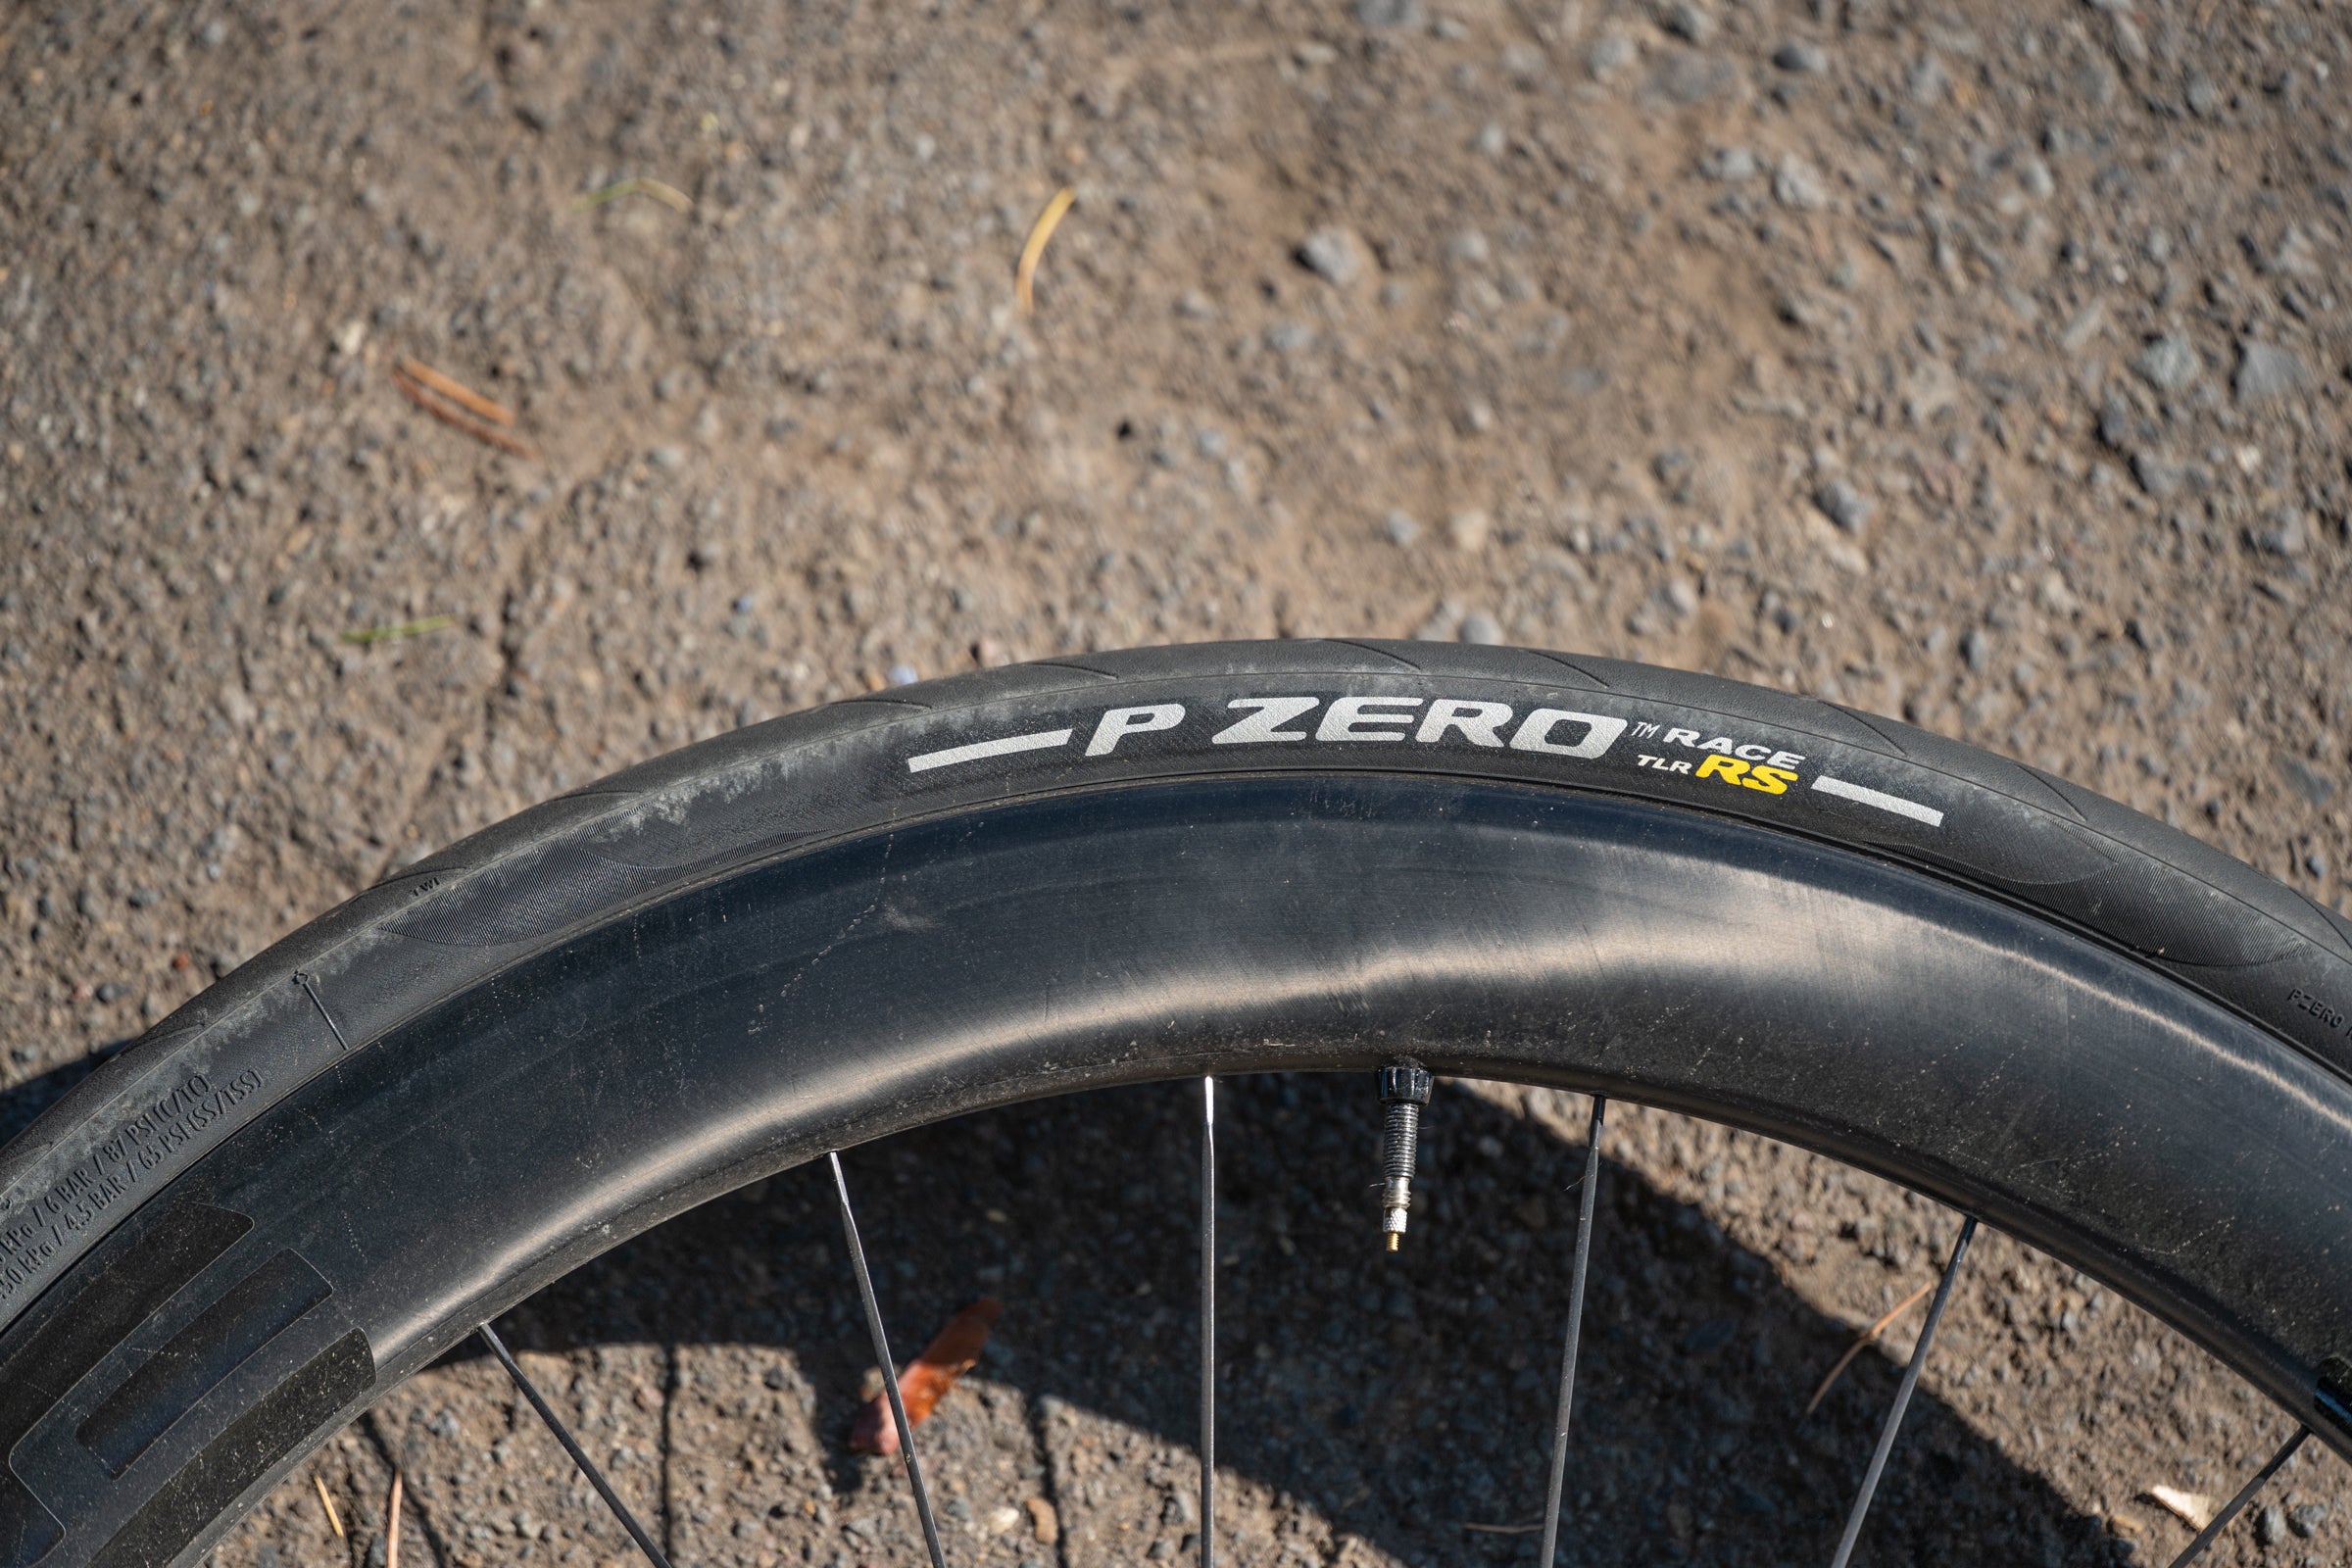
The next thing I tackled was tires. This was a mixed surface adventure so I wanted the biggest I could fit and on the Y1Rs, that’s only a 32mm. I also wanted fast and tough. I ended up going with the Pirelli P ZERO Race TLR RS and they were a huge success. I was running the Enve SES 4.5 wheels I discussed in the Colnago review and the 25mm internal width, plus gravel capabilities, kept the sidewalls looking fast and the ride comfortable when paired with the Pirelli tires. I do find these tires wear quite quickly but I got no punctures and they fit.
 (Photo Josh Ross/Velo)
That last part was a big part of why I made this choice actually. With the Colnago the real tight spot is between the tire and the downtube. Although a 32 is supposed to fit, it looks pretty tight and I was worried. Pirelli lists the outer diameter in the P Zero specs so I was able to do some measuring ahead of time.
That measuring ended up being extra important because I’d wanted to use the Apidura Aero system. I actually think it would have made the Y1Rs faster but it uses a strap on the downtube. It fit with a 28mm tire but I could tell from the Pirelli specs that it wouldn’t work with a 32.
The last thing I did was switch from road pedals to gravel. Another complaint of mine in the Colnago Y1Rs review was that there was no power meter included in the builds. That means power pedals and I chose the same Garmin XC200 that I’ve carried across the world and used for many events. They were flawless as always and I look forward to trying the new Garmin XC210 next time.
That meant my conversion was pretty sparse. I had a special outfront mount, different pedals, and big tires. You can accomplish this on a whole lot of bikes and most of them will actually accommodate a 34mm tire.

What I actually did with the Colnago Y1Rs
A lot of people will have come here because of the bike I chose so I started there but now let’s talk about what I actually did. The original plan was to ride 500k in one shot. Then the weather changed and it was looking like hard rain through the night. I was definitely not interested in that but I still wanted to do a big ride. I settled on breaking it up to mostly avoid the rain.
The weekend centered around the final Swift Summit 200 but I decided to commute there by bike. The event itself is, as the name suggests, 200 miles of mixed surface riding but mostly road. There’s also lots of climbing.
It starts in Lebanon Oregon which is about 80 miles from my house if you take the direct route that I did on the way down. Then I stayed in a hotel and did the event. That night I stayed in the hotel again then took a better, but less direct, route home covering about 96 miles.
That’s a bit over 600km in three days with the big day in the middle and some of that being on gravel roads. Everything was a success. The only real challenge being the race bike gearing that wasn’t friendly to steep gravel climbs with low traction. As already mentioned though, It did require some planning. Here’s how I handled the rest of the details.
What I carried and how I carried it
With no way to carry anything on the bike I ended up using two things to carry what I needed but I also travelled light. The first was the POC Ultra Cycling Vest.
You’ve seen me riding in this during a variety of videos including the Colnago Y1Rs review video. I was testing it because I was considering this ride. Having finished all the testing, it’s the best of the hydration packs I’ve used. It’s also the most expensive, doesn’t have great hose routing, and it doesn’t come with a bladder so I grabbed a Hydrapak Contour 2L. I’d still recommend it over anything else.
The reason I like it so much is because it’s the best fitting and it actually has a ton of storage. In this case I started with the bladder empty and carrying Tailwind High Carb packages instead of water. I can do 80 miles on my own without a hydration pack so I took advantage of the extra space.
The other thing that helped me carry what I needed was the Pedal Ed Odyssey jersey. This is my favorite jersey but it’s also important because it has extra pockets. Specifically on the sides of your torso. Because of this I was able to carry my flat repair, phone, and food plus extra clothes. This is a definite advantage anytime you need to carry a bit more.
Other than that, I travelled light. No casual clothes or shoes, just a hotel room with a grocery store nearby, a credit card, and walkable two bolt shoes. There’s no need for overpacking. Be concise and you can travel light.
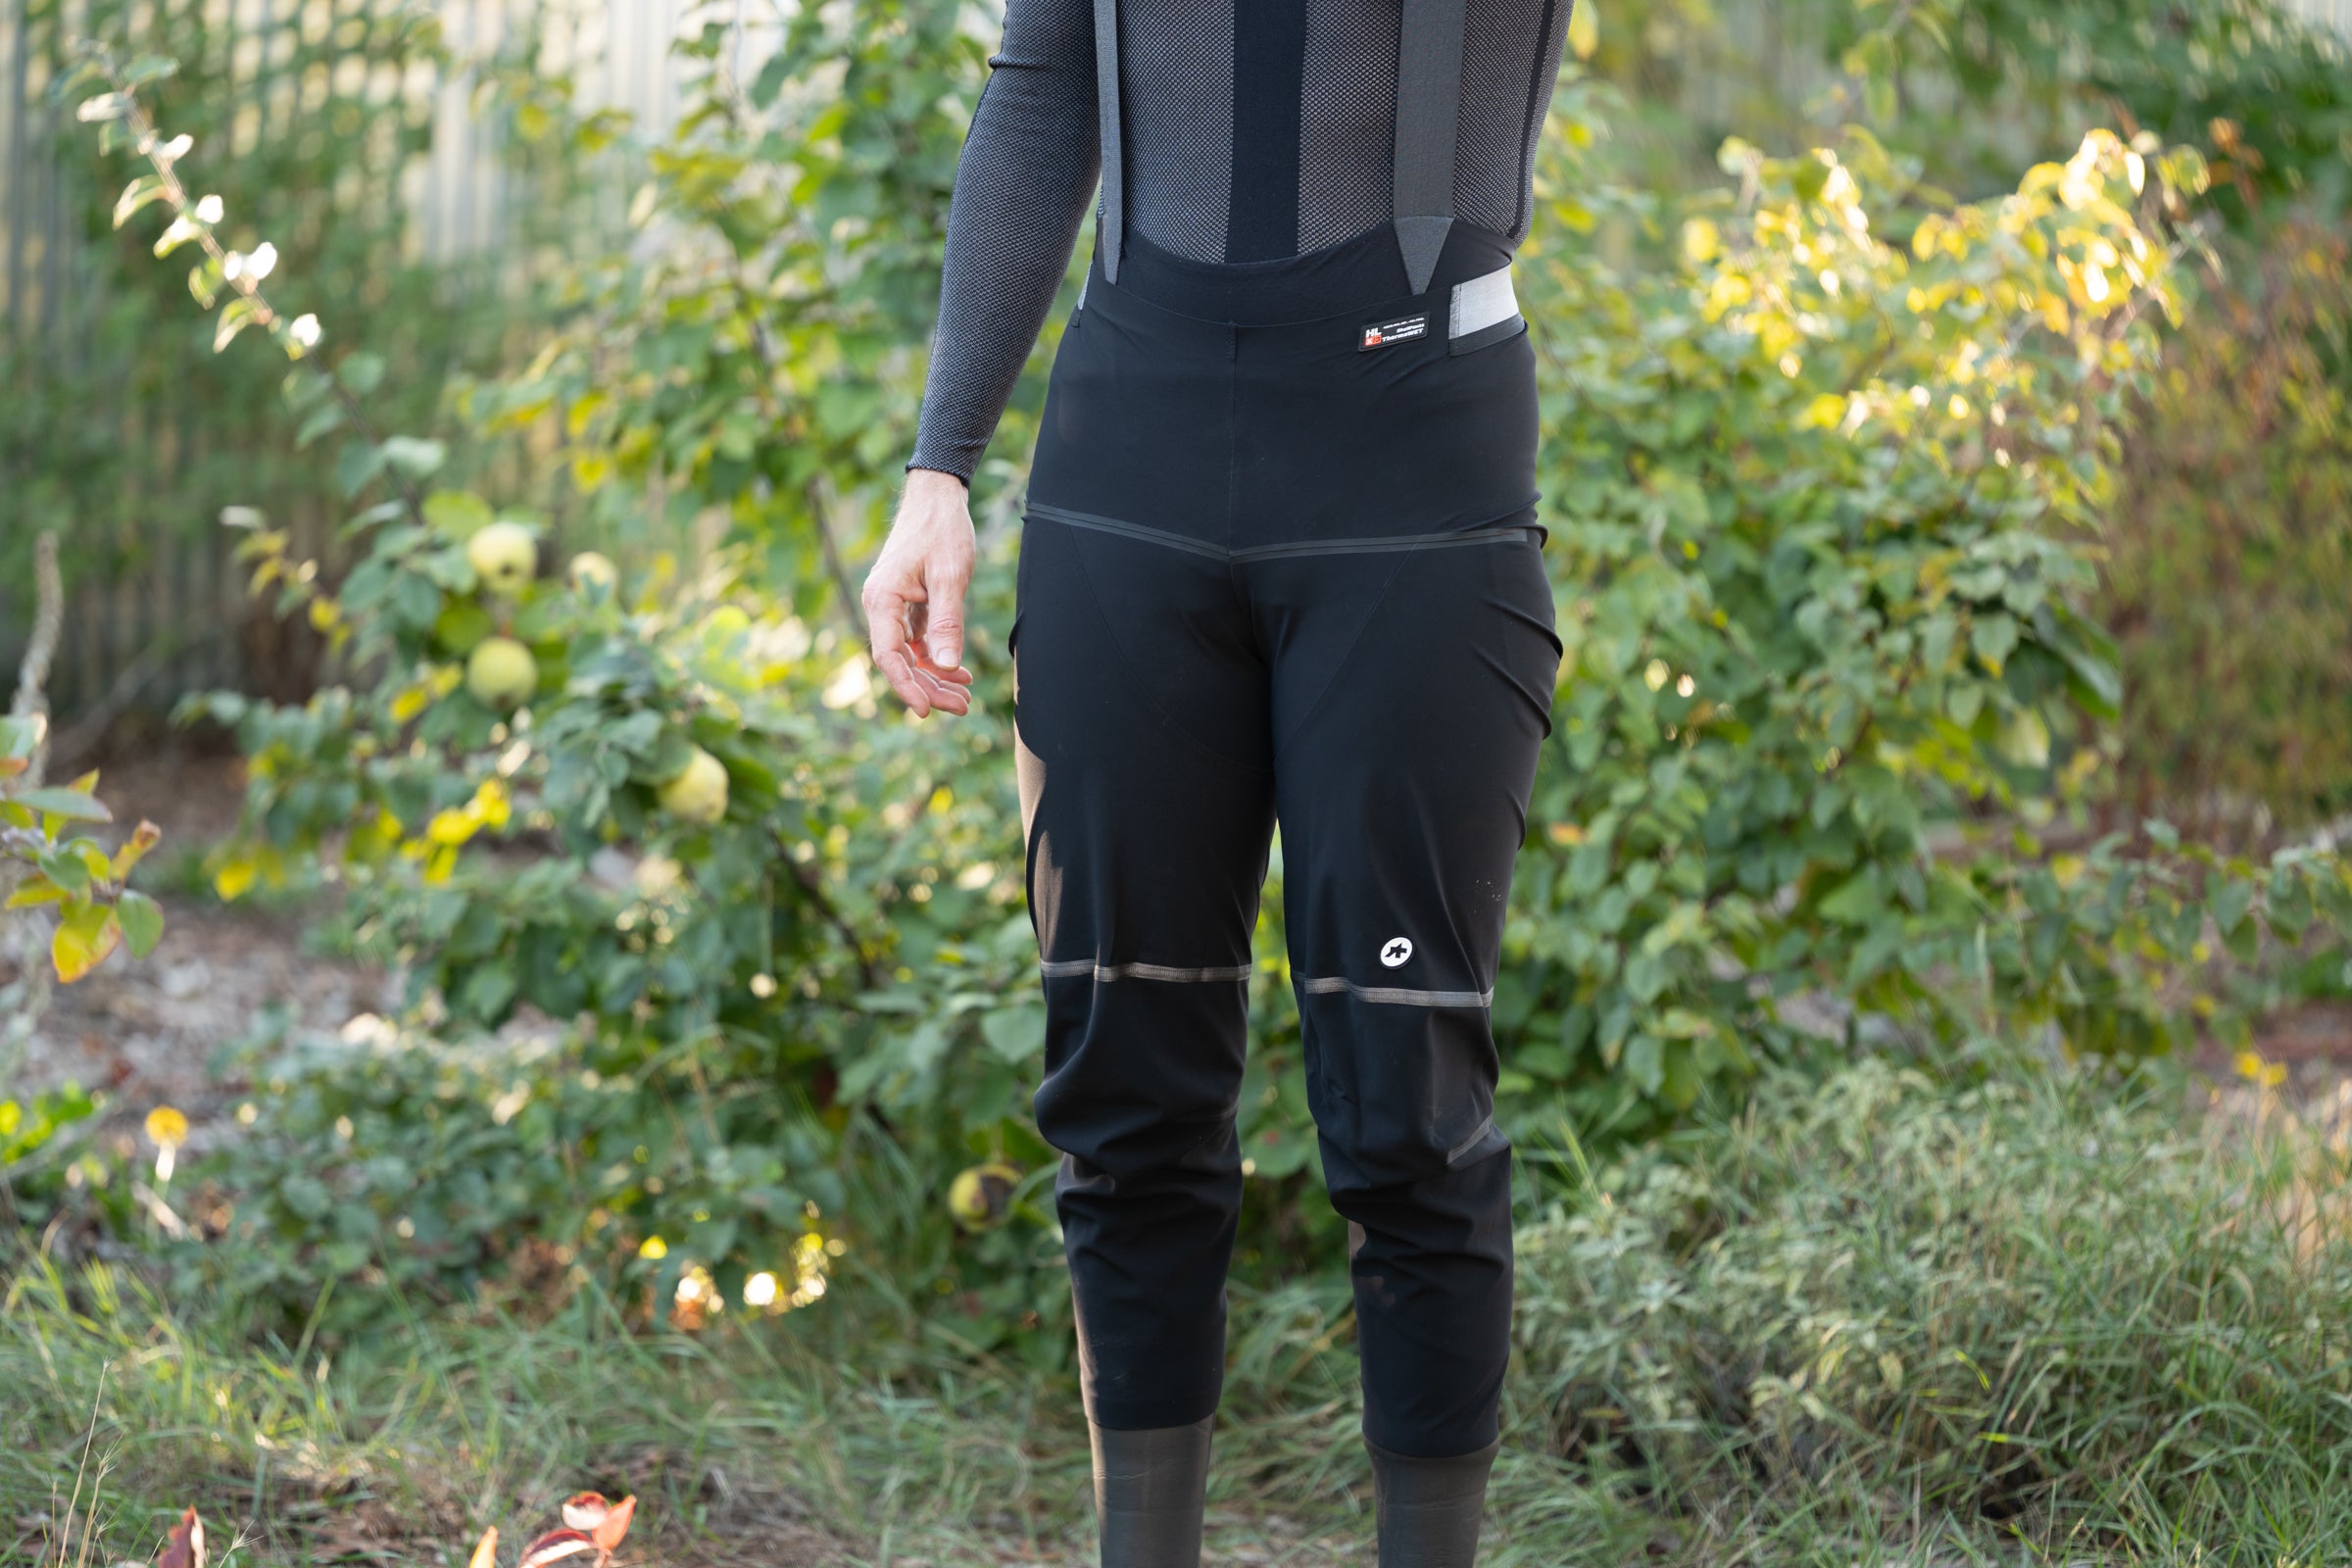 Those are some of the unique Assos bib tights that pair with these rain pants for winter riding you can see peaking out the bottom. (Photo Josh Ross/Velo)
The clothes I wore
I already discussed the jersey but I used a different set of bib shorts. I also have the Pedal Ed Odyssey bib shorts, and they are great for a normal day ride, but I was worried about chafing on a 14-hour ride. Instead I chose LeCol Arc cargo bib shorts. The fabric is soft and the chamois is excellent. I had no issues with these and I expect they’ll show up in next year’s best bib shorts buyers guide.
If this had been any other day of the month the jersey and bibs would have been the clothes. In this case rain was an issue for the exact 24-hours of the event and it was rain clothes I carried in the extra pockets on the Pedal Ed jersey.
Now in understanding these choices, you have to understand that this was not a little drizzle. If it had been then a softshell solution would have been fine. Instead it was an atmospheric river and while it was only forecast to rain in the night, we started in the night. When you need to travel light and have the best protection you need hardshell clothing and I recommend rain paints.
A lot of people will say never to rain pants. Aren’t they for commuters?
There are certainly commuter focused rain paints but there are also a variety of options for riding fast. One of them is the ¾ length Assos Mille GT Thermo rain pants that can pair with Assos bib tights for the absolute best winter solution. On their own though these are great in warmer, but heavy, rain and that’s how I used them. The other advantage is they are easy to take off when it stops raining and they pack down very small.
 If you want warm, protective, and packable, go with hardshell options. (Photo Josh Ross/Velo)
For a jacket I, again, chose a hardshell. This time I thought I was testing a Rapha Proteam Rain Jacket but it’s been discontinued. Functionally it’s the same as the Gorewear Spinshift Gore-Tex jacket as both have a similar cut and use the same Gore-Tex ePe membrane. If you want to stay warm and dry but also pack light, this is my suggestion.
I also carried two pairs of gloves. I’ve taken to using long finger gloves even in the summer and my favorite of these is the Q36.5 long finger adventure gloves. They feel great and there’s just enough padding.
The Q36.5 are also summer gloves and I needed something warmer just in case. What I brought were a set of Sportful Lobster Glove shell gloves. These have become a go to of mine because they pack down to nothing and you can add a lot of warmth and water resistance if needed. Unfortunately they have also just been discontinued. As I write this another option would be the Assos RSR Thermo Rain Shell Glove but those are disappearing fast as well. Hopefully I’ll have something else to share before winter hits harder.
For shoes, I chose the Specialized S-Works Recon that’s down in the Other Cycling Shoes section of our Best Cycling Shoes guide. I made that choice because I know that Specialized shoes work well for my feet, I needed walkable but stiff shoes, and I wanted to put them to a big test. They passed with flying colors as I mostly didn’t think about them.
 (Photo Josh Ross/Velo)
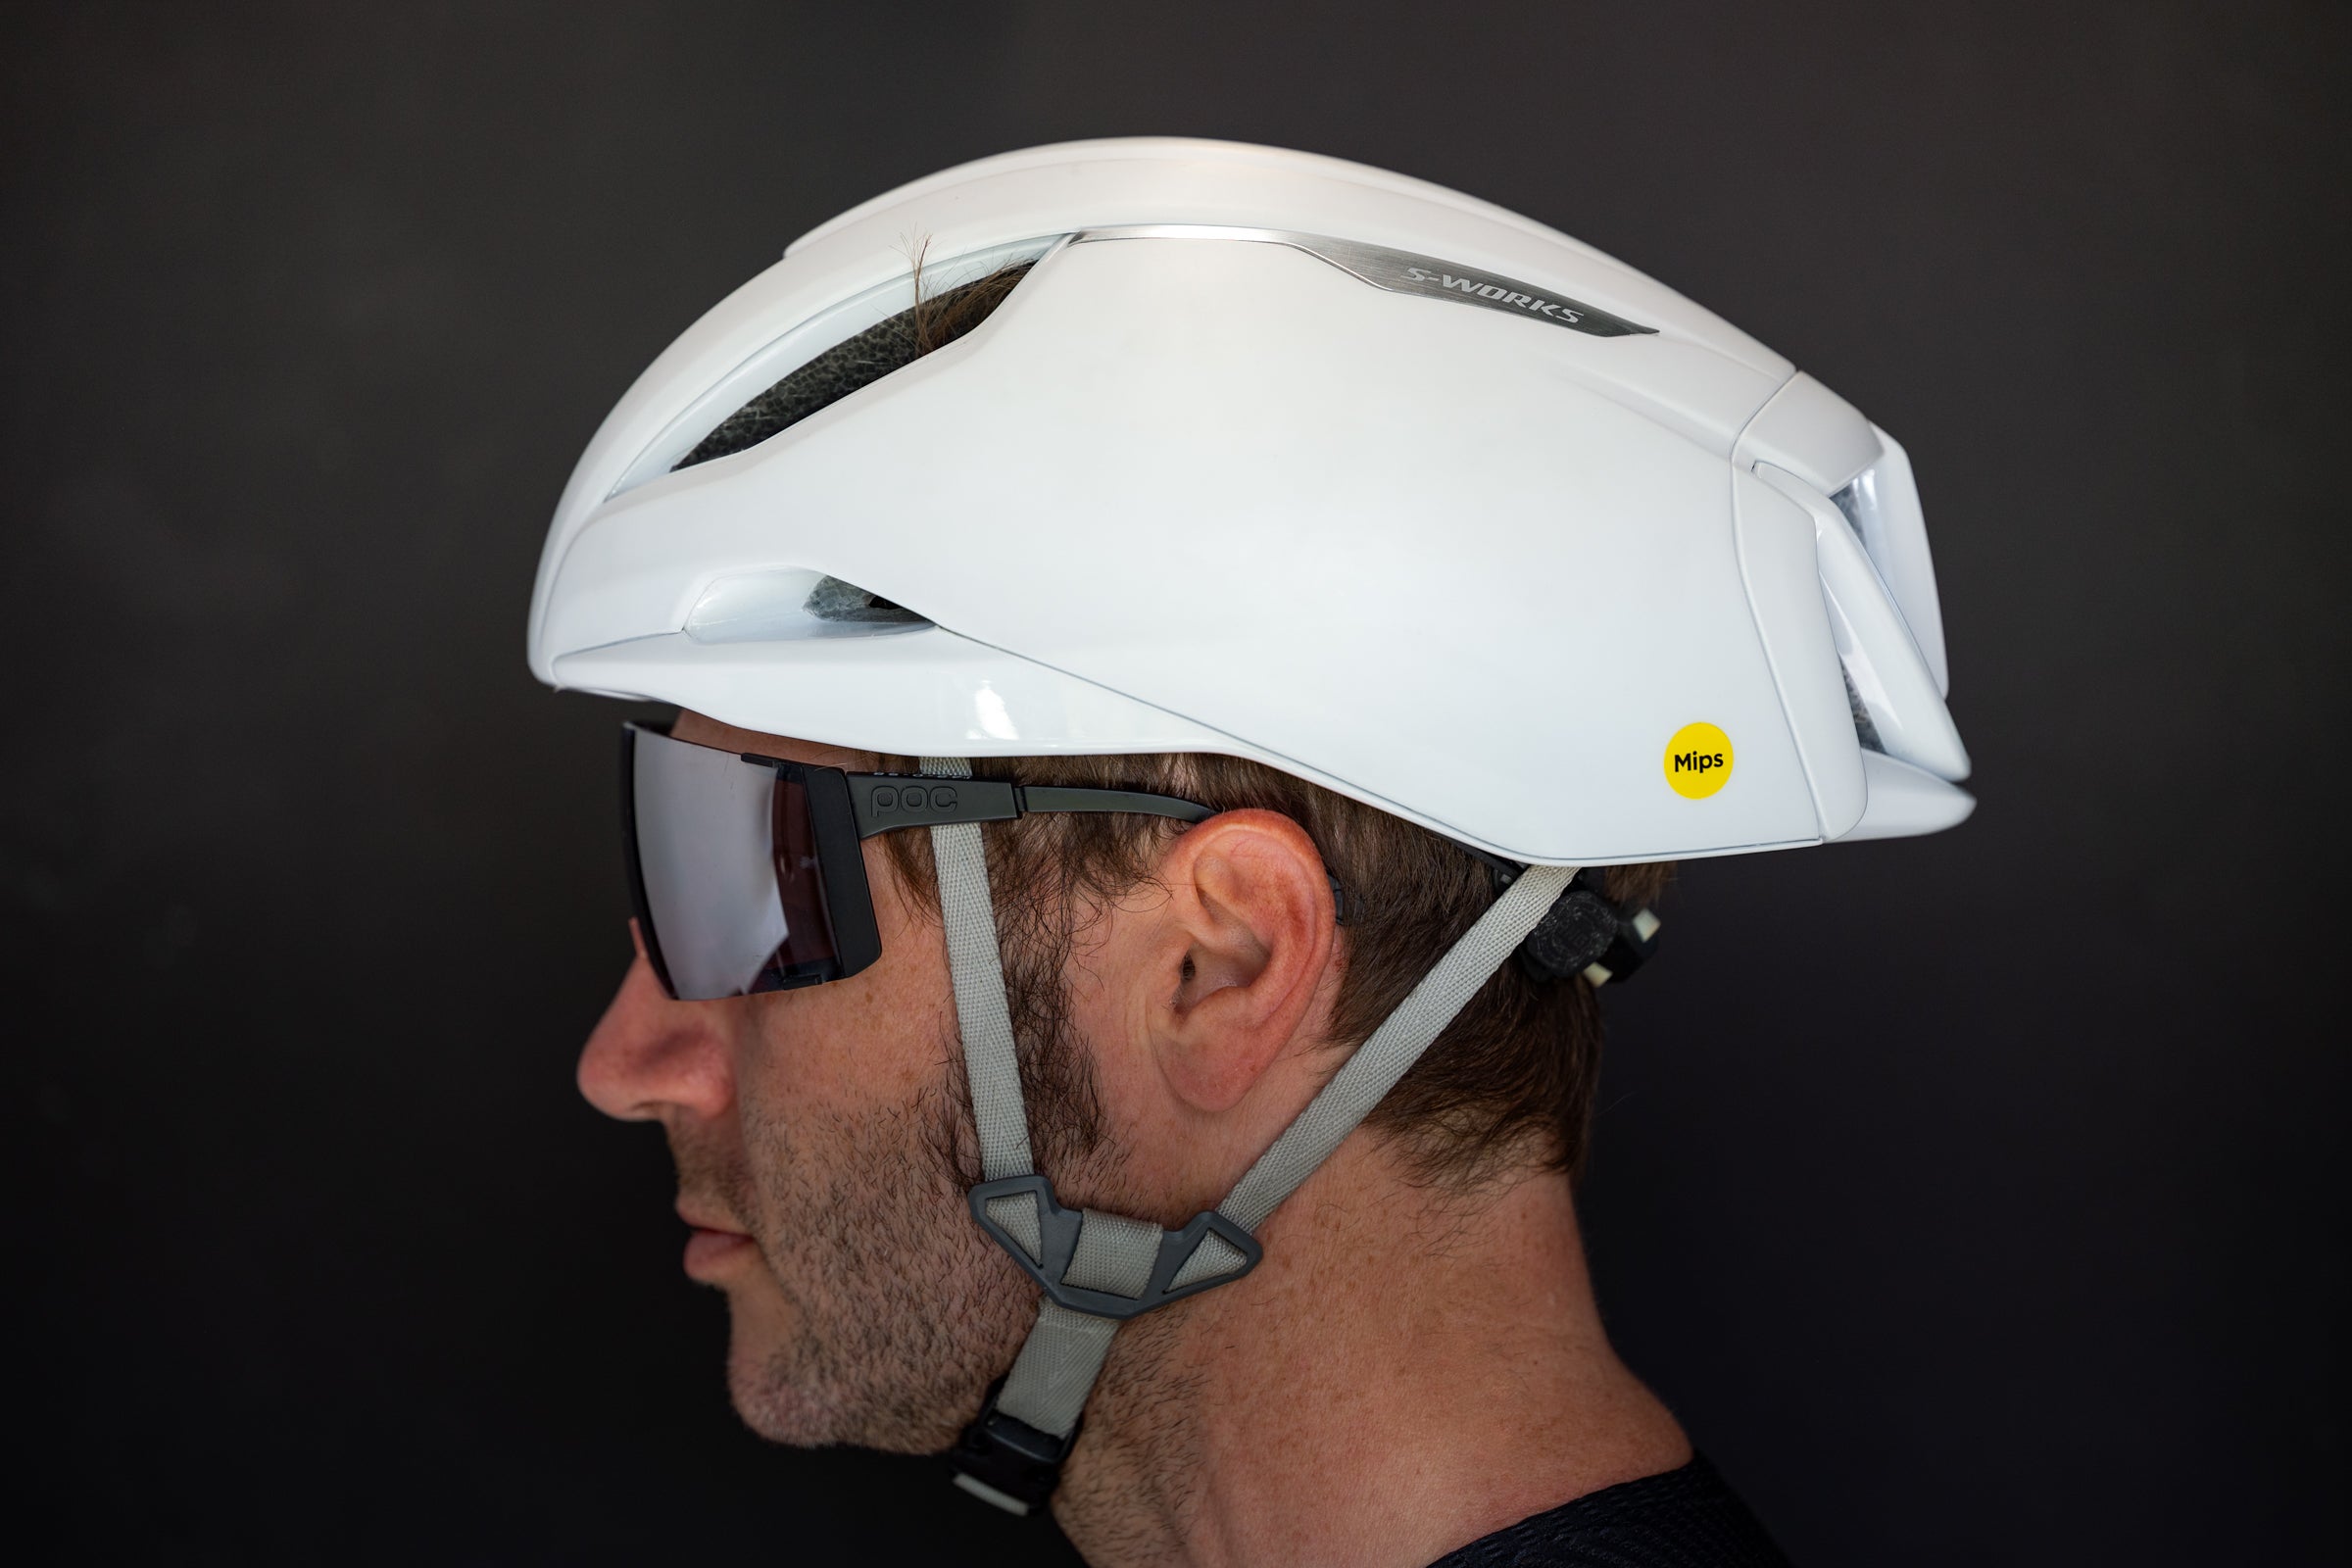
The helmet I brought was the Specialized S-Works Evade 3 but this one was a more considered choice. That helmet is one of many in our Best Bike Helmet guide but it’s the one I choose almost every time. A fast aero helmet is worth as many watts as deep wheels and over long distances a little adds up to a lot.
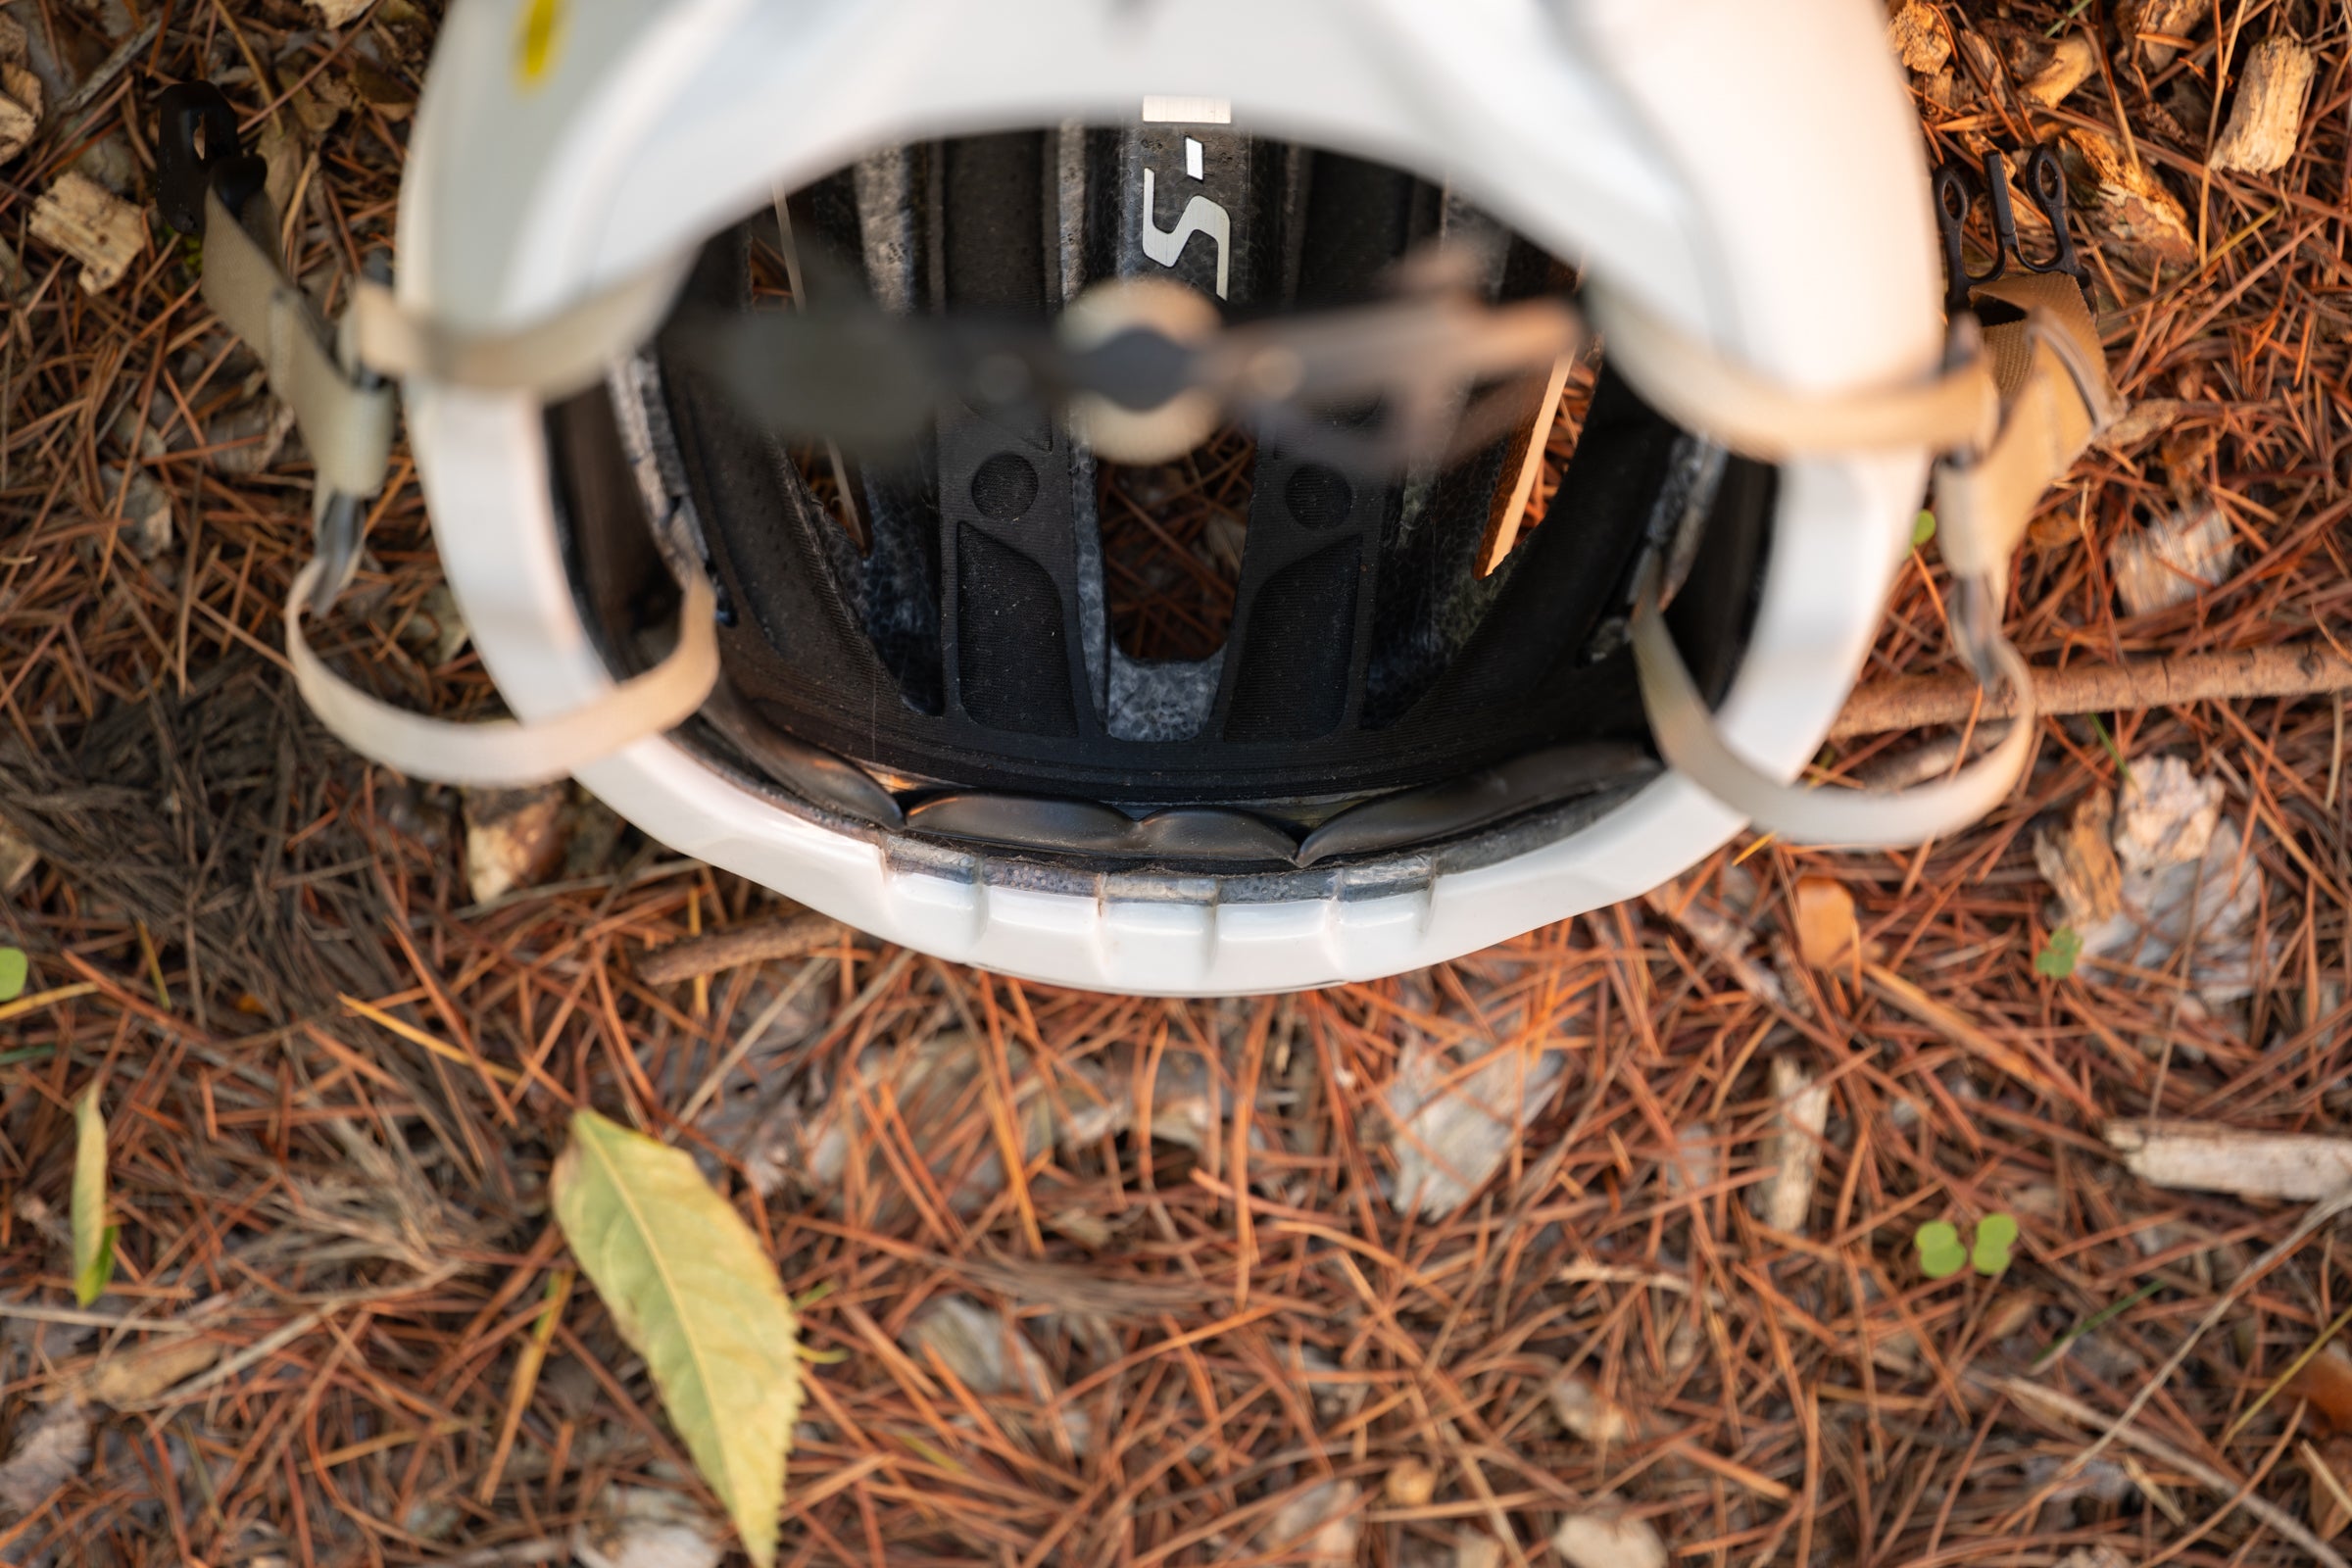 These still wear out, and this one is definitely worn out, but it takes a while. (Photo Josh Ross/Velo)
The only challenge with the Evade 3 is that it can cause sweat to drip into my eyes. I solved that with something called a Veo Strip. It’s supposed to be a one-time use on your forehead but I put it on the front pad on the inside of my helmet instead. No more sweat in my eyes but also nothing that’s one-time use and stuck to my forehead.
The Veo strips also help keep your glasses clean. In this case I went with Shimano glasses because I knew I’d be moving in and out of different lighting. The Shimano Pulsar glasses have a photochromic option that goes fully clear and lets you take off the lower rim for… well just for style.
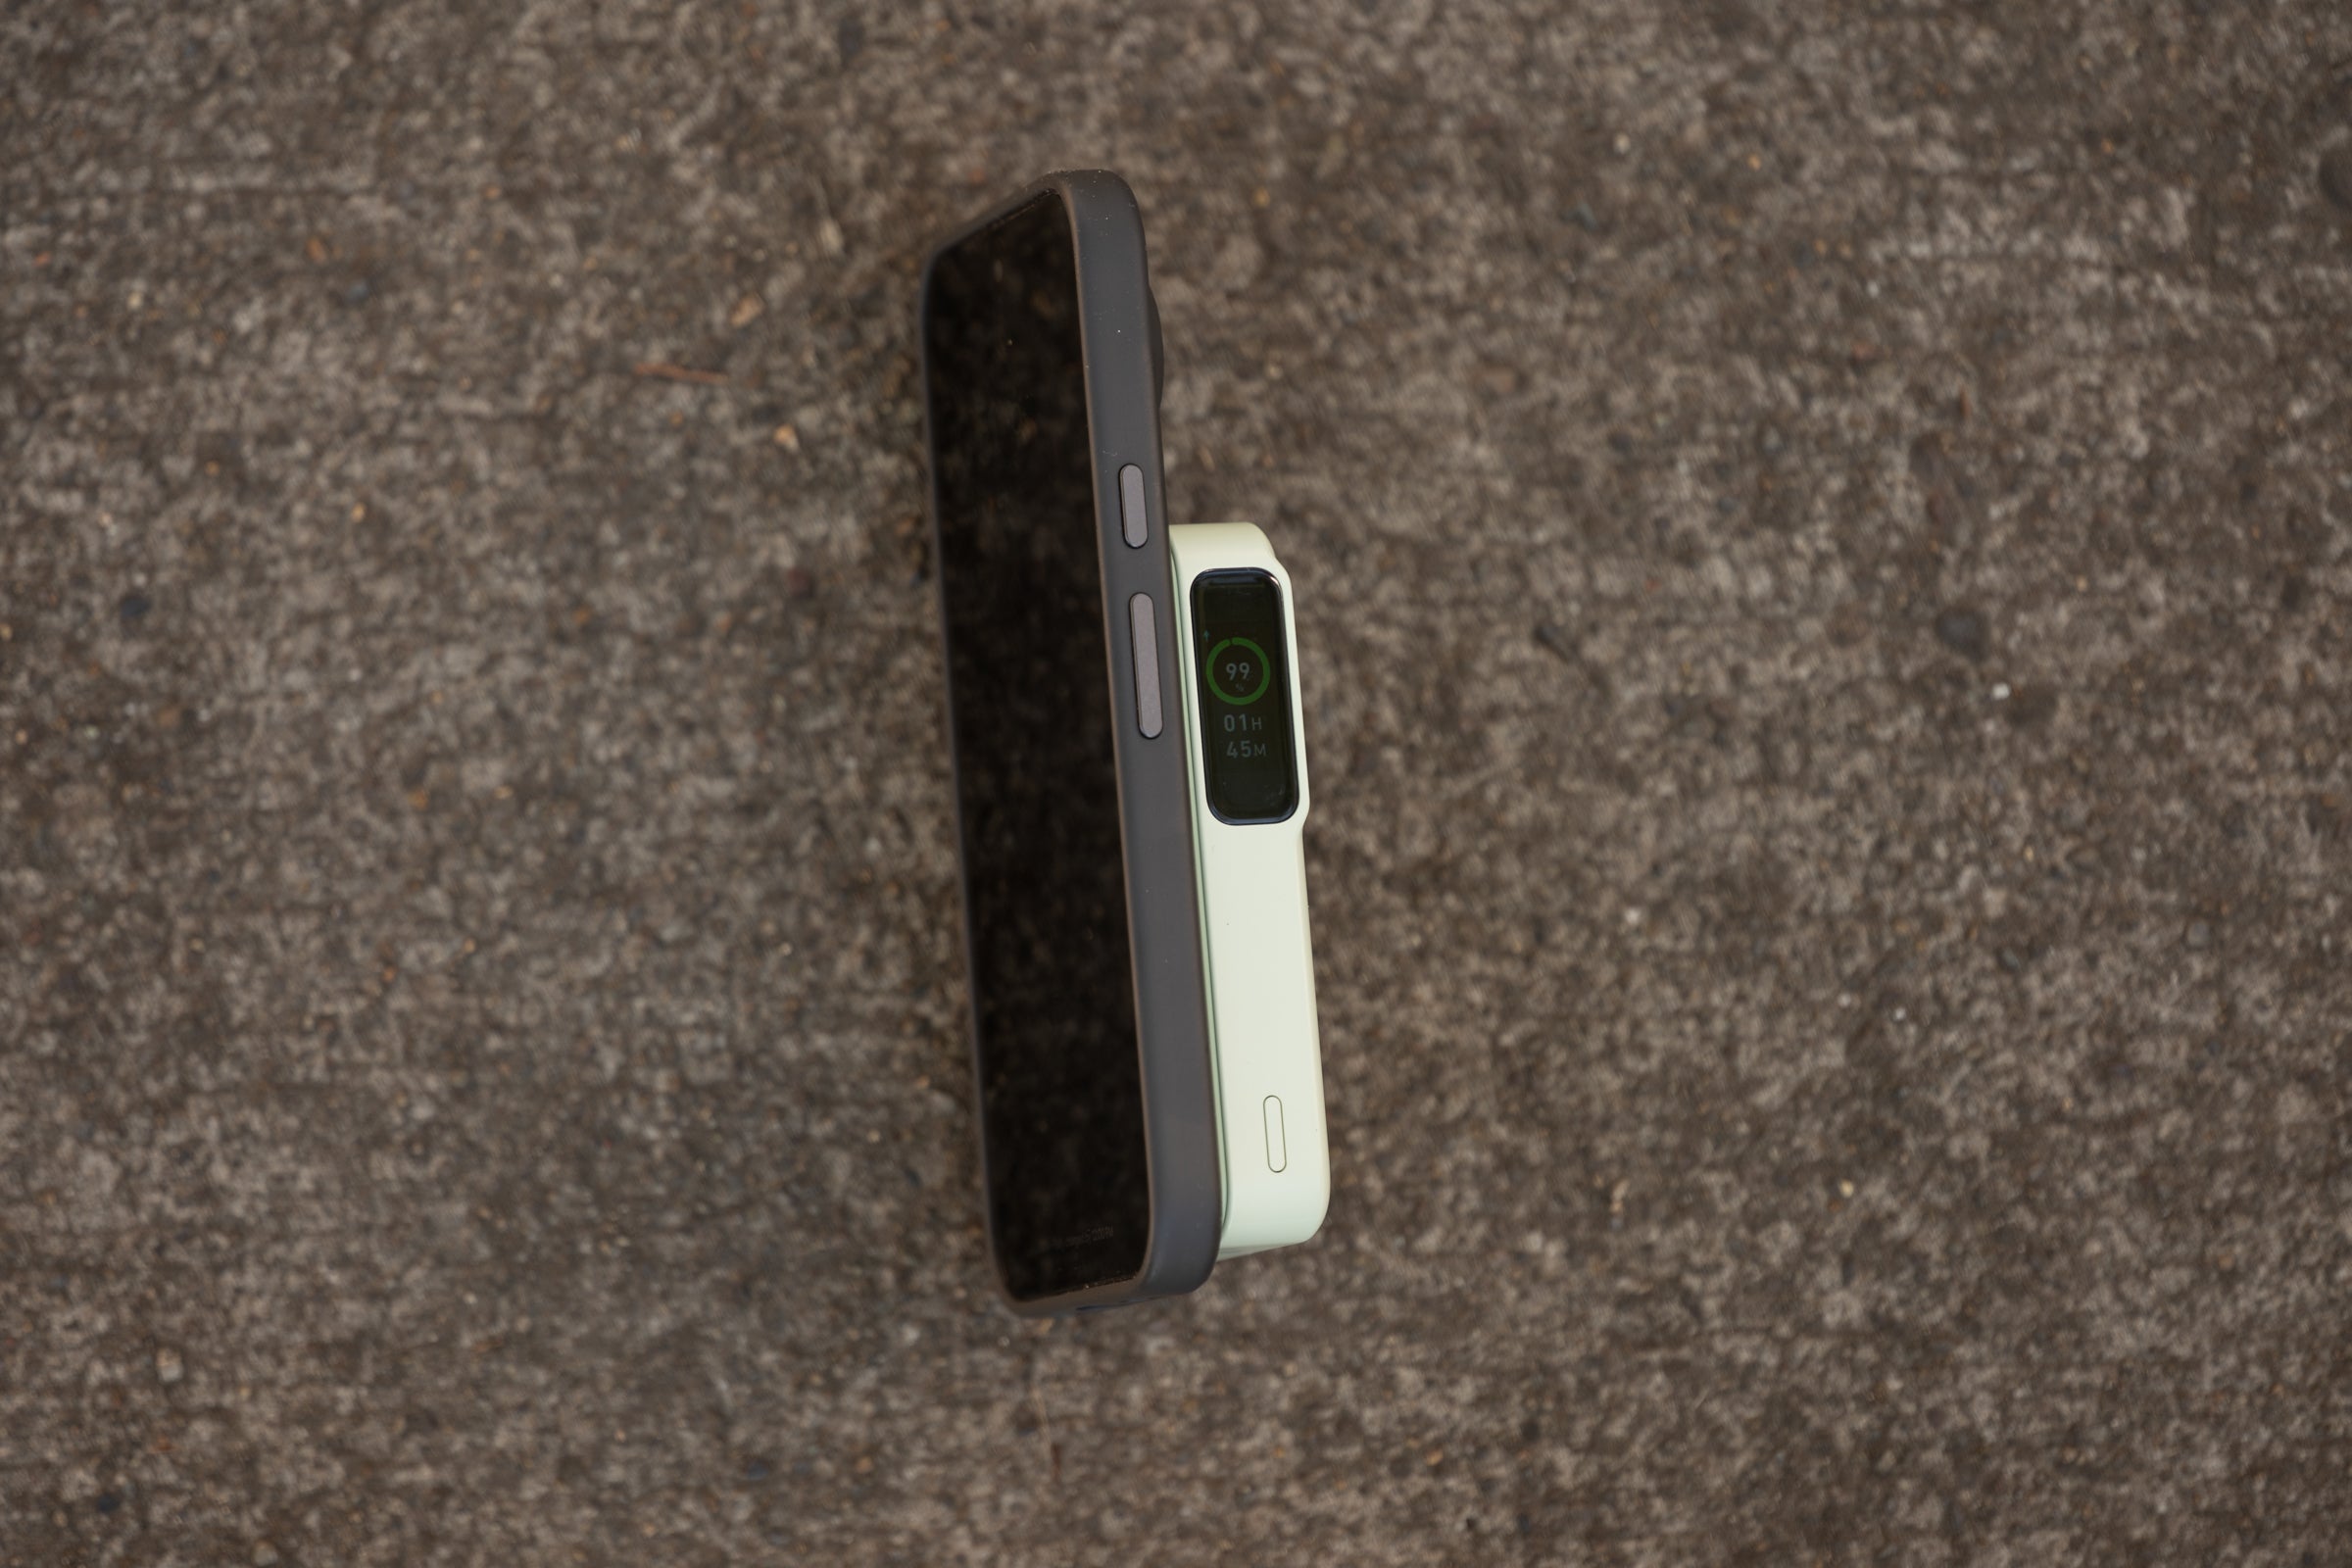 I drop this whole setup into my jersey pocket on extra long rides then don’t have to worry about battery life in the least bit. (Photo Josh Ross/Velo)
Lights, computers, batteries and phones
As I mentioned above, one of the things I had to do with the Colnago Y1Rs was figure out an outfront mounting solution. The solution I landed on worked perfectly but it didn’t have enough length to handle a Garmin 1040 Solar. Instead I chose the Garmin 840 Solar that, at the time, was the number one choice in our best bike computers buyer’s guide.
The Garmin 840 Solar is a fantastic balance of features and battery life and this kind of scenario is why I placed it in the top spot in that guide. It’s small and light with access to training insights through Garmin Connect but it also has high quality navigation features in case you need to quickly reroute without pulling out a phone. Just to give you an idea of battery life, I finished the 200 mile day and forgot to charge it. I still had enough battery to cover the last 100 miles home.
Under the Garmin computer is where I mounted the Exposure Strada Mk 12 AKTiv that I used for a light. Now this particular adventure did not actually involve riding through the night but that was what I planned for and the Exposure light was a big part of that. It was also the basis for a rethink as a new model has just landed.
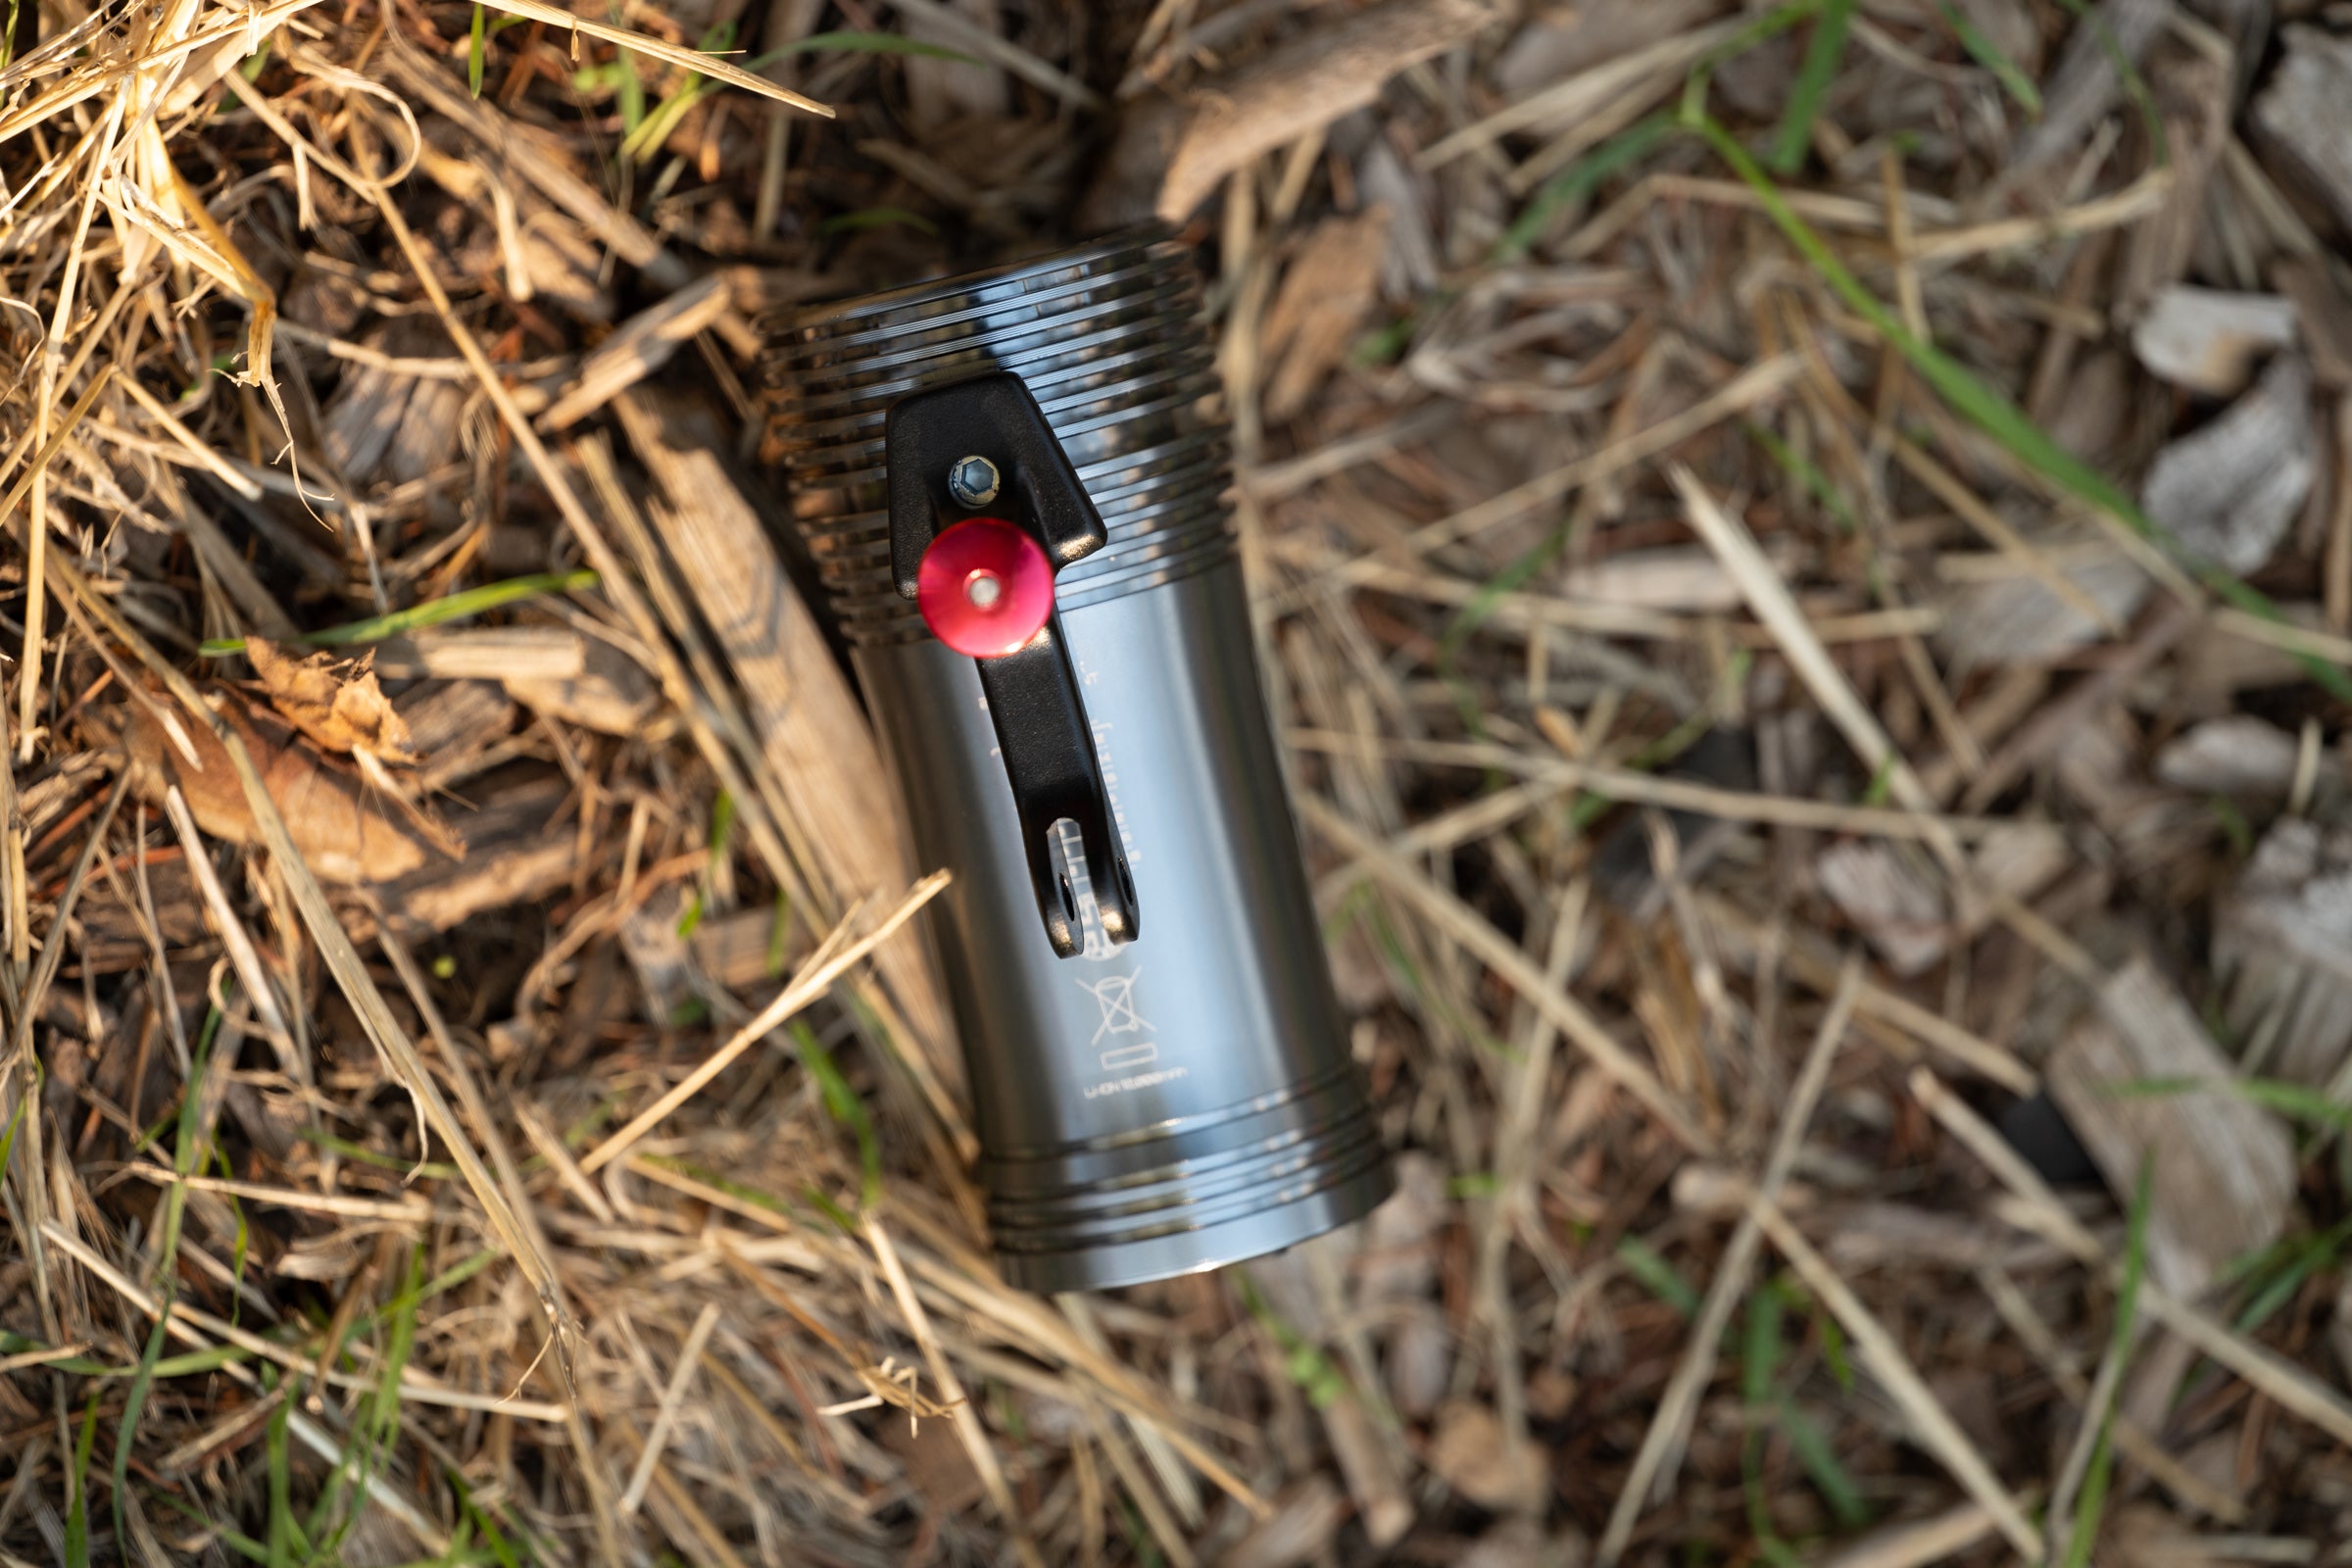 Many of the best lights use an action camera mount making it easy to manage with weird bars as long as there’s also a good outfront mount. (Photo Josh Ross/Velo)
The bottom line here is that in full darkness (no streetlights) and heavy rain the 10-hour program mode for the Strada Mk12 was enough. What that means is not an easy answer, you have to do a bunch of math to figure it out and it still remains elusive. Still, expect that to be around 500 lumens and you can now get that with the recently launched Exposure Lights Toro 16 for 12-hours. If you need to ride through the night, choose this light and it will definitely be in our best bike lights buyers guide.
Which brings a conclusion to on-the-bike electronics but this is 2025 and there’s more. I did this ride with the recently launched Google Pixel 10 Pro XL. I made that choice because it’s got a great camera and long battery life but I still wasn’t sure how long. It’s tough to calculate what it takes to share my location constantly, plus move in and out of service, and play music. That means I also rely on its ability to stick to the Anker MagGo Power Bank and wirelessly charge in my jersey pocket. Simple stuff but I listen to music from Shokz OpenRun Pro 2, share my location with my wife, and I don’t want a dead phone in an emergency.
Pick whatever phone you want but if you like to do big rides, consider battery life and charging.
If you are curious how I got the video while riding, that’s from the Insta360 X5.
Enjoy the race bike, it won’t hold you back
I obviously did something that’s a bit silly. A Colnago Y1Rs is not an ideal all-road bike. That’s the point though. If I can manage a 600k mixed surface adventure on that bike, you can do it on your favorite everyday bike.
I encourage you to optimize for the bike you want to ride most of the time and not worry about the edge cases. Make some smart equipment choices, which hopefully I’ve helped with, and you can manage most adventures on most bikes.